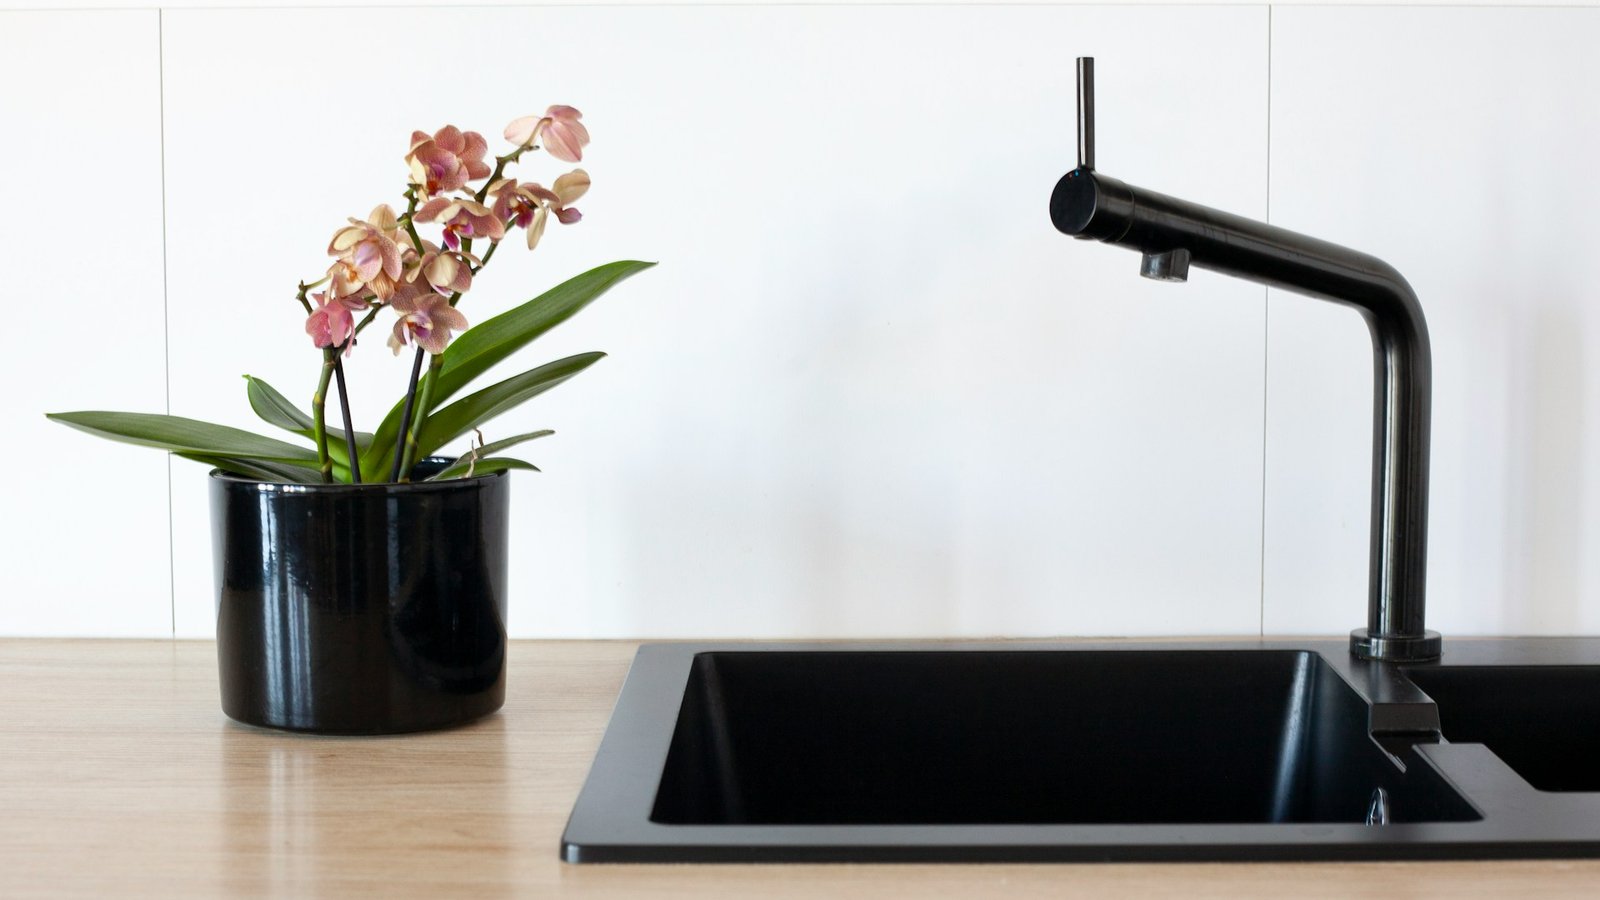
Melbourne Kitchen Tapware That Works Across Layouts
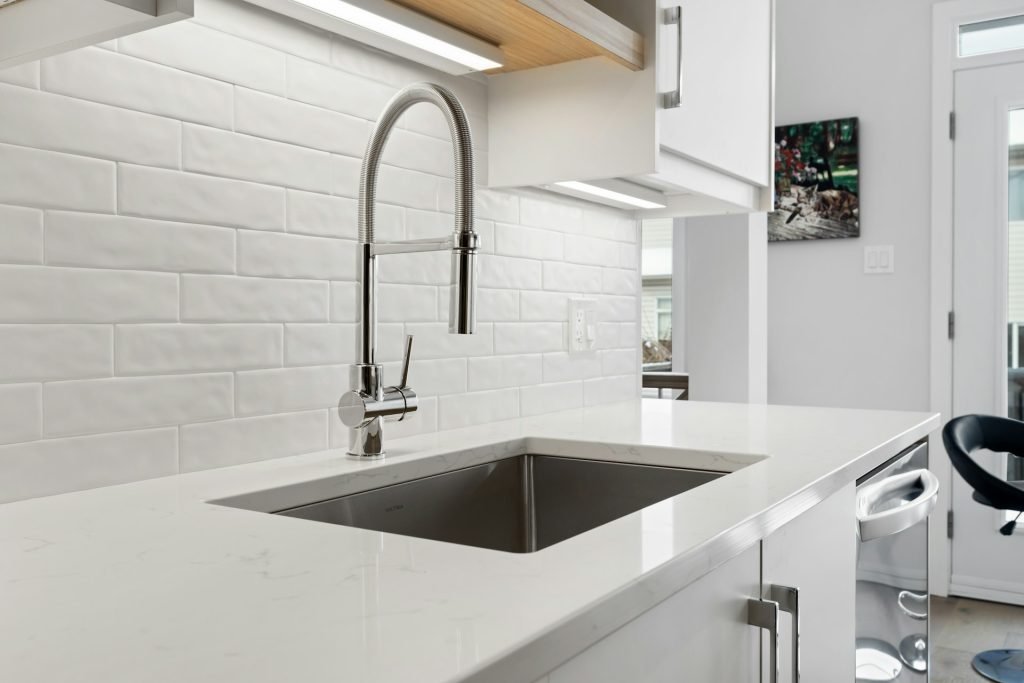
Tapware might be one of the last things we think about when planning a kitchen, but it ends up playing a big part in how well the space actually works. The way a tap fits into a layout can either make daily routines easier or turn them into a bit of a chore. With homes across the city using everything from open-plan kitchens to compact layouts in apartments, tapware that adapts across different settings is more useful than ever. As autumn settles in and more time is spent indoors, kitchen use often picks up. That can mean more cooking, washing, prep, and cleaning all happening in the same space. The right kitchen tapware in Melbourne needs to pull its weight, not just in how it looks, but in how it works morning to night. Matching Tapware to Changing Layouts The way your kitchen is set up affects which kind of tapware will actually suit your space. An island sink where you prep food and wash veggies needs something different from a corner sink tucked into a U-shaped layout. Swivel function, spout height, and even how the handle moves can all affect whether a tap fits comfortably. Picking the wrong design here adds small annoyances every time you turn it on. When layout and tapware line up nicely, the whole kitchen moves a lot smoother. Our tapware range at CARGO Bathroom & Kitchen includes pull-out mixers, gooseneck spouts, and classic lever handles, all designed to fit a wide range of kitchen setups and bench heights. Balancing Style and Everyday Use Taps are often the last piece added to a kitchen setup, but they’re used as often as the fridge or the oven. So they need to blend in, but they also need to hold up to regular use. We always keep one eye on function, even if we’re drawn to something for its shape or colour. Melbourne kitchens carry a range of styles, from period builds to brand new flats. The goal is always the same though, pick a tap that looks right in the space, doesn’t need two hands to use, and stays comfortable over time. You’ll find tapware in a variety of finishes at CARGO Bathroom & Kitchen, such as chrome, matte black, brushed nickel, and gunmetal, so matching colour schemes and material mood boards is straightforward. Smart Choices for Melbourne Homes Every kitchen has its own quirks, but across Melbourne, we all deal with certain things like water pressure differences or cool autumn mornings that have us cooking more indoors. Those environmental factors shape which features are actually worth having. Autumn is a busy time in the kitchen for many of us. As we shift from salads to soups and simple outdoor meals to full indoor cooking, it helps to have a tap that adjusts right along with us. Most of our kitchen tapware is WELS-rated for water efficiency, making it easy to upgrade in old or new layouts while still meeting Australian standards for daily use. Trends That Work Across Kitchens While it’s tempting to go for what’s popular, we find it’s best to look at which tapware styles are staying power, not just what’s trending for the moment. Some finishes and features hold up better over time and across different layouts. If your kitchen has to double up, for example, cooking for guests, helping with school lunches, or even housing a laundry tap, look for a style that moves easily between tasks. We see more homeowners choosing practical styles that won’t look out of place if the surrounding kitchen shifts its look later on. Build a Kitchen That Works in Every Season It’s easy to overlook tapware when there’s a long list of kitchen elements to sort through. But across all kinds of layouts in Melbourne homes, the tap often becomes one of the most used spots during the day. A smart fit here doesn’t just help in autumn, it stays helpful all year round. Comfort, style, and layout don’t need to work against each other. When tapware is chosen to match how your space works, it supports better routines in a more comfortable kitchen. As the cooler months roll in and we start to spend more time cooking and gathering indoors, that kind of balance only becomes more noticeable. Choosing the right tap can quietly shape how your kitchen works from one season to the next, especially in busy Melbourne households. With so many layouts and finishes to consider, we’ve made it easier to find flexible, well-made options that blend smoothly into your space. Whether you’re updating a family kitchen or refining a smaller layout, our range is designed to suit the way people really live and cook. For dependable, good-looking kitchen tapware in Melbourne that fits your home, chat with CARGO Bathroom & Kitchen about what works best for your space.
Expert Installation Guide for Wall Units in Melbourne
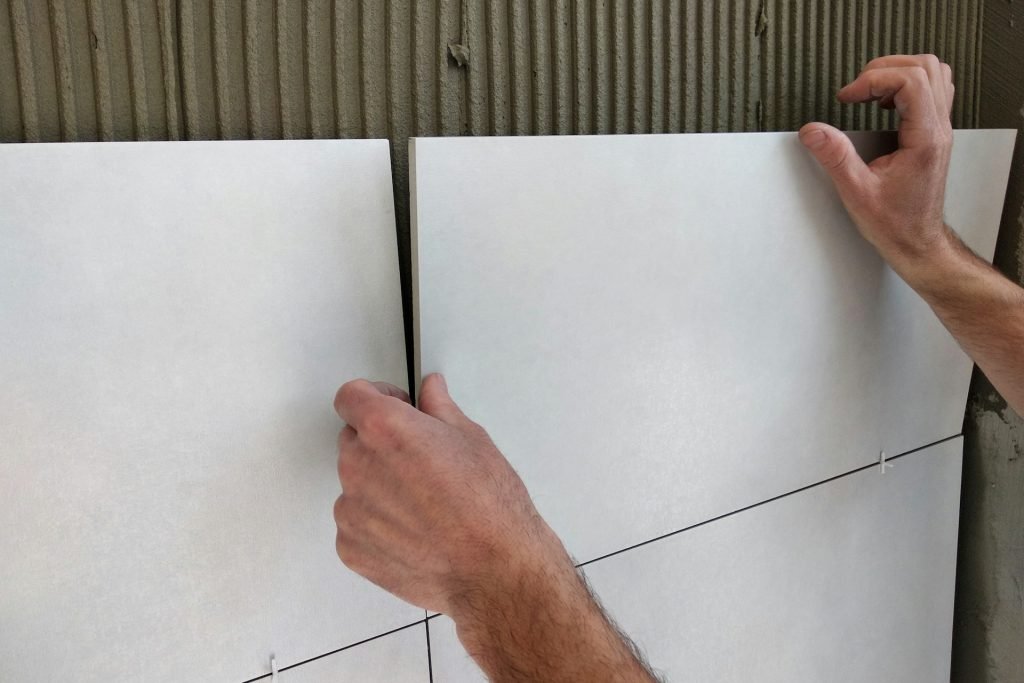
Wall units have slowly become a go-to choice for bathrooms that need both aesthetic charm and practical storage. Wall-hung vanities, in particular, are popular because they don’t eat up floor space, making them a great fit for bathrooms that lean on the smaller side. The raised design also makes cleaning underneath much less of a hassle. If you’re after a setup that feels light, modern and tidy, there’s a good reason to look into having one installed. In Melbourne, wall-hung vanities continue to rise in demand thanks to their sleek look and clever space-saving benefits. But fitting one properly needs care and planning right from the start. This article takes you through how to prep your bathroom for a wall unit install, and what steps are involved when it’s time to put it all in. From choosing the best unit to understanding how to avoid common hiccups, it’s all about helping set things up smoothly from the start. Preparing For Installation Before anything gets drilled or fitted, you’ve got to start with a plan. Every bathroom is different, so taking the time to assess the space properly will make things easier down the line. Here are some things to do before starting installation: – Measure the wall and floor area where you want to install the vanity. Think about door swings, toilet placement, and nearby taps or switches. – Check the wall for studs and plumbing lines. Wall-hung vanities need to be secured into strong support, not just plasterboard. – Make sure the flooring and walls are level. If not, it could mess with alignment later. Choosing a vanity isn’t just about looks. Function plays a big role as well. If you’ve got a narrow room, you’ll probably want something with modest width and just enough depth. Bigger spaces can allow for vanities with double basins or wide benches. It’s also a good idea to think about how much everyday storage you need. Do you want drawers or open shelf space? Soft-close hinges? Wall units come in all sizes and finishes, so match it to the rest of your bathroom style while keeping your day-to-day use in mind. As for tools and materials, here’s a short list to get started: – Stud finder – Spirit level – Measuring tape – Power drill – Screws and wall plugs (rated for the vanity’s weight) – Silicone sealant – Pencil and masking tape – Safety gear (gloves, glasses) The right prep lays the foundation for a pain-free installation. It might take a bit longer upfront, but catching problems early can save a lot of work and cost later. Step-By-Step Wall-Hung Vanity Installation Once you’ve checked measurements and gathered the right tools, the next part is installing the vanity securely. Taking it slow and ticking off each step will keep things steady and reduce the chance of errors. 1. Mark and Measure – Start by marking the top line of the vanity on the wall. – Always double-check height with the basin included. – Use a level to draw a straight guideline. – Mark stud positions for bracketing. 2. Wall Setup – Locate and check timber studs or other solid fixing points. – If they don’t line up properly with the brackets, reinforcement may be needed. 3. Mount Brackets – Fix brackets or support frames securely into the wall studs. – Make sure the levels line up on all sides before fixing into place. – Brackets should feel firm with no wiggle or gap. 4. Attach the Vanity – Lift the unit onto the brackets carefully. – Make slight adjustments to get the cabinet flush against the wall. – Tighten the unit to the brackets using suited screws and fasteners. 5. Connect Plumbing – Line up pipes through the cutouts at the back. – Connect trap and waste fittings. – Double-check for leaks or drips once everything is tightened. All through the job, keep checking levels and alignment. If something seems off, it’s better to pause than to push forward. One common cause of problems is rushing through mounting or failing to notice tiny tilts, which turn into bigger visual issues once the benchtop is on or the plumbing is flowing. For example, an incorrectly mounted bracket once caused a basin to tilt overnight under pressure. Fixing it involved unmounting everything and redoing the wall support. That’s why it pays to get it right the first time. Common Installation Challenges And Solutions Wall-hung vanities are a great choice for style and function, but small issues during or after fitting can throw things off balance. Some of the most common challenges pop up because of things like uneven walls, incorrect measurements or unexpected plumbing configurations. If your wall isn’t perfectly flat or has dips, you’ll likely notice small gaps behind the vanity. Over time, that can cause dirt buildup and moisture problems. One way to handle it is to pack out behind the bracket with proper shims or levelling wedges before securing it in place. That way, you’re mounting on a level surface, not one that’s going to mess with the cabinet’s alignment. Floors with a slight slope can also have an impact. Even though the unit doesn’t sit on the floor, the visual lines across the room can feel off if the vanity isn’t adjusted to match the contour. The spirit level comes into play again here. Always rely on the actual level, not the skirting line or tile joints. Your eyes can play tricks, especially with gradient changes. Plumbing layout is another one to watch. Older homes often have pipe positions that won’t match up with modern vanities. Forcing pipes to fit can lead to stress cracks or leaks. It’s better to adjust the layout properly than to work around it awkwardly. Any visible gaps through pipe cut-outs should be sealed with a proper backing plate or silicone to stop moisture sneaking in behind the back panel. And if drawers or doors aren’t closing evenly after you fit everything, don’t rush to
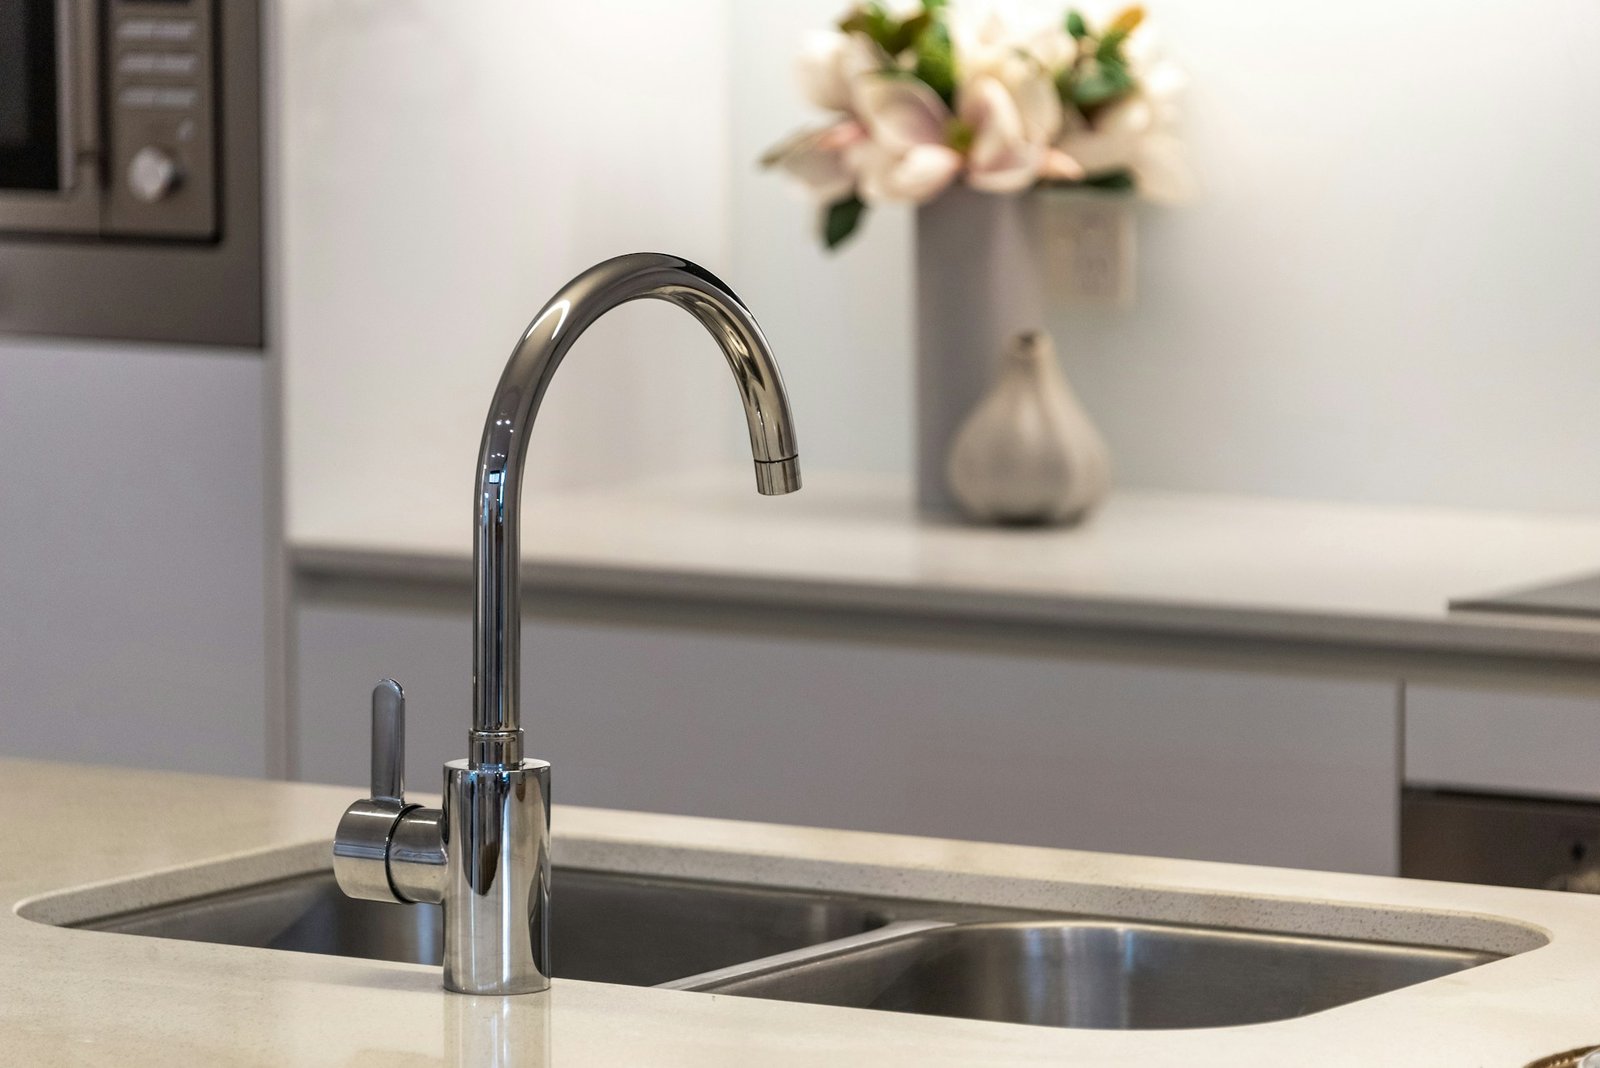
Professional Guide to Kitchen Tap Selection in Melbourne
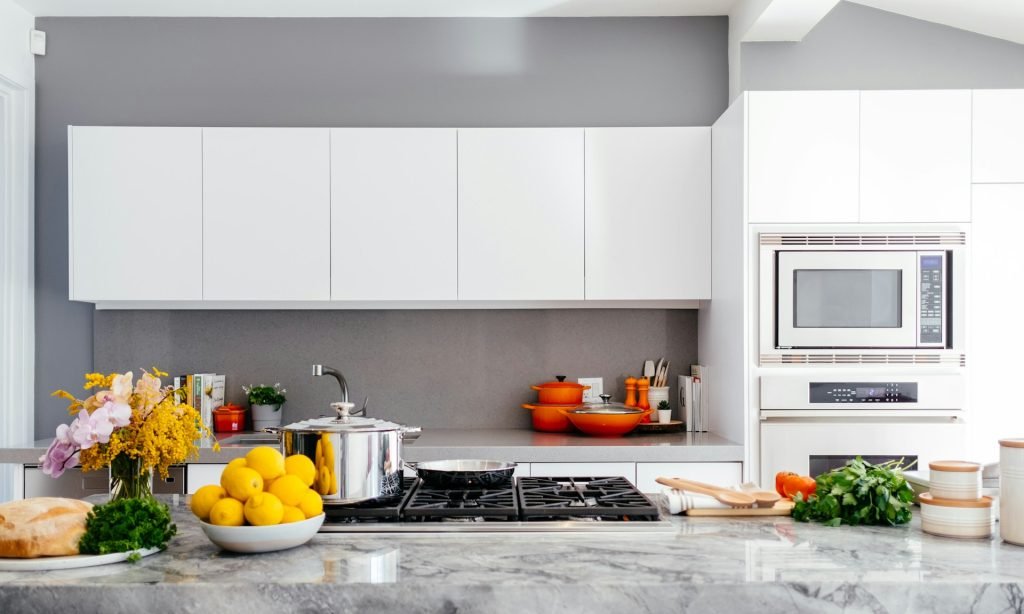
Choosing the right kitchen tap might seem like a small decision, but it actually plays a big role in how your kitchen functions and looks. It’s one of those items that you use daily, so finding the right match isn’t just about what looks good on the benchtop. It should feel comfortable in use, suit your sink size, and tie in with the rest of your kitchen features. The wrong tap can make the space feel off-balance or even become a hassle to use over time. In homes across Melbourne, kitchens come in all sizes, layouts, and styles. That’s why it makes sense to look beyond the standard selection and focus on what works for your exact setup. Whether you’re working with a brand-new build, a small flat, or a classic heritage home, certain types of tapware will feel more natural while still doing their job. Local design trends and plumbing conditions can also shape the options that will hold up over time. Thinking it through before jumping into a choice can save you a future headache or two. Considerations Before Buying Kitchen Tapware Before grabbing the first tap set that fits, take a proper look at the space it’ll live in. It’s worth thinking about the kind of cooking and cleaning you do daily. Do you wash large pots often? Are you working with limited bench space? Is your sink built into the benchtop with no splash zone, or does it have a high lip around it? These things all help narrow down your choices. Here’s a shortlist of what to keep in mind: – Style and shape: Go for a tap design that lines up visually with your kitchen. Modern kitchens might look better with sleek matte black or brushed nickel styles, while farmhouse or vintage looks suit brass or ceramic handles. – Sizing and scale: A tall gooseneck tap can work well with deeper sinks but might look awkward with a short basin in a tight corner. Make sure it’s proportionate to your sink and doesn’t block windows or shelves. – Finish and fittings: Chrome might be low-fuss, but matte finishes or brushed effects are easier to keep smudge-free. Match the tap finish with other visible fittings like cupboard handles, drawer pulls, and light fixtures. – Ease of use: Think about how you’ll turn it on and off when your hands are messy. Levers tend to be easier than twist knobs. Pull-out taps are convenient for washing down veggies or cleaning up spills. – Long-term durability: Stay away from fittings made of plastic parts or cheaply coated metals. These can wear down fast, especially with Melbourne’s water quality which may include some mineral content. Go for solid brass or stainless steel constructions with good sealing to avoid leaks down the track. Often, people rush the decision because a tap can feel like a minor detail, especially during a larger kitchen project. One client chose a lovely, on-trend matte black tap that suited their new benchtop perfectly. A few months in, they realised the tap’s fixed spout made it hard to fill pots sitting beside the sink. Now, they make sure to double-check function, not just form. Types Of Kitchen Tapware When you start looking into kitchen tapware in Melbourne, you’ll see just how many types there are. It helps to understand how the main styles work so you can match them up with your day-to-day kitchen jobs. Each one comes with its clear pros and cons, depending on your setup. Here are the main tap styles you’ll likely come across: 1. Mixer taps These are one of the most common taps in modern homes. They let you control hot and cold water through a single handle. Mixer taps are practical and sleek, and they work well in most kitchen layouts. They’re also easier for kids and older adults to use compared to two-handle setups. 2. Pull-out taps These have a nozzle that can be pulled away from the main spout, offering more control when washing awkward items or rinsing down surfaces. Ideal for kitchens where the sink has multiple basins or deeper bowls. These taps are popular in households where meals or prep work leave a bit of mess to clean. 3. Separate hot and cold taps You won’t see these as much in new builds, but they still appear in older heritage homes across Melbourne. Some people still prefer them for nostalgic reasons or if trying to match a vintage vibe. However, they can be harder to balance temperature-wise and use up more space on the sink ledge. Each of these tap types comes in different sizes, finishes, and designs. If you’ve got a busy household, a pull-out mixer could be the most flexible choice. If your space is more focused on visual charm with minimal use, something traditional might do the trick just fine. The key is understanding what suits your sink size, plumbing access, and lifestyle. Keep in mind that mixing function with style makes for a better choice long-term. Selecting Tapware Based on Functionality Getting the right kitchen tap isn’t just about looks. How it performs makes a difference to your day-to-day routine. A fancy-looking tap that swings too close to your splashback or doesn’t have enough reach might turn out to be a nuisance in the long run. Functionality should come hand in hand with visual appeal. Start with flow rate. Not all taps are created equal when it comes to water efficiency. Some models include built-in restrictors or aerators that help control water pressure without making it feel weak. This can help your kitchen run more sustainably and also cut back on unnecessary splashing. Next, look at how far the spout reaches and how high it sits above the sink. A higher tap gives you more clearance for big pots or washable items, but if it’s too tall, it might cause spillage issues or hit wall cabinets when you swivel it. On the other side, if a tap is too
Planning Your Bath and Kitchen Remodelling Timeline
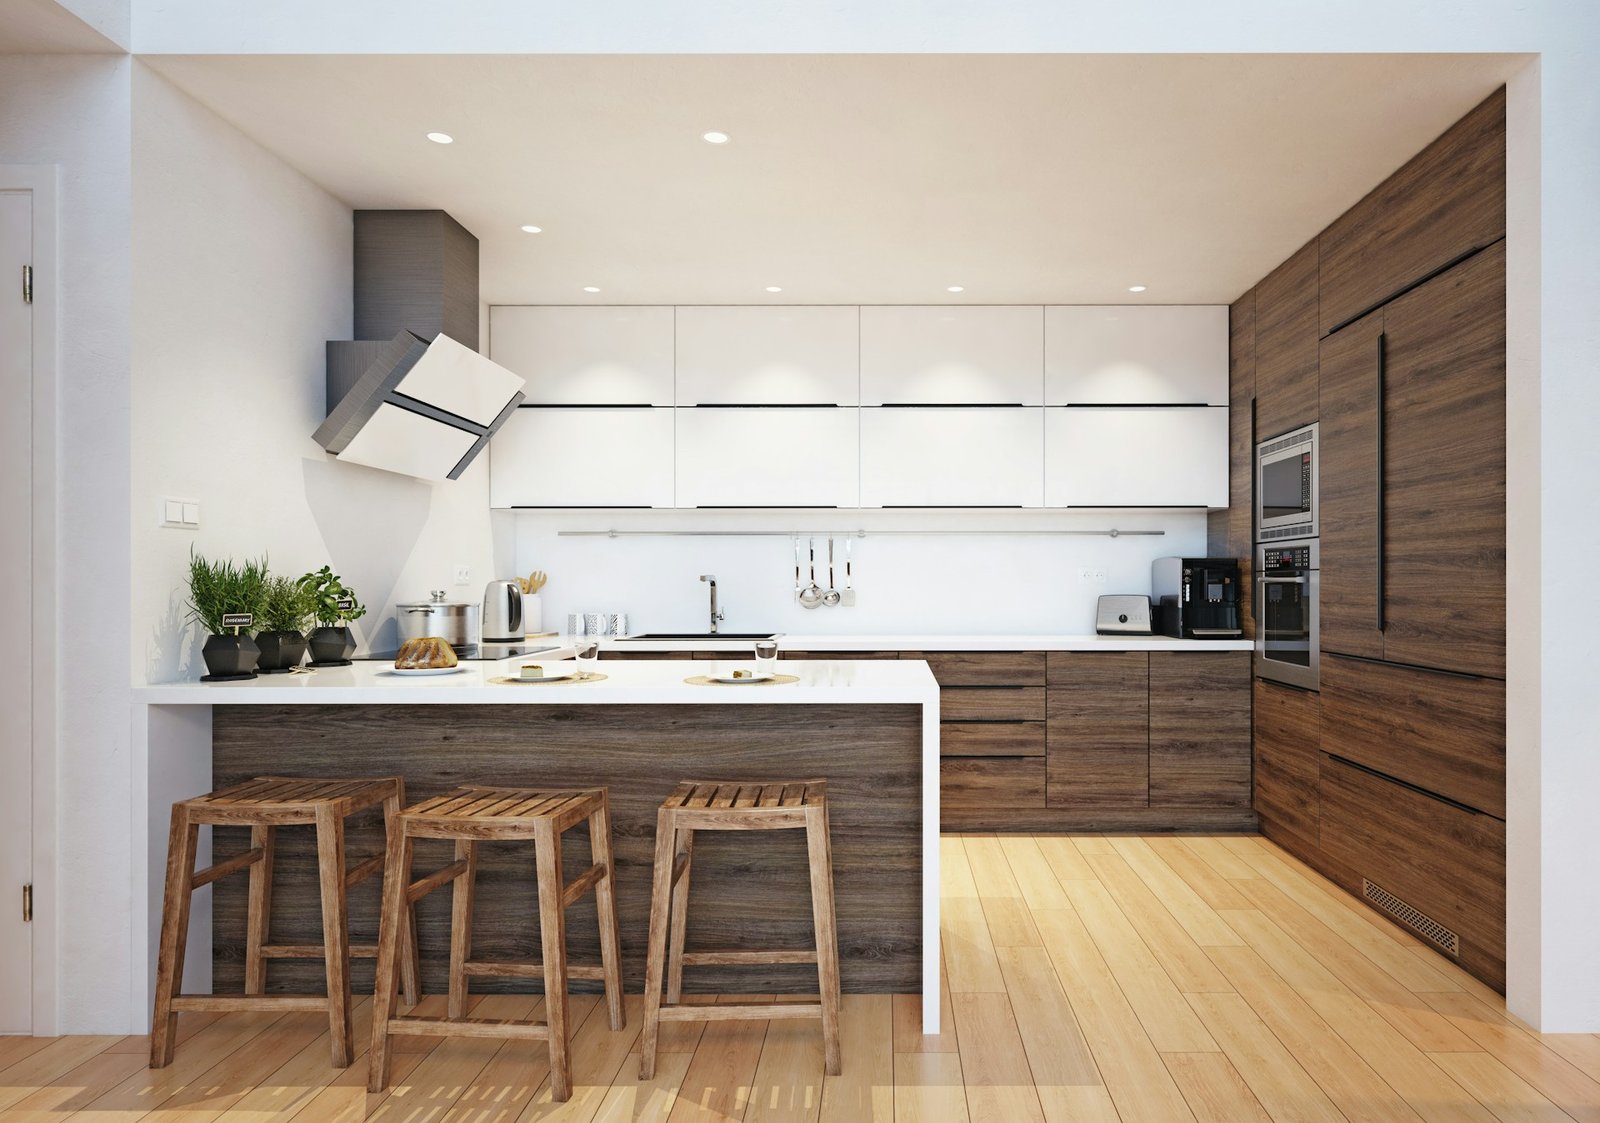
Transforming your bath and kitchen space can be an exciting venture, with the promise of a more functional and beautifully designed home environment lying ahead. However, to navigate this process smoothly, it’s crucial to have a robust plan. A well-thought-out timeline ensures minimal disruptions to your daily routine and helps bring your vision to life without unnecessary stress. Whether you’re upgrading out-of-date fixtures or crafting a new layout, understanding the stages of remodeling can save both time and headaches. A good plan provides clarity and sets realistic expectations at each stage. You wouldn’t start roasting before chopping the veggies, right? Similarly, a home remodeling timeline outlines the sequence in which tasks should be tackled, ensuring you’re not caught off guard by unexpected costs or delays. Let’s explore how to set your goals and ensure you’re ready to take on this rewarding journey. Setting Your Remodeling Goals The first step in any successful project is defining clear, achievable goals. Knowing what you want from your bath and kitchen remodeling project will guide your decisions and keep you motivated. Start by envisioning the result. Do you desire a sleek modern kitchen with top-of-the-line appliances, or perhaps a cozy bathroom retreat? Once you have a vision, it’s easier to make decisions aligned with your dream space. To set clear goals, consider creating a list of priorities: 1. Functionality: Decide how your space should serve you. Do you need more storage, better lighting, or improved accessibility? 2. Aesthetics: Determine the style you want to achieve. Look into different colour palettes, materials, and design themes that resonate with you. 3. Budget: Establish your financial limits. Think about how much you’re willing to spend and where you can stretch your budget a little if needed. 4. Timeline: Consider how quickly you’d like to complete the remodel. Keep in mind that larger projects will naturally take more time. Recognizing the wants and needs can also trim your budget. Distinguish between must-haves, such as replacing a leaking sink, and nice-to-haves, like under-cabinet lighting. This approach ensures you’ve catered to practical necessities while allowing for style elements without stretching beyond your limits. Setting these goals will keep you focused and help avoid unnecessary detours on your path to that dream space. Creating a Realistic Budget After setting clear goals, the next step is to figure out your budget. A well-planned budget acts like a map, guiding you through your remodeling adventure without unexpected bumps. To align your budget with your remodeling goals, begin by listing all potential expenses. This can include everything from materials and labour to permits and unforeseen necessities. Remember to account for any surprise costs that may come up during the renovation process. A good rule of thumb is to set aside a bit of your budget for these surprises to prevent any financial stress. Prioritizing is key at this stage to ensure you’re directing your resources to the most important aspects of the remodel. Here’s a simple way to categorize your spending: – Fixed Costs: These are expenses that are unlikely to change, such as contractor fees and certain material costs. – Variable Costs: These might fluctuate based on changes you make along the way. For instance, choosing fancier fittings or deciding on more elaborate tile work. – Contingency Fund: Set aside 10-15% of your budget for unforeseen situations. This buffer will give you peace of mind and the flexibility to handle issues smoothly. Creating a budget might seem like a challenging task, but breaking it down into manageable sections can make it much easier. With a clear budget in place, you’re on solid ground to move forward confidently. Establishing a Project Timeline A timeline is the backbone of your remodeling project. It helps you track progress and ensures every aspect of your remodel aligns perfectly. To create an effective timeline, start by identifying the major phases of the project, such as demolition, plumbing, and installations. Allocate appropriate time for each step, factoring in potential delays and necessary recovery time after big jobs. Scheduling is crucial to avoid overlaps, like having a painter waiting while the drywall’s still being installed. Here’s how you can effectively plan: 1. List the Steps: Identify every task required from start to finish. 2. Allocate Time: Consider how long each step will realistically take, not just in your best-case scenario. 3. Buffer Zones: Include extra time between phases for any delays or corrections needed. 4. Regular Updates: Keep track of progress and adjust your schedule if needed to accommodate changes. Developing a timeline doesn’t just keep things organized; it helps in managing expectations. With a comprehensive timeline, each phase should transition smoothly into the next, assisting you in maintaining momentum throughout the project. Choosing the Right Professionals Getting the right team on board can make or break your project. Experienced professionals bring expertise and reliability, ensuring that work is completed to a high standard and within the established timeline and budget. When choosing contractors or designers, seek those with proven track records and good references. A little research goes a long way in finding a team you can trust. Here are some tips for selecting the best people: – Check References: Talk to past clients and get firsthand accounts of their experiences. – Credentials: Verify that they hold the necessary qualifications and licenses for the work involved. – Clear Communication: Choose someone who communicates well and understands your expectations and vision. Partnering with professionals doesn’t just relieve you of the technical challenges. It lets you breathe easy, knowing the details are in capable hands—resulting in a smoother and more enjoyable remodeling journey. Staying Flexible and Adapting to Changes While a plan provides structure, flexibility is important when unexpected challenges pop up. The key is to anticipate that changes will occur and adapting accordingly without losing sight of your goals. This agility allows you to handle surprises confidently and keep your project moving. Encourage open discussions with your team about potential obstacles and solutions. By maintaining flexibility, you can make
How to Fix Stains on Black Kitchen Sinks
Black kitchen sinks bring a sleek and modern touch to any home, standing out with their bold and unique appearance. However, their beauty can quickly be overshadowed by the appearance of unsightly stains. These stains, highlighted by the contrast of the dark surface, can become a source of frustration for homeowners wanting to maintain the elegance of their kitchen. Unlike sinks of lighter shades, black sinks demand a bit more attention to keep them looking their best. From everyday use, food particles, and hard water spots, these stains can slowly set in and dull the sink’s once bright and clean finish. But don’t worry, managing these stains can be simpler than you might fear. Let’s explore the common culprits of these marks and what you can do to keep your black kitchen sink spotless. Common Causes of Stains on Black Kitchen Sinks A few everyday offenders are responsible for most of the stains appearing on black kitchen sinks: – Mineral deposits from water: Hard water can leave behind mineral deposits, forming chalky, white stains. – Food and beverage residue: Coffee, tea, wine, and other dark-coloured foods can leave persistent marks if not cleaned promptly. – Soap and detergent buildup: Soap residues can slowly build over time, dulling the sink’s surface. – Scratches and wear over time: Physical scratches not only damage the sink’s finish but allow dirt and grime to collect, contributing to a stained appearance. Understanding these causes is the first step in dealing with them effectively. Let’s take a closer look at how you can remove these stains and keep your black kitchen sink looking as good as new. Effective Cleaning Methods Keeping stains at bay is all about adopting the right cleaning methods. Here are a few ways you can do that: – Daily maintenance tips: Wiping down your sink with a soft cloth after each use can prevent food residues and water spots from setting in. This quick daily task can save a lot of time and effort in the long run. – Baking soda and water paste: For those stubborn stains, a simple paste made from baking soda and water can work wonders. Apply the paste to the stained area, gently scrub with a non-abrasive sponge, and rinse thoroughly. – Gentle cleaners and non-abrasive sponges: Avoid harsh chemicals that can damage the sink’s finish. Instead, opt for mild detergents and a gentle sponge to clean the sink without scratching it. – Using vinegar: White vinegar is great for dissolving mineral deposits. Simply soak a cloth in vinegar, place it over the stained area, and let it sit for a few minutes before wiping and rinsing. With these steps, keeping your black kitchen sink in pristine condition can be manageable. Just by paying a little more attention to regular upkeep, you can keep those marks away and enjoy the elegance that a black sink adds to your kitchen. Preventative Measures Prevention is always better than a fix, and when it comes to maintaining the looks of your black kitchen sink, embracing some preventive steps can go a long way. Setting up a regular cleaning routine can be as simple as making sure the sink is rinsed and dried after each use. Water sitting on the surface can lead to unwanted mineral deposits, which are easier to prevent than to clean once they’ve set. Investing in sink mats or protective barriers is another excellent way to avoid scratches and wear. These act as a physical shield for your sink, reducing the risk of damage from pots and pans. For best results, make sure the mat or barrier is easy to remove for cleaning and does not trap food particles. Choosing the right cleaning products is just as important as the cleaning itself. Opt for non-abrasive, gentle detergents that won’t strip the finish from your sink. It’s worth the effort to check that the products used are suitable for dark surfaces to maintain that pristine look. When to Consider Professional Help Sometimes those stubborn stains refuse to budge, or the sink might suffer from damage that goes beyond cosmetic problems. Identifying when your sink needs professional attention can save it from future headaches. Severe stains, deep scratches, or a worn finish are signs that it’s time to call in professionals. Professional cleaning services offer more than just elbow grease. They come with specialized tools and products specifically designed to tackle the toughest stains without harming the sink surface. Plus, they can provide maintenance tips tailored to your sink’s material and usage. Finding the right expert can feel challenging, but starting with customer reviews and asking for recommendations can narrow the choices down. Make sure to inquire about the services they offer, ensuring they have experience with black kitchen sinks. This small diligence can make all the difference in keeping your kitchen looking its best. Keep Your Sink in Top Condition Maintaining the shine and elegance of your black kitchen sink isn’t a one-time task but a continuous effort. By staying on top of routine care and knowing when to bring in the experts, you can keep your sink beautiful for years to come. A little attention every day really does go a long way, preserving the aesthetic appeal that originally drew you to a black sink in the first place. For further tips and ideas on maintaining various surfaces in your kitchen or bath, exploring a wide range of resources can open up new possibilities and ensure that your spaces remain lovely and functional. With continued care, your black kitchen sink will be a striking feature that enhances both the style and function of your kitchen. Preserve the striking look of your kitchen by exploring the Black Kitchen Sink Sale at CARGO Bathroom & Kitchen. Discover a curated selection of stylish, functional sinks and accessories designed to keep your kitchen looking its best.
Fixing Dripping Taps: Kitchen Tapware Maintenance Guide
Kitchen tapware is a crucial part of every home, often taken for granted until it starts to drip. You might think that tiny drip is nothing more than an annoyance, but over time it can become a real problem. Ignoring a dripping tap not only increases your water bill—it can also lead to more serious damage. Maintaining your kitchen tapware keeps it in good order and helps prevent those unexpected and costly repairs that nobody wants to face. Imagine preparing a meal and noticing a constant drip, drip, drip from the tap. It’s distracting and can make your kitchen feel a bit off. Regular maintenance and timely repairs can prevent this scenario, keeping your kitchen running smoothly. Whether it’s tightening a loose faucet or replacing a worn washer, being attentive to these needs ensures longevity and efficiency in your kitchen space. Common Causes of Dripping Taps Understanding the common causes behind a dripping tap helps tackle the problem effectively. Here are a few reasons why your kitchen tap might be misbehaving: – Faulty Washers and O-Rings: These small components can wear out over time, leading to leaks. Washers control the flow of water, and when they become damaged, the water doesn’t stop flowing even when the tap is off. – Worn-Out Seals: The seals in your tap are key to keeping water flow controlled. If these seals break down, they can allow water to seep through, causing that persistent drip. – Corrosion or Mineral Buildup: Over time, taps can suffer from internal corrosion or get blocked by mineral deposits, especially in areas with hard water. This can affect the tap’s ability to close correctly. – Loose Parts and Connections: Frequently used taps might develop loosened parts and connections. Even minor loosening can lead to leaks, so regularly checking and tightening parts is a useful habit. These points illustrate how various small problems can lead to the bigger inconvenience of a dripping tap. Addressing these issues promptly not only saves water but also keeps your kitchen functioning smoothly, enhancing your day-to-day routines. Steps to Fix Dripping Taps Taking immediate action when you notice a dripping tap can save water and prevent further issues. Below are some straightforward steps to fix a dripping kitchen tap: 1. Turn Off the Water Supply: Locate the shut-off valve under the sink and turn it off. This stops water flow and allows you to work without making more of a mess. 2. Disassemble the Tap: Remove the tap handle by unscrewing it. You’ll likely need an appropriate-sized wrench or screwdriver. Be mindful of how parts fit together to ensure a smooth reassembly later. 3. Identify and Replace Faulty Components: Inspect the internal parts, such as washers and o-rings. If they seem worn or broken, they’re probably the cause of the dripping. Replace them with new parts which are available at most hardware stores. 4. Reassemble and Test the Tap: Once you’ve made the replacements, put the tap back together in the reverse order you disassembled it. Restore the water supply and check to ensure there’s no more dripping. These actions can address the most common reasons for a dripping tap, keeping your kitchen functioning happily. Preventative Maintenance Tips Preventative care is like a regular check-up for your tapware. It extends longevity and prevents unexpected issues. Here’s what you can do to maintain your kitchen tapware: – Regularly Check for Leaks and Drips: Make it a habit to check for any signs of leaking, especially after cleaning or usage of the tap. – Clean and Descale the Tap: Regularly clean your tap to remove grime and calcium deposits. This is particularly vital if your area has hard water, which can lead to mineral buildup inside the tap. – Tighten Loose Connections: Periodically check for any loose parts in the tap and tighten them. Loose connections can lead to leaks if left unaddressed. – Schedule Professional Inspections: Sometimes, having a professional take a look can help spot things you might miss. It’s worth setting routine checks to keep your tapware in top-notch condition. Maintaining your kitchen tapware not only saves money on repairs but keeps your kitchen a pleasant and efficient space. When to Call a Professional Sometimes, a little DIY just isn’t enough, and you’ll need to bring in the experts: – Persistent Leaks Despite DIY Fixes: If the drips continue even after you’ve tightened and replaced parts, an underlying problem may need professional attention. – Complicated or Major Tapware Issues: Complex problems like internal corrosion or an incorrectly fitted tap might be best left to the experts who have the right tools and skills. – Benefits of Professional Maintenance Services: Professionals can provide a thorough inspection and ensure everything runs smoothly. Plus, preserving the warranty on your tapware is always a good idea. Seeking professional help ensures your kitchen tapware continues to serve you without hassle. Enjoy a Drip-Free Kitchen Caring for your kitchen tapware with regular maintenance is a small task with big rewards. Imagine a kitchen where everything functions perfectly, leaving you free to focus on what really matters—enjoying your time there. Keeping your faucets in check not only saves water but makes your kitchen an inviting and efficient place. With simple steps and routine care, you can ensure a drip-free kitchen that’s ready for any culinary adventure. Transform your kitchen into a drip-free haven with top-notch preventative care from CARGO Bathroom & Kitchen. By ensuring your tapware is well-maintained, you not only save on unnecessary repairs but enhance the comfort and efficiency of your culinary space. For those seeking reliable products, our comprehensive range of kitchen tapware in Melbourne offers practical, high-quality solutions designed to keep leaks at bay and your kitchen operating flawlessly.