Preventing Water Damage Around Freestanding Bathtubs with Showers

Water damage in the bathroom can be a pesky problem that many homeowners face. When you have a freestanding bathtub with a shower, the chances of water escaping and causing damage can increase if precautions aren’t taken. Whether it’s an unnoticed leak or poor installation, preventing these issues is key to keeping your bathroom in top shape. Imagine stepping into your bathroom and noticing the tiles lifting or the unpleasant musty smell that signals lurking water damage. It’s not just about keeping your space looking pristine; it’s about ensuring everything functions properly and efficiently. A freestanding bathtub with a shower is a popular choice for those looking to add a touch of luxury and elegance to their bathrooms. Unlike a regular integrated shower bath, freestanding tubs have an undeniable charm and versatility, offering a unique centrepiece to your space. However, they also require specific considerations to prevent any unwanted damage from water. Getting to grips with how water damage occurs and taking preventive steps will safeguard your beautiful bathroom setup, letting you unwind without worry. Understanding Water Damage Risks Having a freestanding bathtub with a shower may look fantastic, but it’s important to be aware of the potential risks involved. Water damage often results from common issues, many of which stem from the unique design of freestanding units. Understanding these causes is the first step in preventing problems. 1. Leaks and Contamination: Leaks can occur when seals around the base of the tub or shower connections wear down. This might lead to water seeping into areas it shouldn’t reach, causing tiles to lift and grout to crack. 2. Improper Installation: Sometimes the tub isn’t sealed to the floor correctly, or the fixture connections may be loose. These installation errors can increase the risk of water getting where it shouldn’t be. 3. Splash Zone: The open nature of freestanding tubs means water can splash over the edges. Without proper splash guards or curtains, you might find unwanted water pooling on the floor. 4. Drains and Plumbing: Faulty drains and poor plumbing maintenance can also contribute to water damage. This involves anything from clogged drains to cracked pipes that let water escape into unwanted areas. If water damage isn’t addressed promptly, it could lead to structural issues in your bathroom or even mould growth, which presents health risks. Being proactive about identifying and addressing these risks means you can enjoy the elegance of your freestanding bathtub with some peace of mind. Regular inspections and maintenance help ensure everything stays in perfect working order. Installation Best Practices Proper installation of a freestanding bathtub with a shower is like setting a solid foundation for a house. It’s where you start in ensuring everything functions smoothly. The placement of such a bathtub can make a huge difference. It needs adequate space around it to minimize water splashing onto the floor. Elevating the tub slightly can help with water drainage, directing it back towards the drain rather than letting it seep into the floorboards. It’s crucial to choose a flat, stable surface for the tub. Make sure it’s properly sealed to the floor to avoid any unwanted leaks. Ensuring the fixtures are securely connected is another priority. Loose taps or showerheads can lead to drips, which, over time, might cause extensive damage. Because of these complexities, opting for professional installation is wise. Experienced installers know the particulars of dealing with showers and baths, making sure everything is sealed tight and correctly plumbed. This means fewer worries about plumbing issues down the line. Waterproofing Techniques Waterproofing is another cornerstone in preventing damage around freestanding bathtubs. Walls and floors must be properly protected to handle the extra moisture. Using moisture-resistant materials, such as tile or certain types of waterproof panels, helps contain water within the bathing area. To bolster this protection, apply sealants in any gaps or seams around the tub and where the shower meets the wall. These sealants act like a barrier against unwanted water infiltration. Good drainage also plays a significant role. Ensure that the floor slopes towards the drain, assisting excess water to exit rather than accumulate. Moreover, curtain and screen installation can help keep water from splashing onto the floor. A shower curtain that wraps around the entire tub or a screen can be extremely useful, acting as a physical shield against wayward sprays. Regular Maintenance and Monitoring Consistent check-ups can make all the difference when it comes to preventing water damage. Regularly inspect the seals and fixtures, ensuring they remain tight and functional. If you spot any cracks or loose connections, attend to them promptly. Look out for telltale signs of water issues, like water stains or mould, which could indicate a lurking problem. Keep an eye on your plumbing. If water takes longer than usual to drain, or you hear unusual sounds when the shower is on, it may be time to call a plumber. Proactive care gives you peace of mind and saves dealing with expensive repairs down the road. Keep Your Bathroom Safe from Water Damage There’s nothing like enjoying a luxurious bath without the worry of water damage lurking. By understanding how water damage happens and taking preventive steps, you’ll protect your bathroom investment. A freestanding bathtub is a stylish addition, but it deserves a thoughtful approach to installation and maintenance. Ensure your bathroom remains a safe, dry haven. By investing time in these best practices and regular checks, you’re setting up your bathroom for continued enjoyment. Embrace the elegance of your freestanding bathtub with confidence, knowing it’s safeguarded against potential issues. For those looking to complement their freestanding bathtub with a shower, enhancing your bathing experience with the right fixtures can make a world of difference. Discover the perfect tapware options at CARGO Bathroom & Kitchen, where you’ll find everything you need to complete your luxury bathroom setup. Explore our selection of freestanding bathtubs with a shower to transform your space into a personal sanctuary today.
How to Fix a Leaking Close-Coupled Toilet
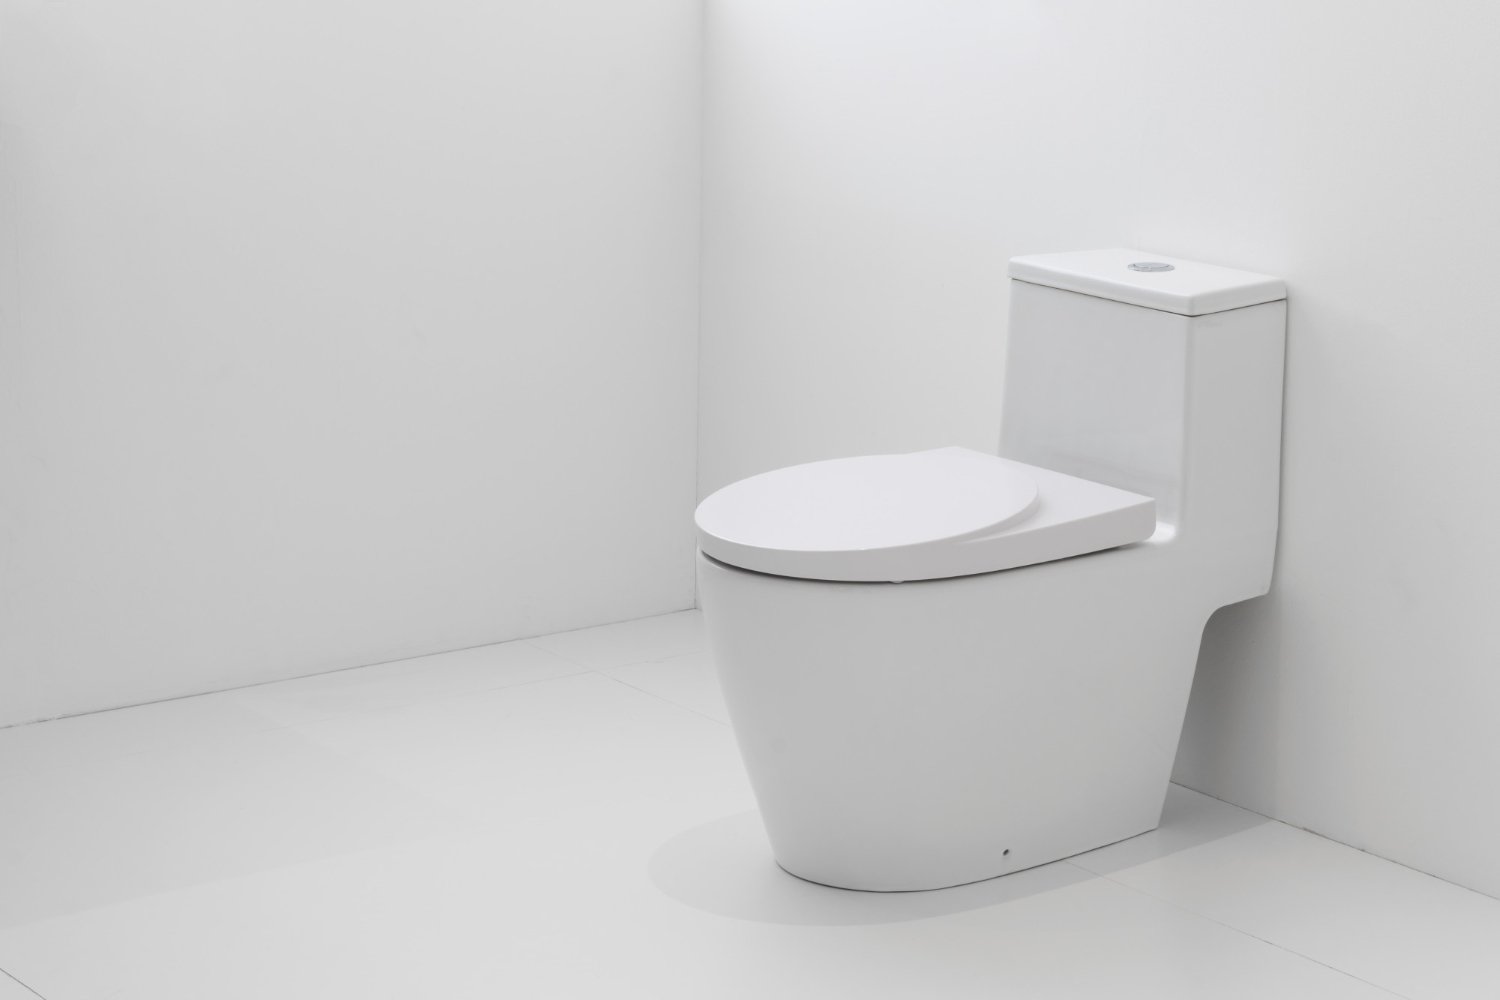
A leaking close-coupled toilet can be more than just a minor annoyance. It can lead to increased water bills and potential damage to your bathroom floor. This problem often starts with a small trickle, barely noticeable at first, but can quickly escalate into a bigger headache if not sorted out promptly. Understanding the nature of these leaks is the first step to addressing them effectively. Addressing a leaking toilet immediately is crucial to avoid unnecessary costs and headaches down the line. Spotting and fixing a leak early can save you time, effort, and money. Besides, no one likes dealing with a soggy bathroom floor. This guide explores common leak sources, what you need to tackle them, and practical steps to get your toilet back in tip-top shape. Identifying the Source of the Leak Before starting repairs, it’s important to pinpoint where the leak is coming from. Close-coupled toilets can leak from various parts, making it essential to identify the right area. Here are some of the usual suspects: – The seal between the tank and the bowl: Over time, the gasket that joins these parts might wear out. – The flapper valve inside the tank: If it’s not sealing properly, water might be leaking into the bowl. – Connections around the inlet valve: Look for drips around the base of the valve where the water supply is connected. To inspect these areas, dry off the toilet to detect where fresh water appears. A flashlight can help spot those hard-to-see leaks, especially around dark corners or beneath the tank. Another trick is to add a few drops of food coloring into the tank and let it sit for 30 minutes without flushing. If the color shows up in the bowl, there’s likely a leak through the flapper valve. Essential Tools and Materials Needed To tackle this task effectively, you’ll need a few basic tools and materials. Preparing these ahead of time can make the process smoother and less frustrating: – Adjustable wrench: Useful for loosening or tightening nuts and bolts. – Flathead and Phillips screwdrivers: Handy for removing screws and tightening components. – Replacement flapper and gaskets: In case the existing ones are the source of the leak. – Plumber’s tape: Great for ensuring watertight seals on threads. – A flashlight: Helps in seeing into dark corners and spots that are not easily visible. – Towels or rags: To soak up water and prevent spills. Having these tools at your disposal prepares you for most leak-related issues you might encounter. They not only make the repair process faster but also help in handling the situation like a pro. Taking a bit of time to gather these essentials upfront means you’ll be ready to act when a leak reveals itself. Step-By-Step Guide to Fixing the Leak Fixing a leaking toilet may sound challenging, but with the right steps, it’s a task you can handle. Start by turning off the water supply to the toilet. This is usually a small valve located on the wall behind the toilet. Turn it clockwise until the water stops running. Next, flush the toilet to empty the tank. You might need to use a sponge to soak up any remaining water in the tank to ensure it’s completely dry before proceeding. Once the tank is empty, focus on the specific area causing the leak. If the issue is with the tank bolts, use a wrench to gently tighten them. Be careful not to over-tighten, as this might crack the porcelain. If the flapper valve appears to be the culprit, replace it with a new one. Simply unhook the existing flapper from the chain and attach the new one following the instructions on its packaging. For leaks around the inlet valve, check the connections. Undo the coupling nut using your wrench, apply plumber’s tape to the threads, and reattach the nut. This will help create a watertight seal. Reconnect the water supply, turn it back on, and test for any leaks by flushing the toilet. If everything is dry, well done—you’ve fixed your leaking loo! Preventive Measures to Avoid Future Leaks Regular maintenance can keep your toilet running smoothly and help you catch potential issues early. Make it a habit to check the toilet parts periodically. Look at the flapper, fill valve, and connections every few months to ensure everything is tight and free of wear. Keep an ear out for running water sounds when the toilet isn’t being used, as this often indicates a slow leak. It’s also wise to keep the area around your toilet clean and dry. This not only makes leaks easier to spot but also prevents water damage to your floor. If you notice your toilet frequently needs repairs, it might be time to think about upgrading to a more efficient model. Lastly, early detection is your best friend against bathroom troubles. Keep an eye out for these signs: – Constant running water sounds even when not in use. – Water pooling around the base of the toilet. – Frequent need to jiggle the flush handle. A Dry Bathroom Is a Happy Bathroom Taking care of a leaking toilet promptly ensures your bathroom remains a dry and peaceful space. By following the steps outlined above, you can tackle most leaks with confidence and prevent future issues from taking root. It’s all about being proactive and not overlooking even the smallest trickle, as that can snowball into bigger problems. Maintaining your toilet isn’t just about stopping leaks when they happen. With regular checks and proper maintenance, you’ll keep your bathroom in great shape, conserve water, and avoid unexpected plumbing expenses. Armed with these tips, you’re well-equipped to enjoy a leak-free bathroom and peace of mind. When dealing with a leaking toilet feels like too much of a hassle, or if you’re thinking about upgrading, consider exploring your options for close-coupled toilets for sale. CARGO Bathroom & Kitchen offers a wide selection that combines quality and efficiency, ensuring your bathroom stays leak-free for the
Accessibility Challenges Solved with Extra-Height Toilets
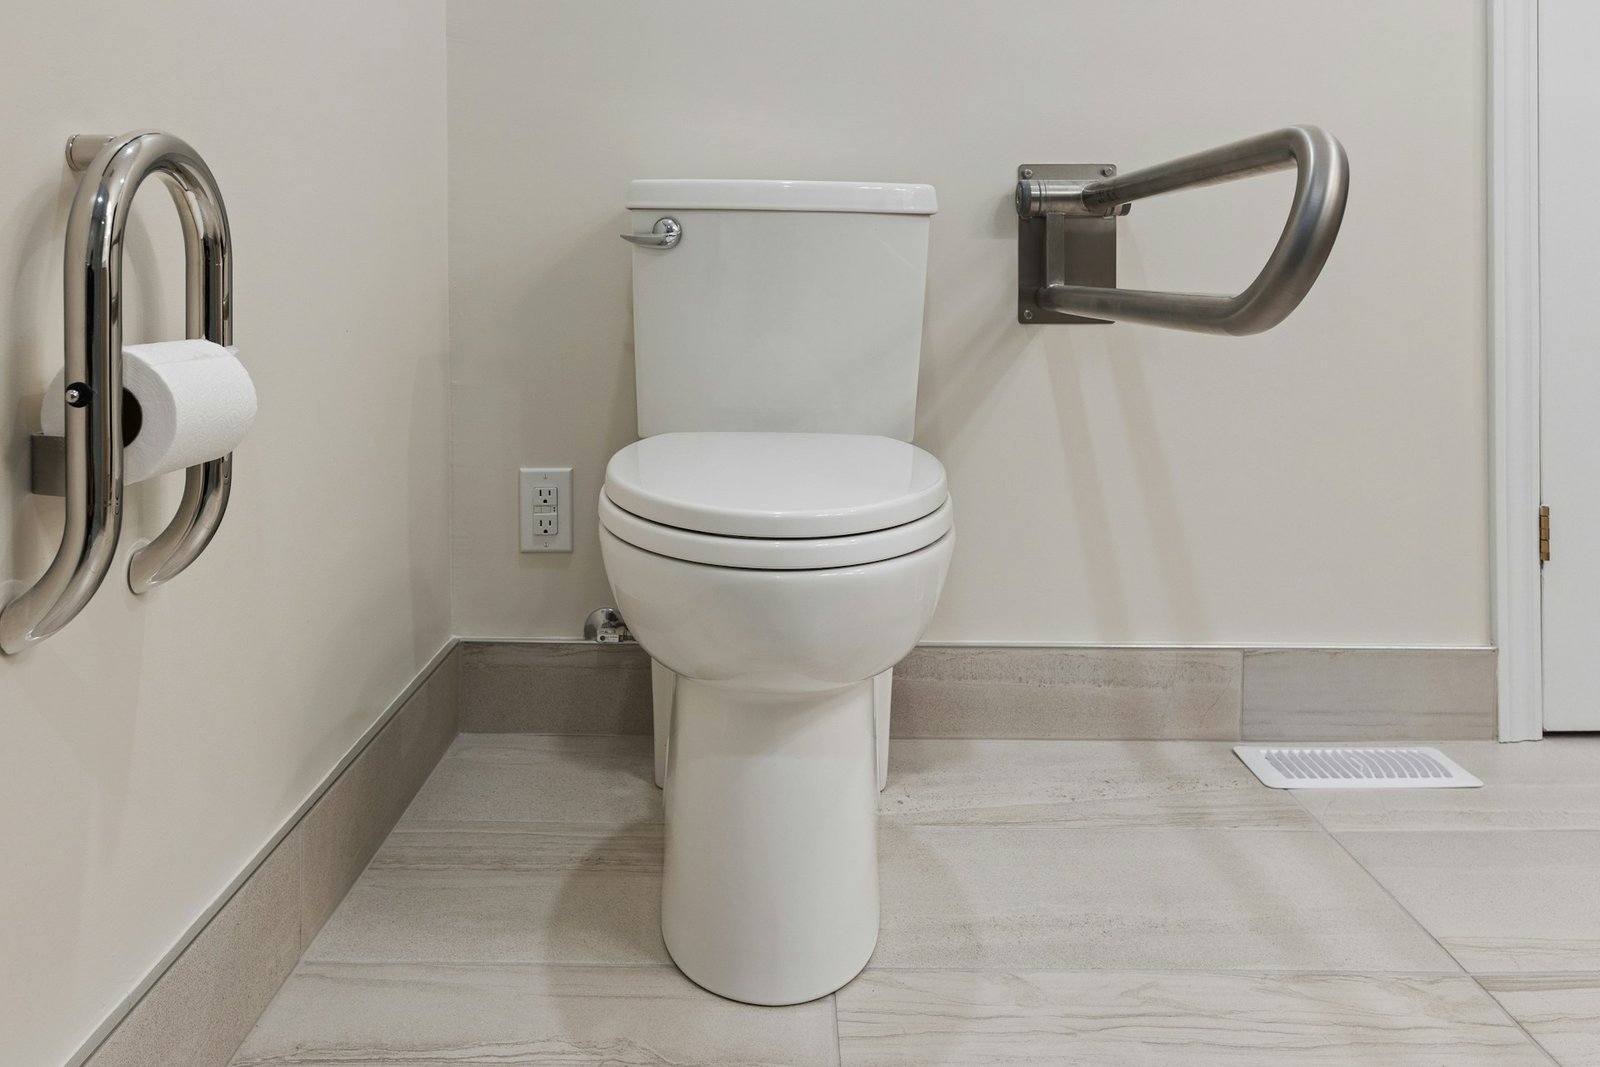
Bathrooms should be comfortable and easy to use for everyone. Accessibility is a key concern, particularly in spaces like bathrooms, where a slight design tweak can make a significant difference. Extra-height toilets have emerged as a practical solution to address the challenges faced by people with limited mobility. They offer increased comfort, ease of use, and a safer experience, which is crucial for many households. By elevating the height a bit above the standard, these toilets can significantly reduce discomfort in everyday bathroom use. Traditional toilets might present difficulties for seniors, people recovering from surgery, or individuals with physical disabilities. Getting up or sitting down may require extra effort, increasing the risk of falls or discomfort. With the growing awareness of universal design principles, more families are considering options that promote independence and safety, such as extra-height toilets. These innovative solutions cater to the needs of a broader audience, creating a more inclusive environment. Here, we’ll explore how these toilets improve daily life and why they might be the right choice for your home. Understanding Extra-Height Toilets Extra-height toilets, often referred to as “comfort height” toilets, stand slightly taller than standard models. Typically, they are about 17 to 19 inches from the floor to the rim, compared to the 15-inch height of regular toilets. This seemingly small difference can make a world of difference for those who struggle with mobility issues. These toilets are designed to mimic the height of a standard chair, making it easier for individuals to sit down and stand up. Who stands to benefit from these toilets? Broadly speaking, anyone facing mobility hurdles can find relief in using an extra-height toilet. Elderly individuals often experience joint pain or muscle weakness, for whom a bit of extra height can reduce the strain on knees and hips. People with conditions like arthritis or those recovering from surgeries also find these toilets advantageous as they provide a more comfortable seating position. Meanwhile, the popularity of extra-height toilets is also increasing among young families. Imagine a scenario where a parent must help a child or elderly parent use the bathroom. An extra-height toilet makes the process more manageable and comfortable for both the caregiver and the person being assisted. By accommodating a wider range of needs, these toilets can enhance the quality of life for many, making everyday tasks simpler and less physically demanding. How Extra-Height Toilets Improve Accessibility Extra-height toilets shine in their ability to make everyday life simpler and safer for those who need it most. Here’s how they make a significant difference: 1. Easier Transfers: The additional height reduces the effort needed to transition from standing to sitting and vice versa. This is especially helpful for those with limited strength or balance. 2. Greater Comfort: Users find that these toilets offer a more natural sitting position, akin to sitting in a regular chair, which can alleviate discomfort in the knees and hips. 3. Support for Caregivers: With higher seats, caregivers can more easily assist someone needing help, as the angle is more conducive to offering support. The ergonomic design of these toilets also plays a critical role in minimizing physical stress. By embodying the principles of comfort design, extra-height toilets cater to the body’s natural movement, thereby reducing risk and enhancing user confidence. This attention to detail ensures that each use is less taxing, making day-to-day activities smoother for individuals and their caregivers alike. Choosing the Right Extra-Height Toilet for Your Bathroom Selecting the perfect extra-height toilet involves considering various factors to suit personal needs and bathroom aesthetics. Here are some tips to guide you: – Measure Your Space: Ensure the toilet will fit comfortably in your bathroom. Pay attention to both width and height, as well as the distance from the wall or adjacent items. – Consider the Style: Extra-height toilets are available in various designs. Choose a style that complements your bathroom decor, be it modern or traditional. – Functionality: Look for features that enhance usability, such as soft-closing lids or dual-flush systems, which can provide a better overall experience. – Complementary Fixtures: Pair your new toilet with fixtures that enhance both style and utility. For example, consider grab bars or non-slip mats for added safety. When you integrate complementary fixtures, your bathroom not only becomes more practical but also more harmonious in style. Creating a cohesive environment enhances the overall experience, making it inviting and comfortable for everyone who steps in. Installation and Maintenance Tips Installing an extra-height toilet might seem daunting, but with the right approach, it can be straightforward: – Professional Installation: For those unfamiliar with plumbing, hiring a professional is the best way to ensure correct and safe installation. – Regular Maintenance: Like any other fixture, keeping your toilet in top shape involves simple tasks. Clean regularly to prevent build-up and inspect for leaks or loose parts. – Replace Worn Parts Promptly: Gaskets, seals, and handles may need replacing over time. Quick attention to these parts can prevent bigger issues down the track. Investing some time and care in the maintenance of your extra-height toilet ensures it remains an asset, delivering comfort and functionality over the long term. Make the Switch for Better Accessibility Upgrading to an extra-height toilet isn’t just a change in size—it’s a meaningful step towards improving accessibility and enhancing daily routines. These toilets ease everyday challenges, providing comfort and security for everyone who uses them. A thoughtful choice in bathroom fixtures not only transforms a space but can also significantly impact an individual’s quality of life. By prioritizing accessibility, individuals and families can create a home that’s both stylish and inclusive, meeting the needs of all its members with grace and elegance. Upgrade your bathroom’s accessibility and comfort with an extra-height toilet tailored to meet your specific needs. Discover how these thoughtfully designed toilets can transform your daily routine into a more pleasant and straightforward experience. Visit CARGO Bathroom & Kitchen to explore our range of options that combine style and functionality. Whether you’re accommodating elderly
Dealing with Stability Issues in Freestanding Bathtubs
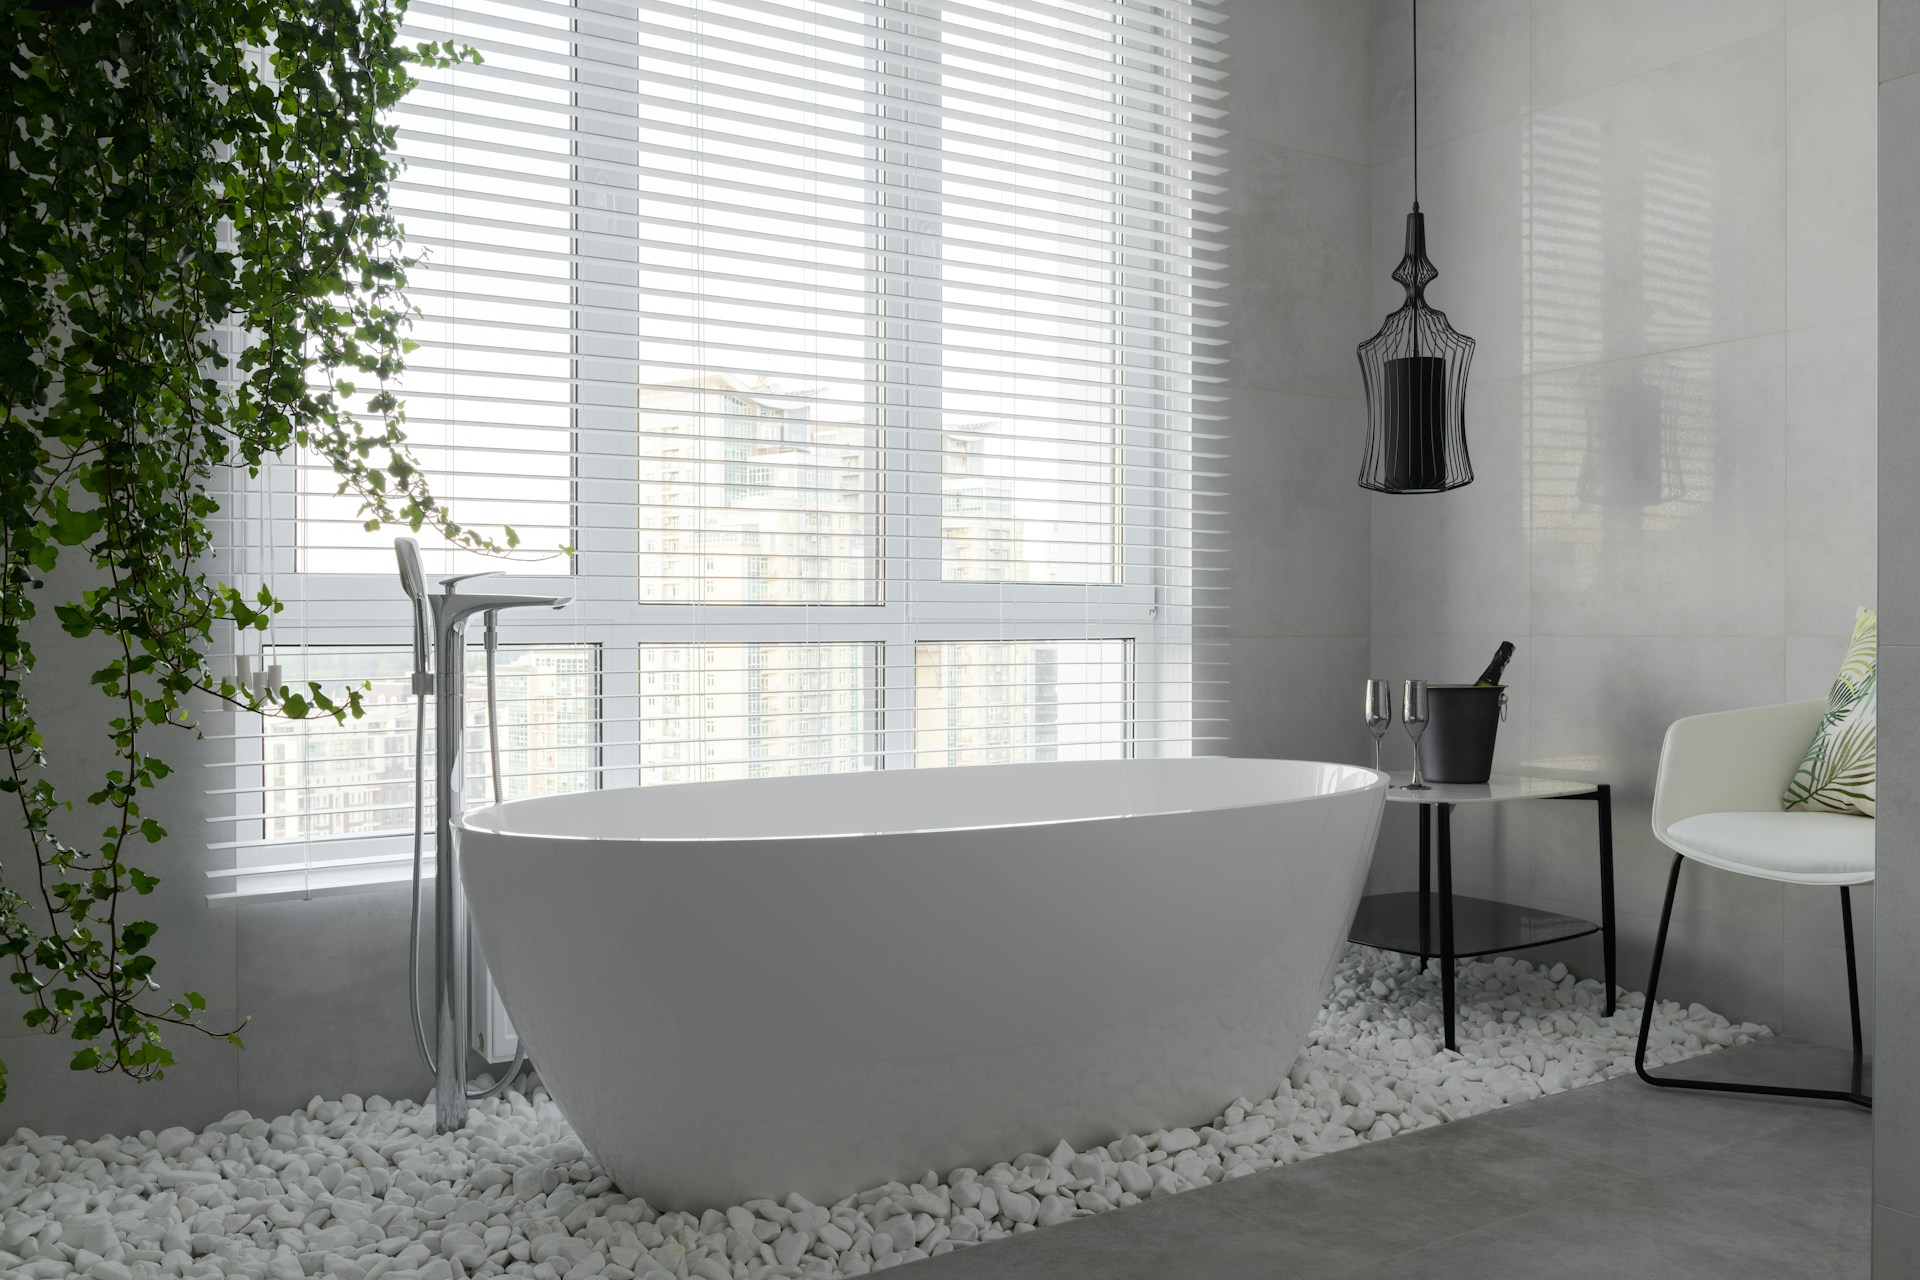
Freestanding bathtubs are a beautiful addition to any bathroom, giving a touch of elegance and relaxation. They come in various styles and materials, making them versatile for different interior designs. Yet, they can face stability issues, which can be both annoying and problematic. Addressing these concerns is crucial to ensure your bathtub remains a safe, comforting retreat. Enjoying a relaxing soak, only to feel a wobble or slight shift in your tub’s position, is far from ideal. Such problems can arise from a range of factors, each affecting your bathtub’s steadiness. Whether you’re planning to install a new tub or maintain an existing one, understanding potential stability issues is key to enjoying your freestanding bathtub for years. Common Causes of Stability Issues Freestanding bathtubs are often the centerpiece of a bathroom, so keeping them sturdy and secure is vital. To manage this, consider the common issues that can disrupt their steadiness. – Uneven Floors: One of the most frequent culprits is an uneven floor. If your bathroom floor isn’t perfectly level, it won’t provide the support a freestanding tub needs. Imagine trying to place a chair on a slope—it wobbles and feels unsettled. – Improper Installation: An improperly installed bathtub can create long-term problems. If the tub isn’t secured correctly during installation, small movements can gradually become larger issues, leading to discomfort or even damage. – Heavy Use or Impact: A tub may become unstable over time due to regular use, especially if there’s heavy use or accidental impacts. For instance, kids playing energetically around or in a bathtub might put unexpected strain on its supports. Understanding these common issues helps in preventing them. Regular checks and mindful installation can save time and money down the track. Steps to Ensure a Stable Installation Installing a freestanding bathtub might seem like a straightforward task, but taking the right steps ensures it stays secure. Here’s a checklist to guide a stable installation: 1. Preparing the Floor Surface: Before you start, ensure the bathroom floor is even and strong. Check for any irregularities and fix them before installing the tub. A smooth, level surface forms a solid foundation for your bathtub. 2. Correct Positioning and Leveling: Carefully position the tub, ensuring it’s balanced correctly. Use a spirit level to measure and adjust where necessary. Proper leveling not only contributes to stability but also prevents water from pooling in undesired areas. 3. Securing the Bathtub: Once leveled, secure the tub using the appropriate hardware and techniques for the specific model. This might include anchoring it to the floor or using specialized supports designed for your tub’s weight and shape. By following these steps, you create a durable and secure setup for your freestanding bathtub, letting you enjoy it worry-free. Maintenance Tips for Long-Term Stability Once your freestanding bathtub is securely installed, keeping it stable over the years depends on a few key maintenance steps. Regular attention will not only preserve the bathtub’s charm but also ensure it remains a relaxing spot without unexpected issues. Regular inspections are a must. Check on your bathtub’s supports periodically and look for any signs of wobble or movement. By catching potential problems early, you prevent them from becoming more serious or costly. Think of it like taking your car for routine maintenance—small checks can prevent big breakdowns. Next, focus on tightening fixings and supports. Over time, the hardware holding your bathtub in place could loosen slightly due to normal use. Keep an eye on any exposed screws or bolts and tighten them as needed. This simple task can make all the difference in maintaining stability. Addressing wear and tear is also vital. With daily use, bathtubs may show signs of aging or damage. Pay attention to any chips, cracks, or areas that seem worn down. Fix these promptly to prevent water damage or other related issues. A little maintenance can go a long way in extending the life of your bathtub. Professional Solutions and When to Seek Help Sometimes, despite your best efforts, stability issues can persist. In these cases, turning to a professional provides the most effective solution. Professionals bring expertise and experience, ensuring any underlying problems are identified and addressed correctly. Consulting a specialist is particularly important if you notice significant movement or if the tub feels consistently unbalanced. They can assess the situation with a trained eye and make necessary adjustments, which might involve more complex solutions like reinforcing floor supports or replacing faulty hardware. Additionally, if you’re planning any larger bathroom renovations, it’s wise to involve a professional right from the planning stages. They can help blend the design efficiently and account for the placement of your bathtub, reducing the chance of future stability issues. Reaching out for expert help doesn’t mean you can’t have input or make choices about your bathtub. Instead, it’s about collaborating with someone who can make your space safer and more enjoyable, ensuring your freestanding bathtub remains a beloved feature of your home for years. Enjoying Your Freestanding Bathtub Maintaining the stability of a freestanding bathtub requires a blend of thoughtful installation, ongoing care, and sometimes professional expertise. By taking these proactive steps, you not only keep your bathtub secure but also enhance the overall experience of your bathroom oasis. With the right attention, your bathtub will continue to offer a space of calm and relaxation, free from the worry of unexpected wobbles or slips. It’s all about creating a safe and stylish space that you can enjoy every day.For a stunning, secure bathroom, choose quality fixtures that complement your style. Visit CARGO Bathroom & Kitchen to explore our curated selection of freestanding bathtubs and find the perfect fit for your home. Transform your bathroom into a personal oasis with products that combine elegance and functionality.
Troubleshooting Clogged Bathroom Basins in Melbourne
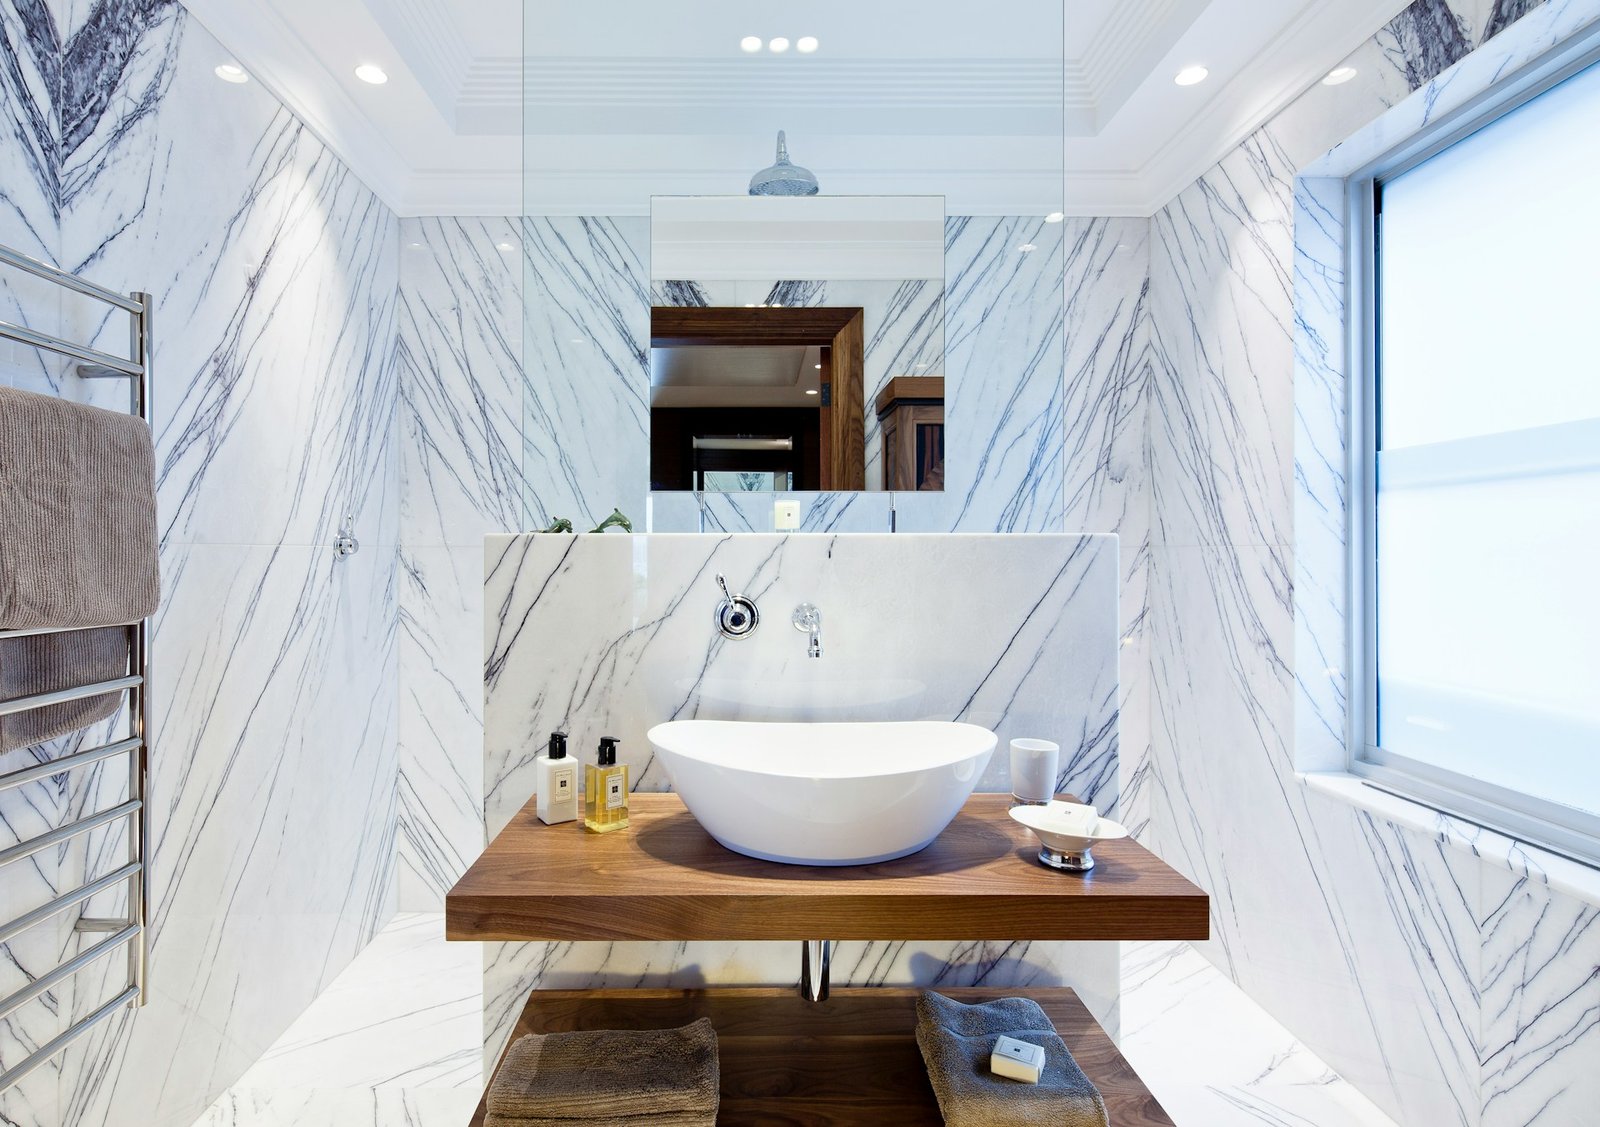
Taking care of your bathroom basin is just as important as any other area in your home. A well-maintained basin not only looks good but also helps to avoid daily annoyances like clogs and slow drainage. Finding that your basin isn’t working as it should can be frustrating and inconvenient, especially if you’re getting ready for the day. It’s easy for dirt and grime to build up, leading to blockages that can stop the water from flowing properly. Whether it’s extra hair, soap residue, or even mineral deposits, these sneaky contributors can cause quite a stir in your home. Every household seeks a smooth-running home environment. When the bathroom basin acts up, it might be tempting to try and fix it yourself. Yet, knowing when to call in the professionals can save you time and hassle. With a little bit of knowledge on what causes these issues and how to spot them early, you can keep your bathroom basin flowing freely without too much fuss. Common Causes of Clogged Bathroom Basins Understanding what causes your basin to clog is the first step in tackling this problem. Here are some of the usual culprits: – Hair Build-Up: Hair loss is a natural thing. But when it finds its way into your sink, it tends to bundle up and create a barrier for water, leading to clogs. – Soap Scum Accumulation: Those sudsy soap bars can leave behind a residue. Over time, this scum forms a sticky layer that holds onto other debris. – Foreign Objects: Sometimes, small items like toothpaste caps or hairpins accidentally end up in the basin, causing obstructions. – Mineral Deposits and Hard Water Issues: If your home has hard water, you might notice a chalky build-up. This mineral deposit can narrow the pipe’s opening, lessening water flow. Understanding these common causes can help you keep a closer eye and possibly prevent some problems before they become larger issues. It’s like noticing a telltale sign before things get too complicated. How to Diagnose the Problem Understanding that your bathroom basin isn’t working quite right is the first step in setting things straight. There are a few clear signs you can look for to diagnose a clog before it turns into a bigger issue. Here’s how you can identify the problem: 1. Slow Drainage: If water is taking its sweet time to disappear, it’s a classic sign of a blockage. This sluggish retreat of water reveals that something is causing water to “back up” rather than freely flow down. 2. Unusual Sounds: A basin making gurgling noises isn’t just noisy; it’s trying to tell you something. These sounds often point to air trapped due to partial blockages, indicating it’s time to inspect what’s going on underneath. 3. Unpleasant Odours: If an unwanted smell creeps up from your sink, it’s often because debris or standing water is decaying. This is not something you want to linger and will probably need attention sooner rather than later. These telltale signs can help you pinpoint the issue early on, giving you a better chance to manage it and maintain harmony in your bathroom. When to Call a Professional Plumber While DIY solutions can sometimes work, there are moments when calling a professional is the best course of action. It’s important to know when a problem goes beyond your control. Here are some situations where a plumber can save the day: – Persistent Clogs: If your efforts to clear the blockage aren’t working, it might be due to a more significant issue within the plumbing system that needs expert tools and knowledge. – Signs of Deeper Problems: Persistent blockages or pipe noises can hint at underlying issues like tree roots invading your pipes or a long stretch of buildup that requires more than simple tools. – Preventing Further Damage: Hiring a professional early can prevent minor problems from escalating into more costly repairs. A quick professional visit often avoids major headaches later on. Calling in a professional isn’t just about fixing what’s broken; it’s about guaranteeing the problem doesn’t return, offering peace of mind and a smoothly operating bathroom basin. Preventive Measures to Avoid Future Clogs Once your basin is free from clogs, ensuring it stays that way involves a few simple habits. Prevention always beats cure, and with these strategies, you’re less likely to find yourself wrestling with a blocked basin: – Regular Cleaning: Make a point to clean your basin regularly. Removing hair and rinsing away soap scum before it settles can keep future clogs at bay. – Using Drain Guards: Pop these handy devices over your drain to catch hair and other debris. This simple step keeps unwanted materials from finding their way into your pipes. – Avoiding Disposal of Unsuitable Items: Refrain from rinsing things like paint or grease down the drain. These substances can solidify and create blockages you’ll regret. Implementing these straightforward actions can mean the difference between constant fuss and a hassle-free routine where water flows exactly as it should. Wrapping Up: Keep Your Bathroom Basins in Melbourne Running Smoothly Maintaining a clog-free bathroom basin in Melbourne doesn’t need to be a complex task, as long as you catch problems early and practice a little prevention. It’s about spotting the signs, knowing when to call experts, and keeping track of what goes down the drain. With some mindful practices and the occasional professional help, you make sure your bathroom stays a clean and pleasant zone. Keeping these steps in mind, the journey from troublesome clogs to free-flowing drains becomes much simpler. You’ll find it easier to manage, less stressful, and ultimately more satisfying when your bathroom is in top form. For peace of mind with your bathroom basins, consider the range of options available to complement your space. Whether you’re in need of a stylish update or robust functionality, CARGO Bathroom & Kitchen offers an impressive selection of bathroom basins in Melbourne. Our diverse collection ensures you can find exactly what suits your needs, providing both
How to Repair Damaged Discount Bathroom Vanity Units

Bathroom vanity units are more than just practical fixtures. They’re often the centrepiece of a bathroom, bringing together design and function in one cohesive element. Whether you’re getting ready for the day or winding down in the evening, a vanity unit plays a pivotal role in daily routines. Over time, however, even the sturdiest units can show signs of wear and tear, especially those on the budget-friendly side. Repairing damaged discount bathroom vanity units can restore their functionality and appearance, prolonging their life and enhancing the overall look of your space. Maintaining your vanity units not only keeps your bathroom looking fresh but also ensures it remains a space that reflects your style and meets your needs. Whether it’s a small scratch, a chip on the surface, or water damage, taking the time to address these issues can make a big difference in preserving your bathroom’s allure. Repairing these imperfections can seem challenging at first, but with the right approach and tools, you can tackle these problems effectively. Below, we explore the steps for assessing damage and gathering the necessary tools to start the repair process. Identify the Damage To begin fixing your vanity unit, first pinpoint the type and extent of the damage. Doing so not only sets the right expectations but also guides you in selecting the appropriate repair method. Here’s how you can identify what needs fixing: – Scratches: Check for any surface scratches that may be affecting the look but not necessarily the function. These are usually common in high-use areas. – Chips and Dents: Look out for these imperfections, especially around the edges, which are easily bumped during everyday use. – Water Damage: Moisture can seep into materials, causing swelling or discolouration. This is more prominent around the sink area. – Loose Components: Inspect if the drawers or doors are loose or if the hinges have come away from the framework. – Finish Issues: Sometimes the paint or finish might be peeling or bubbling, affecting both aesthetics and protection. Assessing the damage accurately can help in planning the repair process wisely. Taking time to inspect your unit allows for a more structured approach, reducing unnecessary waste of time and resources. Prepare Necessary Tools and Materials Once you’ve identified what needs fixing, gather the right tools and materials before starting any repair. Having everything you need at your fingertips saves time and ensures a smoother process: Tools You Might Need: – Screwdriver set – Sandpaper or a sanding block – Putty knife – Hammer and nails – Drill and bits – Paintbrushes Materials to Gather: – Wood filler or putty for filling in gaps or chips – Sealant to protect against future water damage – Primer and paint that matches your vanity’s colour for touch-ups – Replacement parts for any worn or damaged components like hinges or handles Check if these tools and materials are already at home or if you need to visit a local hardware store. Sometimes, it might be handy to ask the store staff for tips if they’re familiar with bathroom repairs. Having these essentials sorted in advance will make the repair work more efficient and less stressful, ensuring your vanity unit looks its best once fixed. Step-By-Step Repair Guide Now that you’re all set with your tools and materials, it’s time to tackle those repairs. Each type of damage has its own method for fixing, ensuring your vanity looks great once again. 1. Fixing Scratches: – Begin by lightly sanding the scratched area with fine-grit sandpaper. Sand in the direction of the grain to avoid further damage. – Wipe away any dust with a damp cloth. – Apply a matching wood stain using a small brush for precision, allowing it to dry thoroughly. 2. Repairing Chips and Dents: – Clean the surface area to remove dirt and debris. – Use a putty knife to apply wood filler into any chips or dents. – Once the filler dries completely, sand the area smooth so it’s level with the rest of the surface. 3. Addressing Water Damage: – Ensure the damaged area is completely dry. – Sand down swollen or discoloured areas, being careful not to sand too much. – Seal with a waterproof sealant and repaint if required. 4. Tightening Loose Components: – For loose hinges, tighten screws using a screwdriver. If the screw holes are stripped, fill them with a toothpick or matchstick coated in wood glue. – Allow the glue to dry and tighten up with new screws. 5. Refreshing the Finish: – Sand the peeling or bubbling paint with medium-grit sandpaper. – Prime the area first, then repaint with a colour that matches the existing finish. Maintenance Tips to Prevent Future Damage Once your vanity unit is back to its former glory, maintaining it to prevent future damage is key. A few simple habits can keep it in great shape for years to come. – Regular Cleaning: Clean surfaces with a non-abrasive cleaner and a soft cloth at least once a week. Avoid excessive water to prevent wood from warping. – Moisture Control: Install a bathroom fan or keep windows open to reduce humidity. Wipe up water spills immediately. – Protective Measures: Use coasters or trays for items that can cause spills, like soap dispensers. Apply a protective sealant to keep the surface water-resistant. – Inspect Regularly: Check hinges and handles periodically to make sure they’re tight and functioning properly. Expert Tips for Restoring and Maintaining Your Vanity Unit Restoring your vanity unit doesn’t just refresh your bathroom’s look, it also extends the life of your investment. The effort you put into understanding and repairing damage will pay off in a space you’re proud to use every day. Compartmentalising tasks, gathering the right tools, and applying careful techniques make the process manageable and rewarding. Incorporating these maintenance tips ensures that you’re caring for your vanity unit properly. It preserves its beauty and functionality, saving you from more extensive repairs in the future. Regular care not only boosts the