Professional Solutions for Extra-Height Toilet Installation

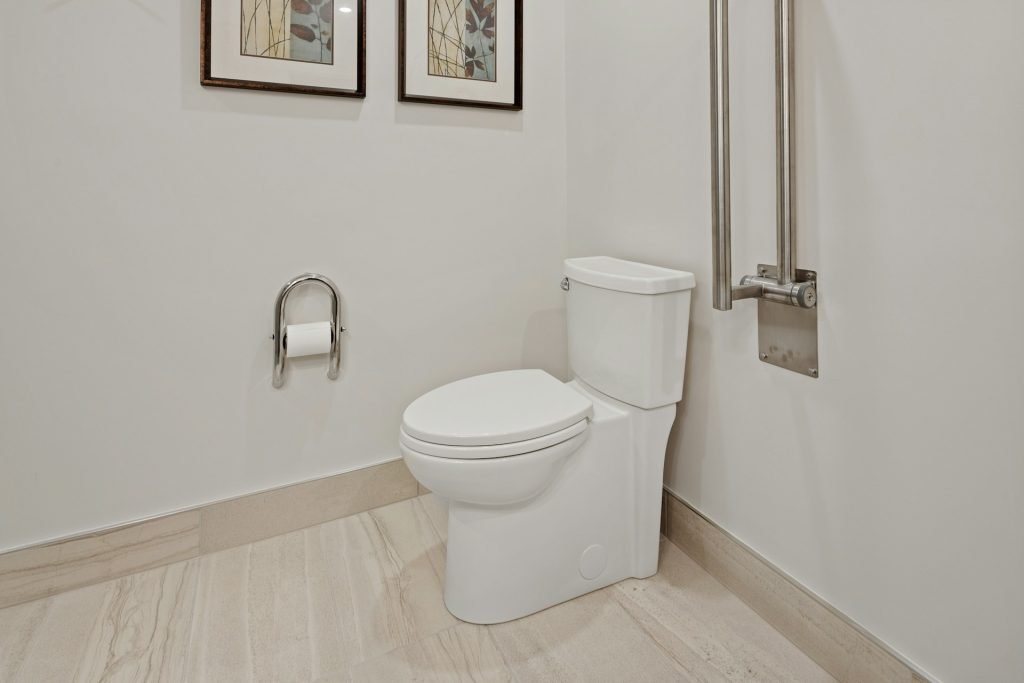
Installing a toilet might sound straightforward, but some setups need more thought, especially when it involves an extra-height toilet. These toilets sit higher than standard designs, making them a solid option for improving comfort and convenience. Whether you’re working on an upgrade or building a new bathroom from scratch, knowing what’s involved in a proper installation can save time, money and frustration later on. Extra-height toilets offer simple solutions for a wide range of users, from people with mobility issues to those who simply prefer a little extra support when sitting or standing. They’re practical, comfortable and increasingly common in modern homes. But before jumping into installation, it’s worth understanding how these toilets differ from standard ones and what you’ll need to get the job done right from the start. Understanding Extra-Height Toilets Extra-height toilets, sometimes called comfort height or raised toilets, are designed to stand a few centimetres taller than the traditional variety. This slight change can make a big difference for anyone who struggles with low seating. The added height makes it easier for people to sit down or get up without putting strain on their knees, hips or back. It’s not just for older adults either. Tall individuals, people recovering from surgery or those with joint issues all tend to benefit from the extra elevation. The raised seat can also help prevent awkward angles or pressure, which can sometimes lead to discomfort with standard toilets. They’re often used in accessible bathrooms or even in family homes where multiple generations live together. One common example is when older parents move in with their children, and making the home safer and more comfortable becomes a priority. From a design point of view, these models come in plenty of styles just like standard toilets. Whether your bathroom has a modern finish, traditional features or a mix of both, you won’t have to sacrifice looks for function. Preparation Steps Before Installation Getting the groundwork sorted before fitting an extra-height toilet is key. A bit of careful planning saves a lot of hassle on installation day. It helps to know early that these toilets may have a slightly different footprint, which affects how they’ll line up with existing plumbing and wall clearances. Here’s a simple list to help you get started: 1. Measure the height and rough-in space. Rough-in refers to the distance between the wall and the centre of the toilet outlet. Double-checking this avoids misalignment. Extra-height toilets may need more space vertically or might sit differently against the wall. 2. Check for clearances. Make sure there’s enough room around the bowl and seat for comfort and ease of movement. Doors, vanities or fixtures nearby might need adjustment. 3. Gather the right tools and fittings. At a minimum, you’ll need a spanner, a level, plumber’s tape, a new wax ring or seal and any fixings provided with the toilet. 4. Assess the flooring and stability. If your floor is uneven or damaged, fixing that first will help your toilet sit properly and securely. 5. Locate the water shut-off valve. Know where it’s located and test it to ensure you can turn off the water when it’s time to disconnect the old toilet. These might seem like small tasks, but overlooking even one could lead to leaks, poor alignment or water damage. Taking the time now means the job will go more smoothly and reliably later on. Professional Installation Process Installing an extra-height toilet might look similar to fitting a standard one, but there are a few extra points to consider. Heights vary across brands, floor levels aren’t always even and lining up the seal properly is non-negotiable. If it’s not done right, the toilet might wobble or leak over time. It’s the kind of work that benefits from having an experienced installer on the job. A licensed professional usually starts by removing the existing toilet and cleaning the area thoroughly. This includes inspecting the sewer flange to confirm it’s in good condition. If the floor around it is soft or damaged, it’ll need to be addressed before installation. Stability is critical, especially when placing a heavier or taller fixture. Next is applying the wax ring or rubber seal to prevent leaks between the toilet and the waste pipe. Then, the new extra-height toilet gets lowered into place. This step requires patience and a steady hand to ensure it’s sitting level and directly over the flange. Once positioned, the bolts are tightened carefully to secure the base without cracking the porcelain. After securing the base, the water supply line is connected and tested. At this point, an installer checks for any sign of movement or leaks. Unlike standard-height toilets, getting the positioning right with an extra-height model is even more important, especially in tight bathrooms where clearances around vanities and storage units are tighter. Professionals are also equipped to make fast decisions if something doesn’t line up. For example, if the new toilet affects the swing of a nearby door or feels too tight near a cabinet, they can quickly suggest adjustments. Whether that means repositioning the toilet slightly or coming up with a simple workaround, saving time and reducing stress is the bonus of having a pro handle it. Post-Installation Maintenance Tips Once the new toilet is in, it’s tempting to tick it off the list and move on. But like anything in the home, a little ongoing care keeps things running smoothly and can help avoid repairs down the track. Here are a few basic checks to keep things in order: – Check for movement. If the toilet rocks at all, it may need to be re-sealed or have the floor bolts tightened. – Look underneath and behind the toilet every few weeks to spot any signs of dripping or dampness. – Test the flushing strength regularly. A weak or delayed flush could mean the cistern needs cleaning or adjusting. – Clean the external parts weekly using a damp cloth and cleaning supplies that are safe for ceramics and
Bath and Shower Combo Maintenance: Professional Tips
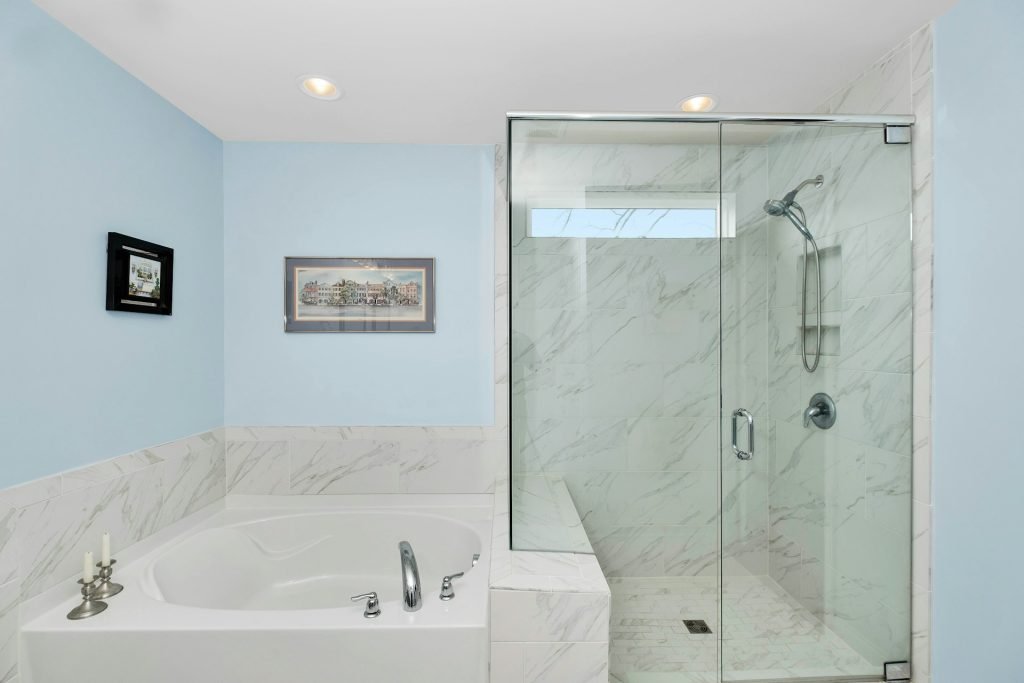
A bath and shower combo is a practical choice for many homes. It saves space and comes in handy when you want the option of a quick wash or a long soak. But like any part of the bathroom, it needs a bit of care to stay in good shape. When neglected, soap scum builds up, surfaces lose their shine and leaks start creeping in. Keeping your combo unit clean and well looked after helps it last longer and keeps the bathroom pleasant. It’s not just about how it looks. Regular maintenance also prevents mould from settling in and makes sure your fittings keep working properly. With a few simple steps, most issues can be stopped before they turn into bigger problems. Regular Cleaning Routine A simple cleaning routine makes a huge difference to how fresh your bath and shower combo feels. Different materials need different approaches, so knowing what your system is made of helps. For example, acrylic and fibreglass often show marks and need non-abrasive cleaners, while ceramic and enamel surfaces can handle a bit more scrubbing. Here’s a short list of cleaning tips based on common materials found in shower and bath combos: – Acrylic and fibreglass: Use a soft cloth and a gentle liquid cleaner. Avoid anything gritty or powder-based as it can leave scratches. – Porcelain and enamel: These are hardier surfaces. A paste of bicarb soda and water works well, followed by a good rinse. – Glass screens: A mix of vinegar and water helps keep them clear. Wipe off droplets after each use to reduce build-up. – Chrome fixtures: Dry them after cleaning to keep them shiny. A little diluted dish soap works well for daily cleaning. Keeping a small bucket with your chosen products nearby can help you stay on top of things. A quick wipe down as part of your weekly clean can stop stains from silently building up. Don’t wait until grime is obvious. It often forms in unnoticed corners or behind the screen. If you use commercial cleaners, read the label first. Some products are too harsh and can strip coatings or cause discolouration. Once you’ve found what works for your combo, stick with it. A consistent routine makes deep cleaning a lot easier down the track. Preventing Mould And Mildew Mould tends to grow in moist spots like corners, seals and grout lines. If your bathroom stays damp between uses, the problem can spread before you realise. Regular cleaning helps, but small habits make the biggest difference. Start by improving airflow. Turn on the extractor fan during and after showers or open a window to let damp air out. Less moisture makes it harder for mould to take hold. Other helpful habits include: – Wiping down glass and tiled surfaces with a squeegee or microfibre cloth. – Pulling your shower curtain wide open so it dries evenly. – Hanging up towels and mats outside the bathroom to dry instead of leaving them nearby. – Cleaning silicone and grout monthly with a mould treatment safe for your combo’s surfaces. If your fittings are old or showing signs of wear, consider replacing the seals and grout with modern mould-resistant materials. These can make a big difference long-term. Just make sure everything is dry and clean before applying any new products. A clean and dry bathroom fights off mould without much effort. It doesn’t take a lot of time, but doing it consistently really pays off. Addressing Leaks And Dripping Issues Small leaks can lead to big issues. Water might slowly seep into the floor, walls or cabinetry without being noticed right away. That kind of damage builds up over time, weakens seals and attracts mould. Leaks often appear in places like where the bath meets the wall, under taps, around drains or behind handles. Check these areas every couple of weeks, especially after use. If something feels damp or you see water pooled where it shouldn’t be, take it seriously. Look out for signs like: – A steady drip from taps or the shower even when off – Stains or discolouration on ceilings beneath the bathroom – Squishy floorboards near the bath – Cracked grout or peeling edges on sealants Don’t ignore leaks thinking they’ll go away. Even a small drip means the fixture might need service or a worn seal replaced. Acting quickly reduces the chance of letting moisture damage spread. If you notice loose or cracked fittings during a check-up, don’t try to patch them yourself. These repairs often need a trained professional to get it done right. Otherwise, you might end up with a bigger problem down the track. Maintaining Fixtures And Fittings Your combo’s taps, shower head and drain are used daily and need regular care to keep running smoothly. Dirt and mineral deposits can block water flow or damage finishes if left too long. Chrome, matte black and brushed nickel fittings all need different treatment depending on their surface. Hard water adds a layer of residue that sits around spouts and shower heads, dulling their shine or leaving hard stains. Use a soft cloth with warm soapy water, then rinse and dry. Each month, it’s a good idea to: – Twist taps to check for stiffness or wobbling – Look for rust marks or pitting on metal parts – Unscrew the shower head gently to clean blocked nozzles – Pour water down drains to see how fast it clears or if there’s gurgling Older set-ups might have fittings loosening with use. This includes drain covers, tap handles and even the supporting rails around the bath area. A plumber can help tighten or replace these items and check that everything seals properly. These fixes go a long way in giving your system stability and a longer life. Schedule Professional Inspections Even with good day-to-day maintenance, you’ll want an expert to check on your combo at least once a year. This helps catch hidden wear that might be brewing below the surface, behind fittings or under
Professional Solutions for Freestanding Bath Support Issues
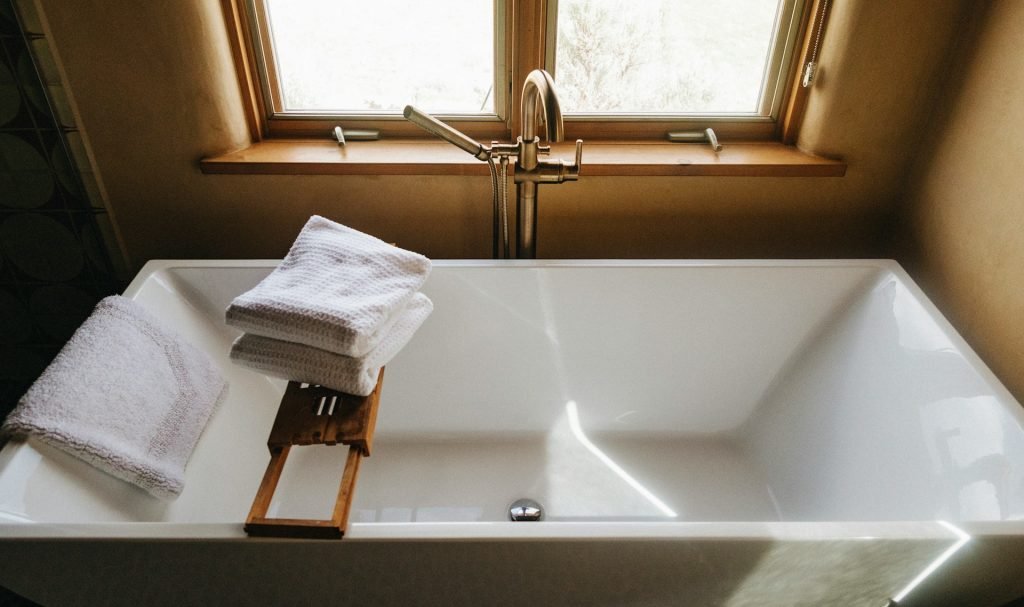
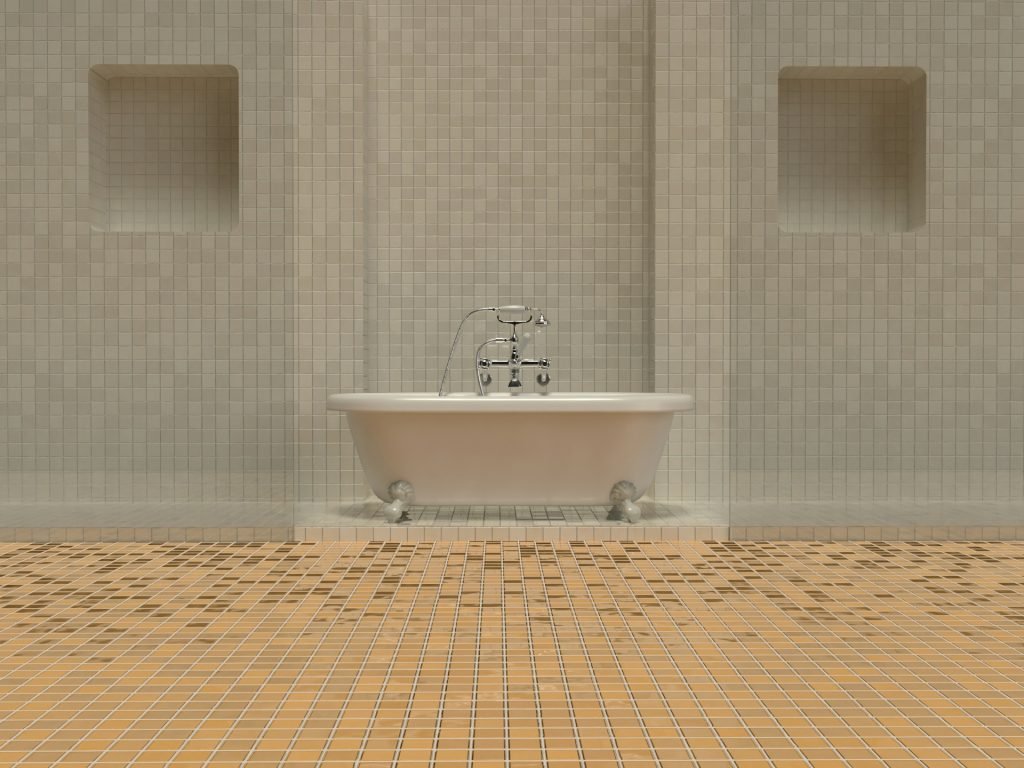
Freestanding bathtubs have become a favourite choice for many bathroom makeovers. They bring a sense of style and comfort while adding a clean, modern look to any space. With their bold presence and flexibility in placement, they’re a smart fit for both large and compact bathrooms. But even with their good looks and roomy designs, they come with challenges that shouldn’t be ignored. One of the most common problems people face with freestanding baths is their lack of built-in support. Unlike bathtubs that are secured to walls or frames, freestanding tubs rely solely on their base for balance. That means if the surface isn’t perfectly flat or strong underneath, you could end up with a rocking tub or even structural damage. That’s why getting a professional to handle the assessment and installation makes all the difference. Identifying Common Support Issues If your freestanding bathtub doesn’t feel quite right, the problem could be linked to its support. You might notice slight movement, creaks when you step in, or even small changes in the flooring around the tub. All these signs are worth paying attention to early before they turn into a bigger headache. Here are a few common support issues: – Wobbly or unstable base: This is the most obvious sign something’s off. If the tub feels like it shifts, even slightly, when you sit in it, the centre of balance might be wrong or the floor beneath may be uneven. – Cracks or wear around the bottom: When weight isn’t spread out properly, stress builds at certain points of contact. This can lead to cracking at the base, the part that supports everything. – Sloped or tilted setup: Baths that tilt slightly can be difficult to drain fully. Water might pool at one end, which can lead to build-up, odours, or water damage on the surrounding floor. Sometimes, issues like these are caused during installation when things get rushed or overlooked. Other times, the floor underneath might not have been strong enough to begin with. Either way, it’s worth having the bath properly inspected before continuing to use it as usual. Professional Assessment Techniques Checking the support of a freestanding bathtub isn’t just about looking at it from above. There’s more going on under the surface. To get a full picture, skilled professionals often start by looking at the floor beneath the tub to figure out if it can even handle the bath’s weight, especially when it’s filled with water. Here’s what a professional might do: – Review flooring structure: The type of flooring and how it’s built underneath plays a big part. Timber floors may flex more than concrete ones, so they need extra attention. – Look for signs of wear or damage: Professionals will check the floor and any junctions between walls and tiles for hints of shifting or cracking. It’s not just about what’s visible. Sometimes small signs point to bigger hidden problems. – Use tools for accuracy: Levels and measuring tools help check that the bath sits evenly. In some cases, damp meters or infrared tools can detect hidden moisture that may have weakened the floor without you knowing. For example, a client once had a freestanding tub installed directly on old tiles without any reinforcement. After a few months, they noticed the bath had an odd tilt. When checked, the base had started sinking into soft subfloor areas. If it wasn’t caught in time, it could’ve damaged the plumbing too. Getting the structure checked by someone experienced makes it easier to avoid these sorts of surprises. It also helps when choosing the right kind of support solution that suits the weight and shape of the bath. Solutions For Stabilising Freestanding Bathtubs Once a problem with support has been spotted, it’s time to get things fixed properly. Freestanding bathtubs aren’t light, and the combination of water and body weight can put serious pressure on both the bath and the floor underneath. Without the right setup, you’re inviting damage over time. The first step often involves handling the flooring itself. If the subfloor isn’t strong enough or is showing signs of movement, it may need reinforcing. This might mean adding support between floor joists or using a specific underlay designed to handle heavier loads. It’s not just about keeping the bath in place, but making sure everything beneath it remains secure for years to come. Then there’s the way the bath is connected to the plumbing and floor. Support brackets or adjustable feet can help level out uneven ground and spread out the pressure more evenly. These fittings need to be installed with care, or they might cause more harm than good. Here’s what should be looked at during this stage: – Reinforce structural support under the bath, especially on raised timber floors – Check and resolve floor level differences before fixing the bath in place – Install support brackets or adjustable feet if required by the bath’s design – Secure connections at all plumbing points to prevent stress or movement – Use anti-slip pads or under-mounts to keep the footprint stable on tiles One home had a freestanding bath sitting on a tiled floor with slight dips. Every time someone stepped in or out, it wobbled. With a bit of time spent adjusting the footing and reinforcing underneath, the difference was night and day. Stability came back, and so did peace of mind. Long-Term Maintenance Tips Even with a strong setup, things can shift over time. Floors settle, materials expand or shrink, and high-moisture areas like bathrooms go through daily wear and tear. Keeping your freestanding bath in good shape means you’re less likely to deal with costly repairs down the track. Simple checks done once or twice a year go a long way. Look around the base of the bath after deep cleans. If there’s slight movement or you notice cracked tiles, it’s worth having someone take a proper look. Loose sealant around the base or signs of water pooling can also point to
Expert Guide to Quality Toilet Selection in Melbourne
Choosing a toilet isn’t just about ticking a box on a bathroom checklist. It’s something you want to get right the first time. With so many options around, taking a few minutes to learn what makes a quality toilet can make a real difference. A good one improves your everyday comfort, saves water and hassle long term, and works with the style of your whole bathroom. Get it wrong and you’ll deal with regular repairs, poor flushing, or a loo that just looks out of place. If you’re living in Melbourne, it helps to know what’s available locally, especially with bathroom trends shifting towards cleaner, more minimal designs. Whether you’re mid-renovation or just replacing an old unit, understanding what separates a decent toilet from a great one is a smart move before you shop. Here’s a breakdown of what matters most when picking a quality toilet that actually holds up over time. Key Features To Consider It’s easy to assume most toilets are the same, but a closer look reveals plenty of differences that can affect comfort, performance, and style. When you’re standing in a showroom or browsing online, these are the things to look for: – Style and design: These days, you’ll find plenty of styles to suit your bathroom setup. If your space leans more modern, sleek lines and concealed plumbing may suit you better. On the other hand, traditional models with more detail can suit heritage-style homes. Matching the toilet with the rest of the room makes everything feel more put together. – Water efficiency: With Melbourne households more aware of saving water, high-efficiency models are worth the look. Toilets with dual flush buttons let you choose how much water is used each time. Less waste, lower bills — it’s a simple win. – Comfort and height: Not all toilets feel the same. Taller models make it easier for people with knee or back issues to sit and stand, especially if the toilet’s used frequently by older family members. The seat shape and width can also make a big difference, so don’t be afraid to compare them side by side before deciding. For example, someone living in an older brick home in Melbourne’s inner suburbs might go for a toilet that’s both water-saving and compact to fit tighter spaces, without moving existing plumbing too much. But someone in a larger home out in the suburbs might prefer a full-size toilet with extra height for ease of use. Choosing a toilet comes down to more than just the look and price tag. Think about who’s using it, where it’s going, and whether it’ll hold up over the next decade. If it doesn’t feel right or work the way you want, you’ll notice fast. Understanding Toilet Types Not all toilets work or install the same way. Here’s a quick breakdown of the common types you’ll spot around Melbourne: 1. Close-coupled toilets These are popular and easy to spot. The cistern connects directly to the back of the toilet bowl, which means no exposed plumbing between the parts. They’re known to be easier on the wallet and simpler to install in most homes. 2. Wall-hung toilets These are attached directly to the wall, keeping the base off the floor. It gives a cleaner look and makes cleaning around and under the toilet way easier. Just keep in mind that the plumbing goes into the wall, so it suits new builds or major renovations. 3. Back-to-wall toilets These sit flush against the wall like wall-hung ones, but they have a visible base that rests on the ground. The pipes are hidden inside the wall or a cabinet behind the unit, which keeps everything tidy and minimal in appearance. 4. Rimless toilets A rimless toilet looks the same as other models but flushes without a hidden inner rim inside the bowl. That means better hygiene, easier cleaning, and fewer hidden corners where grime builds up. Each type has its own perks based on how much room you have, your budget, and the look you’re going for. Before choosing, think about the layout of your bathroom and how much work you’re planning to do on plumbing fixtures. The best one will balance both form and function. Installation And Maintenance Getting a new toilet installed sounds straightforward, but there’s more to it when you want it done right. A quality toilet won’t do much for you if it’s poorly fitted or leaking at the base. That’s why it’s always smart to have a trained professional handle the installation. It’ll save you time and prevent unwanted damage to floors, walls, or pipes. Even a small misstep in placement or sealing can lead to water issues or a weak flush. With local plumbing codes to keep in mind, professional work gives you peace of mind that everything runs as it should. Once your toilet is in place, keeping it in good shape doesn’t take much effort but consistency matters. Regular cleaning with non-abrasive products helps prevent staining, limescale, and build-up inside the bowl or tank. The outside of the toilet, including under the seat and behind the base, deserves attention too. If you’ve got a wall-hung or back-to-wall toilet, checking inside the concealed cistern from time to time can catch early leaks or parts that need tightening. Here’s a simple maintenance checklist to help you avoid common toilet troubles: – Wipe the seat, lid, and base weekly with gentle cleaner to keep germs and dirt away – Flush the inside of the cistern monthly to stop residue build-up – Check for water pooling around the base or behind the toilet — signs of possible leaks – Press the flush button to check for slow flushing or water that keeps running – Listen for hissing sounds from inside the tank — this might mean the inlet valve isn’t shutting off properly – Avoid using chemical cleaners inside the tank, as they can damage seals and flushing parts over time Addressing small issues as they pop up,
Professional Solutions for Square Bath Drainage Problems
Square bathtubs can give your bathroom a clean and modern look, but they can also bring a few unexpected headaches, especially when it comes to drainage. You might notice the water takes longer to disappear or that there’s a lingering puddle even after everyone’s had their soak. It doesn’t take much for minor drainage issues to turn into a bigger mess, and no one wants standing water at their feet when they’re meant to be relaxing in the tub. If you’re thinking, “This shouldn’t be happening with my new tub,” you’re not alone. Square designs might tick all the style boxes, but the sharp corners and flat bases can cause a few hiccups for water flow. Without the right drainage setup, you could be stuck with unpleasant smells, mould, or even small leaks around your tub. Let’s take a look at why square bathtubs can have these issues and what proper solutions look like. Understanding Square Bath Drainage Problems Drainage problems with square bathtubs usually come from the way the water moves, or rather, doesn’t move across the bottom of the tub. Unlike rounded bathtubs where water naturally flows toward a single low point, square shapes often have completely flat bases. This might look great, but there’s no natural slant to guide the water quickly down the drain. So what happens? Water sits. Here are a few of the most common issues people run into with square bathtub drainage: – Water pooling at the corners: The sharp angles in square bathtubs can trap small puddles of water, especially if the base isn’t slightly sloped – Slow-draining water: If the drain position isn’t well-planned, water takes longer to clear out, often staying on one side longer than the other – Trapped hair and debris: Square tubs sometimes have wider or flatter drains that don’t pull in hair and soap chips as strongly, causing blockages to build over time – Poor installation: If the bathtub hasn’t been levelled correctly during installation, even a small tilt can cause drainage problems. In some bathrooms, the fall in the floor isn’t strong enough, meaning the water just doesn’t flow the way it should – Bad drain placement: If the drain is too close to a flat edge or corner, water might consistently miss it or drain unevenly A real-world example: a family had a brand-new square bathtub installed, thinking it would be perfect for their sleek, updated bathroom design. Within a few weeks, they noticed water starting to build up on one side of the base. Turns out, the tub was installed ever so slightly off-level, causing water to pool in the far corner rather than flowing naturally toward the drain. What should’ve been an easy soak became a constant source of frustration. Square bathtubs look neat, but without thoughtful planning around drainage and smart install techniques, they can cause more hassle than they’re worth. The good news is most of these problems aren’t permanent, and experienced professionals know exactly how to deal with them. Professional Solutions To Combat Drainage Issues Fixing drainage problems in square bathtubs isn’t always straightforward, but professionals have a variety of tools and techniques that make a big difference. Step one is usually a thorough inspection, not just of the drain itself but also how the tub sits on the floor, how the floor is sloped, and where the water naturally flows. This kind of check is key to understanding whether it’s an installation issue, a plumbing issue, or both. Here’s what the process usually looks like: 1. Level check and adjustment: If the bathing base was installed unevenly, the floor underneath might need to be adjusted or re-levelled 2. Drain relocation or modification: Sometimes, the only fix is to move the drain to a better position or update it with a more efficient trap that handles water flow better 3. Pipe inspection and clearing: Slow draining can often be traced back to partial blockages or pipe alignment issues. A camera inspection helps confirm the problem area and clears up guessing 4. Upgrading the plumbing setup: For ongoing issues, it might be necessary to upgrade the waste outlet or install a more powerful drain that pulls water more efficiently 5. Custom sloping or base inserts: In square bathtubs with completely flat bases, pros may install thin inserts or bases under the tub to gently encourage water to move toward the drain Professional help matters. You get a clear diagnosis and the right fix without trial and error. It also saves you from damaging the waterproofing or structure around the tub, which can happen easily if you try to fix the slope or drain without the right tools. By getting someone to assess the full layout, including the floor, tiles, and water flow direction, you’re not just putting a bandage on the issue, you’re fixing it for the long run. Choosing The Right Drain For Your Square Bathtub The type of drain you choose can make a big difference in how well your square bathtub performs. While it doesn’t sound like a major decision, the design, placement, and function all work together to help water clear efficiently and avoid flooding or slow drainage. With square bathtubs, flat bases demand a more thoughtful approach. Some drain types suit these tubs better than others: – Centre drains: These work well for tubs with symmetrical layouts, helping to draw water evenly from all sides. They’re common in square designs – Offset drains: This option can be useful if your plumbing setup doesn’t allow for a central drain. However, it might need extra care in installation so the water doesn’t pool on the opposite side – Integrated pop-up waste: These look tidy and modern, but cheaper versions can clog easily or sit slightly too high, creating water buildup. Choose one with a low-profile design for better flow – Channel or linear drains: These are more common in wet rooms and showers, but some modern tub designs include them for faster flow. If installed properly,
Professional Solutions for Caroma Rimless Flush Problems

Caroma rimless toilets have become a go-to option for people wanting a cleaner, easier-to-maintain toilet setup. Their sleek, modern shape paired with rimless technology helps reduce build-up and makes cleaning a lot simpler than traditional styles. The way the water flows without the usual rim means fewer hidden spots for dirt to settle, which definitely sounds like a win. But while these toilets offer clever design and better hygiene, they’re not free from the occasional headache. A common issue for many households is when the flush stops performing the way it should. It can be anything from a weak flush to water leaking from unexpected places. When this happens, the whole bathroom routine can get frustrating quickly. If your Caroma rimless toilet isn’t doing what it’s meant to, holding off on getting help usually leads to bigger problems down the line. Common Issues With Caroma Rimless Toilets Even popular toilet models have their weak spots. With Caroma rimless options, most problems show up in how the flush system works either by not doing enough or by doing too much. These are a few of the problems people often call us about: – Weak or incomplete flush: Probably the most common issue. This makes waste removal ineffective, which leads to repeat flushing, wasting water and causing frustration. – Water dripping or leaking after a flush: Sometimes water keeps dripping into the bowl or even onto the floor. It might look minor at first, but it could point to a faulty seal or valve that needs replacing. – Flush button issues: Some Caroma rimless models use a dual-button flush system. If the button stops working or feels loose, it can create issues with activating the right flush. – Water not filling properly: If the tank takes too long to fill or doesn’t fill up fully, the flush loses its power. This could be from a blocked inlet valve or low water pressure in your system. – Toilet bowl splash or overflow: Improper installation or water pressure issues might lead to an uneven rimless flow, causing water to splash or, worse, push over the edge. Each of these problems can affect overall bathroom hygiene and make using the toilet more annoying than it should be. What makes it tricky is that many of these issues seem small at first, but they can quickly lead to damage and increased water bills if ignored. A good example is someone who thought their toilet was just flushing a bit weaker than usual until they noticed water pooling around the base. It ended up being a slow valve leak that had dripped into the floorboards. That sort of hidden damage isn’t easy to fix once it gets going. Instead of guessing or hoping it’ll sort itself out, it’s better to get it checked by someone who knows what to look for. Caroma toilets are well made, but every product works best when it’s matched with the right care. Professional Inspection And Diagnosis When a Caroma rimless toilet starts acting up, it’s tempting to poke around and see if the problem can be solved quickly. But flushing issues are rarely surface-level, and taking things apart without understanding the system fully could do more harm than good. Calling in a professional allows you to get straight to the root of the issue. The inspection usually covers a few key things: – Water pressure check: Too much or too little pressure can throw off the rimless system’s flow. A plumber can test the pressure and see if a regulator or valve needs adjusting. – Seal and valve inspection: Slow leaks or constant running often come from worn-out seals. A professional will check these parts and replace anything that’s cracked or loose. – Flush mechanism test: If the buttons or flush plate aren’t working right, the issue might be deeper inside the tank. A technician will open things up to inspect the flushing system thoroughly. – Bowl and cistern alignment: A toilet that’s not properly fitted to the floor or has a crooked cistern can throw off the entire flush. Even a slight misalignment can cause water to drain or splash the wrong way. – Internal component wear: All moving parts wear down eventually. A licensed tradesperson knows what to check and when to recommend a full replacement rather than a patch job. The peace of mind you get from a full inspection is worth it. Instead of second-guessing every creak or drip, you get solid answers and advice on what should happen next. Plus, when small parts are caught before they totally fail, the costs and inconvenience of major repairs often drop considerably. It’s better to act sooner than find out months later that something small turned into a bigger headache. Effective Repair Solutions Fixing common issues with Caroma rimless toilets doesn’t usually involve guesswork once a proper inspection’s been done. Most flushing problems call for practical repairs, not a full toilet replacement. Once the real issue is clear, repairs often focus on restoring the original function with long-lasting parts and adjustments. Here are a few examples of how flushing issues are fixed, depending on the cause: – Weak flush? This usually gets sorted by cleaning or replacing a partially blocked inlet valve or cistern filter. Water pressure might also need adjusting. – Constant dripping? That often means changing a worn-out seal or washer. These parts usually degrade from years of normal use. – Button problems? Sticky or broken flush buttons can sometimes be replaced on their own, but if the internal mechanism’s damaged, the entire flush plate may need tightening or swapping out. – Splashing over the bowl? If water shoots out unevenly, a professional may need to adjust how water flows from the rim channels by repositioning the bowl or adjusting internal guides. – Slow water refill? A blocked or calcified valve may be the problem. Clearing or replacing the valve usually gets things working again. Having the right replacement parts really matters. Generic parts might look