Professional Installation Tips for Custom Screens in Melbourne
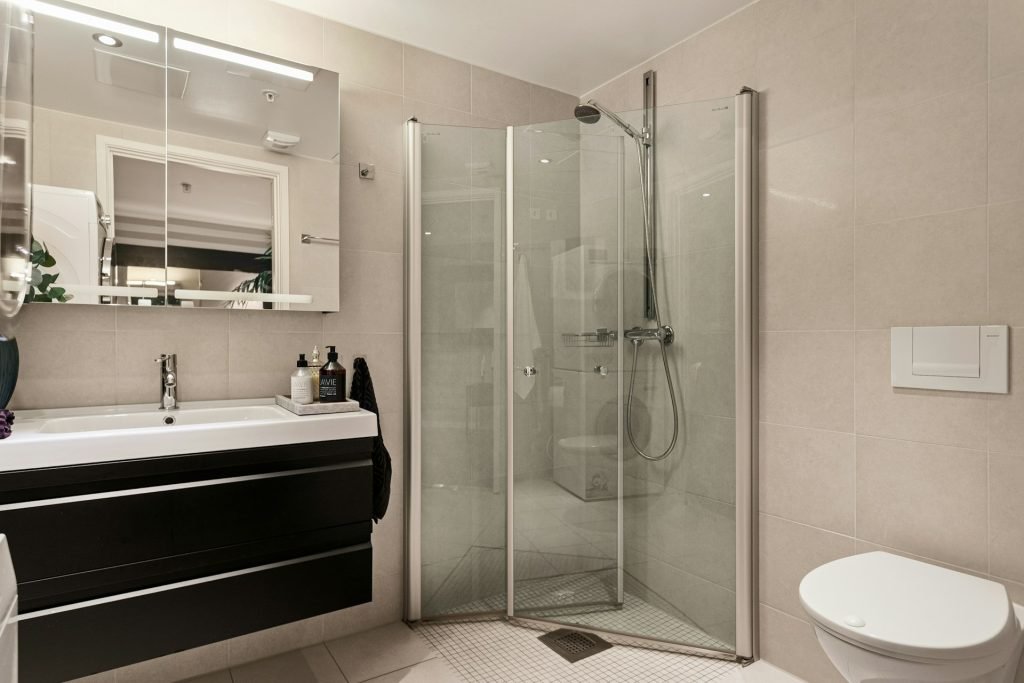
Custom shower screens are one of those features that can really change the look and feel of a bathroom. They keep water where it should be, but they also add a cleaner and more tailored style that’s hard to match with off-the-shelf options. When done properly, they fit the space perfectly and make the shower area more enjoyable to use every day. But the key is proper installation. Cutting corners here often leads to ongoing problems down the track. If you’re planning to install a custom shower screen in Melbourne, the right approach makes all the difference. Getting the prep work right, knowing what style suits your layout, and avoiding common slip-ups can help get better results. Let’s take a look at what to know before and during your installation process to help you avoid stress and make sure it’s done right the first time. Measuring and Preparing the Space Before anything goes near a drill or wall plug, focus on careful measuring. Taking the time to get the size right will save loads of trouble later. Even small misjudgements in width or height can cause the screen not to fit or lead to leaks because of uneven edges. Start with measuring: – Height and width of the shower opening – Floor-to-ceiling height if a full-length screen is planned – Any angles or wall corners that might affect fitting – The size of your shower tray or base Double check your numbers. Having someone else look over the measurements before ordering the glass can help avoid simple errors. Next, prepare the installation area. The tiles should be fully installed and dry. Walls need to be smooth and level, and free from dust or excess grout. If your floor slopes unevenly or the walls bulge slightly, the screen won’t sit properly. Use a spirit level to catch any slight off-centre spots. You’ll also want to get your tools ready. A typical job might call for: – Drill and ceramic tile bit – Screwdrivers – Measuring tape and spirit level – Silicone sealant and sealant gun – Corner protectors or rubber spacers for the glass Having everything ready before work starts helps the job go smoother, especially in smaller bathrooms where space is limited. Choosing the Right Custom Shower Screen The design and type of screen depends on your space and how you want it to function. Some go for a simple fixed panel. Others want sliding doors, pivot doors, or a frameless walk-in design. Each comes with its benefits. Frameless screens are popular for their clean and open look. They work well in modern bathrooms with a minimalist style. These need a well-prepared surface, with plumb walls and level floors, to sit properly. Semi-frameless designs offer a bit more structure, with slim metal frames on the edges of the glass to help with alignment and support. These can be more forgiving if your tiles or base aren’t perfectly level. Here’s a quick guide: – Frameless screens – sleek look, great in well-prepped spaces, usually need stronger glass – Semi-frameless – more flexibility onsite, slightly easier to install and maintain – Fully framed – most support, often with sliding or hinged doors, suited for high-use bathrooms When picking, don’t just go by appearance. Think through things like: – How much room do you need to enter and exit the shower? – Will the door swing outward and hit anything? – Do you want low-maintenance glass or treated surfaces? – Is the layout suitable for a walk-in style? Choosing based on these details makes the whole installation smoother and helps avoid regret later. One example that’s worked well in Melbourne homes is using a semi-frameless corner screen in a tight ensuite. It gives a polished finish but has enough structure to deal with the slightly uneven corner tiles that are common in older homes. Step-by-Step Installation Process Once you’ve picked the right screen for your layout, it’s time to get into the install itself. This part needs steady hands and a bit of patience. The goal is to make sure everything fits snug and lines up without gaps. Though it might look straightforward, each step needs to be done in the right order to avoid long-term issues like leaks or wobbly panels. Start with the frame or wall brackets. Some designs have U-channels that run along the wall, while others use discreet clips. Either way, they need to be mounted into place first. 1. Mark drill points after double checking with a spirit level 2. Use masking tape over your marks before drilling to prevent tile cracking 3. Insert wall anchors and screw brackets into place firmly Then it’s time to position and secure the glass panels. These are heavy and fragile, so having a second set of hands helps a lot. Hold the glass in your brackets or frame, then tighten any clip or fastening mechanism. Make sure every panel is square and level before moving on. Sealing and waterproofing are what keep moisture from sneaking out. Use a good-quality silicone sealant and run a smooth bead along all outer edges where the glass meets tiles, the floor, and any metal channels. Don’t seal the inside bottom edge as that part often needs to drain. Let the sealant cure as per the instructions before testing. A small splash test in the shower tray is usually enough to catch bad seals early on. Rushing this stage often leads to slow leaks that only show up once water gets under tiles or into walls. Common Installation Mistakes to Avoid Some of the most frustrating problems pop up after install, which is why it helps to know what to avoid beforehand. Even experienced installers watch out for these issues, especially in older homes or tricky spaces. Here’s a list of common slip-ups that can throw a job off course: – Misaligned brackets or channels – If your brackets aren’t square, the glass won’t sit cleanly. Always use a level and double check before drilling
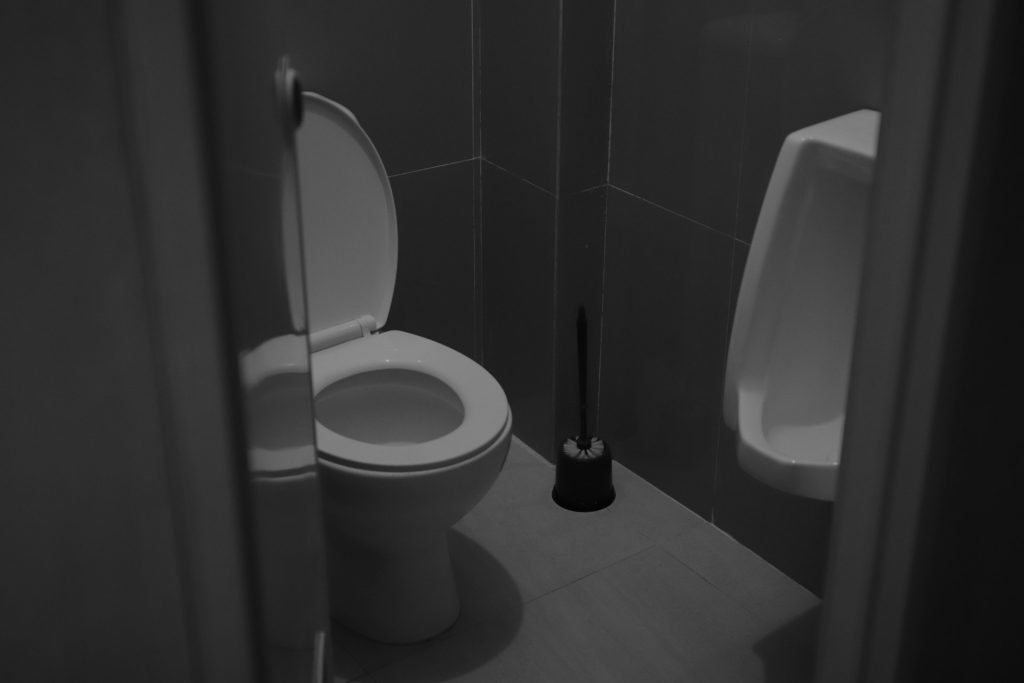
Professional Repair Guide for Wall-Mount Toilet Blockages
Wall-mount toilets are often chosen for their sleek design and space-saving style. Because the flushing mechanism and plumbing are hidden behind the wall, they give bathrooms a clean, modern look. But when blockages happen, it’s not always easy to spot or deal with the problem. Unlike traditional floor-mounted units, accessing the system can be more complicated. That’s why it’s important to recognise the warning signs early and take the right steps to fix them. Letting a blocked toilet go unchecked can lead to worse damage behind the wall, costing more time and money down the track. Whether it’s a minor clog or something deeper in the connected pipes, this sort of plumbing problem shouldn’t be ignored. Knowing what to look for and when to bring in help can save you the stress of a bigger issue later on. Signs Your Wall-Mount Toilet Is Blocked It can start off subtle. Maybe the water doesn’t flush properly, or it’s slower than usual draining from the bowl. These small signs can easily be overlooked, but they usually point to something blocking the flow. A little patience in noticing the early symptoms can make a big difference. Here are some common signs that suggest your wall-mount toilet might be blocked: – Water is slow to drain after flushing – Gurgling sounds come from the bowl or pipes – Unpleasant odours linger around the toilet area – Water rises higher than normal in the bowl – Flushing seems weak or incomplete If you’ve noticed one or more of these, it could mean waste or debris is stuck somewhere in the line. Sometimes foreign items like wipes, cotton buds or even too much toilet paper can create a jam. At other times, the blockage might be forming deeper along the pipe, making it harder to reach. It’s also worth pointing out that smells can be more than just unpleasant. They’re often a major clue pointing to a slow or stopped flow. When the toilet isn’t clearing properly, waste can sit for longer than it should, leading to trapped smells that don’t go away even after cleaning. Common Causes of Blockages in Wall-Mount Toilets Some toilet clogs happen suddenly, but many build up over time. Wall-mount units are no exception. The concealed plumbing may look clean on the outside, but what’s going on inside the lines can tell a different story. The most frequent causes of blockages include: 1. Foreign objects – Flushing anything other than human waste or toilet paper is risky. Items like wipes labelled as “flushable”, feminine hygiene products and paper towels don’t break down easily. They can catch and clump together, especially in pipes with older or narrow fittings. 2. Toilet paper build-up – Even using too much regular toilet paper can clog the lines. If your water pressure is already low, or if the pipe angle is too flat, the waste might not clear fully with a single flush. 3. Hard water scale – Over time, minerals found in hard water can build up along the inside walls of your pipes. This narrows the opening and makes it easier for waste to become trapped. If your home has hard water, this type of blockage can be a recurring issue. Some blockages don’t show signs until the problem is well underway. That’s why keeping tabs on how things are flushing and listening for strange noises can help you spot a problem before it grows. One homeowner mentioned how their toilet started bubbling after showers. Turns out, an old toothbrush had somehow been flushed and was half lodged in the pipe. It took professional tools to get it out. Understanding what causes blockages can also help you avoid them moving forward. In the next section, we’ll walk through how professionals safely break down clogs and why it often works better than trying fixes yourself. Professional Methods For Clearing Blockages When a blockage is beyond the surface, you’ll need more than just a plunger. Wall-mount toilets have plumbing hidden behind the wall, so standard tools might not reach the problem. Professional plumbers use a mix of gear and techniques to locate and remove clogs without damaging the surrounding area. One common method is the use of a drain auger, often called a plumber’s snake. These flexible tools are designed to work their way through bends in the pipes and break up blockages. For deeper or more stubborn clogs, a motorised auger may be used to get the job done faster and more thoroughly. If that isn’t enough, hydro-jetting often comes into play. This technique uses high-pressure water to clear out sludge, mineral build-up and any remaining debris along the inside of the pipe. Advanced equipment like inspection cameras helps professionals see exactly where the blockage is and what it’s made of. That way, they don’t have to rely on guesswork, which can save a fair bit of time. If a clog keeps coming back, camera inspections can reveal underlying problems like poor drain slope or hidden damage in the pipeline. Here’s why hiring help is usually the better way to go: – Professionals have the right tools to reach deep clogs – They’ve seen it all and can quickly identify the problem – They’ll clean the blockage thoroughly rather than pushing it further – They can check for long-term issues during the visit – You won’t risk damaging the internal wall system A backed-up toilet is frustrating enough without causing further damage by poking around behind your tiles. Trying to force the blockage out without proper equipment may just send it deeper into the line, or worse, crack something inside the wall. That’s why many people choose to bring in someone qualified when dealing with wall-mounted units. Preventive Measures To Avoid Future Blockages Keeping your wall-mount toilet running smoothly isn’t just about reacting to clogs. A few easy habits and small checks here and there can go a long way in keeping blockages from forming in the first place. Start by being careful about
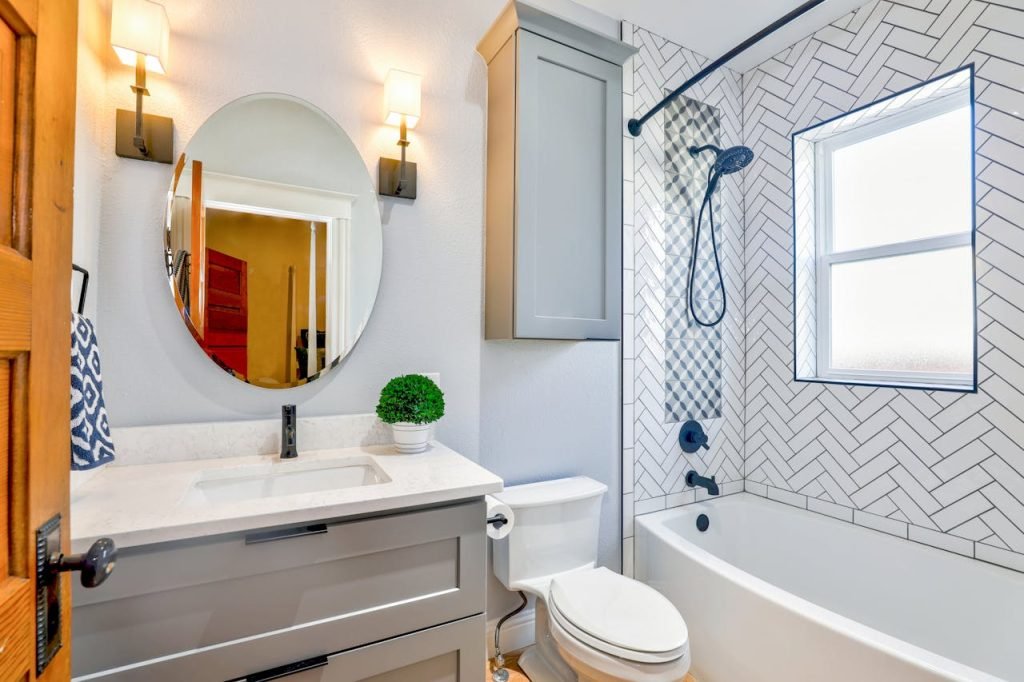
Professional Solutions for Caroma Bathtub Installation Problems

Installing a Caroma bathtub may seem straightforward at first, but there are plenty of things that can go wrong if the job isn’t handled right. Even small errors can lead to annoying leaks, poor stability, or gaps that mess with waterproofing. These problems don’t always show up straight away either. They can take weeks or even months before they become noticeable, and by then they’re harder to fix and more expensive to deal with. Bathtubs are meant to last a long time, but that only happens if they’re installed properly from the beginning. Caroma bathtubs are known for their quality, but like any fixture, they need the right setup to perform well. A rushed or incorrect installation can affect comfort, cause surface damage, or even lead to tile and floor deterioration over time. That’s why relying on proper installation methods and experienced professionals makes all the difference. Common Caroma Bathtub Installation Problems Many installation problems come down to a mix of poor planning and lack of experience with the product. Caroma baths are made to strict standards, and while that means they’re reliable, it also means they need to be handled in a very specific way. One wrong step can affect how the rest of the room functions. Here are the usual suspects when it comes to these issues: – Bad fitment A bath that doesn’t sit flush against walls or the floor can leave gaps that invite water in. Sometimes the tub doesn’t line up perfectly because the floor isn’t level, or the wall behind it has slight warps. That leads to uneven joins, which can make sealing hard or impossible. – Leaks at joins or waste outlet If plumbing connections don’t line up just right under a Caroma bath, water can sneak out after every use. It often collects underneath the tub before spreading to other parts of the bathroom, which can cause damage to timber framing or subflooring. – Unstable support Caroma bathtubs need proper framing or support underneath them. If they’re not supported well along all sides or underneath the base, people may notice movement when standing or sitting in the tub. That movement might feel small, but over time it can crack tiles and loosen wall or floor sealants. – Incorrect waterproofing The waterproof membrane around a tub is one of the most overlooked parts of the job. If it’s applied in the wrong spot or not extended far enough, small leaks will seep into spots that are hidden from view. That leads to black mould, rotting frames, or ugly stains. – Inadequate access for future servicing A bathtub that gets sealed up with no spare access gap can cause major headaches if plumbing has to be repaired later. That’s especially common with drop-in or inset styles when the installer forgets to leave a removable panel. These problems don’t just create costly repairs. They also get in the way of what should be a relaxing and enjoyable experience. One example we’ve come across is a newly installed Caroma bath where the waste outlet was misaligned by just a few millimetres. That tiny gap was enough to let water out slowly each time the tub was drained, causing water damage that wasn’t spotted until a stain showed up on the ceiling below. Mistakes like that aren’t always easy to find during installation. That’s why hiring someone with a solid track record and experience with Caroma fixtures is worth the investment. Benefits of Professional Installation Services When a Caroma bathtub is installed correctly, its full features come through whether that’s a seamless fit, solid support, or proper drainage. It’s not just about getting the job done, but doing it the right way, without cutting shortcuts that bring problems later on. Here’s why getting expert help makes a real difference: 1. Hands-on experience with Caroma units Every brand is different, and Caroma especially has very specific installation clearances and mount options. Professionals not only know the products but also know what kind of floors and walls they sit best against. 2. Access to tools that matter From getting the heights right to cutting tiles or sealing edges properly, pros have the right kit to do a neat and secure job. More importantly, they’ve done it enough times to know what to measure and where to look for common trouble spots. 3. Avoiding costly damage Slip-ups during install like overtightening plumbing or missing a sealing join can cost hundreds to fix later. Experts know where those problem areas come up and work to prevent them upfront. 4. Staying within local building rules There are always state or council rules about how baths should be installed, particularly when it comes to waterproofing and drainage. Hiring qualified help means the job gets signed off correctly, which is especially important for any insurance or future resale plans. 5. Longer-lasting results When a tub is mounted firmly, sealed neatly, and connected properly, it stays looking fresh for longer. No sagging edges, no peeling sealant, and no annoying creaks every time you get in. With the warmer months approaching, spring is a popular time to freshen up bathrooms, especially after the wear and tear of winter. If installation is rushed during this peak season, long-term performance gets pulled into question. It makes way more sense to get it sorted right the first time, so you don’t end up reopening walls or replacing tiles before next winter rolls around. Getting professional help with a Caroma bath doesn’t mean stepping back from the project. It means handing over part of it to people who know how to support the rest of your plans, without interruption or disasters down the track. Tips For Choosing The Right Professional Installer A smooth Caroma bathtub installation depends heavily on who’s doing the work. Not every tradesperson has experience with these specific products, so it’s worth doing a bit of homework before locking someone in. Spending time finding the right person now can prevent headaches later. Here’s what to look
When Your Close-Coupled Toilet Needs Professional Repair in Melbourne
A close-coupled toilet is one of those things you barely think about when it’s working right. It does its job quietly and keeps everything neat and tidy in the bathroom. But when it starts acting up, it quickly jumps to the top of your home repair list. Whether it’s weak flushing, strange sounds, or water where it shouldn’t be, these issues can become frustrating fast. If you’re dealing with toilet problems and you’re based in Melbourne, knowing when to call in a professional is key. Some repairs are more than just a quick tighten or clean. Ignoring the signs can lead to water damage, higher water bills, or even a full toilet replacement down the line. So, recognising issues early and dealing with them the right way can save time, money, and a fair bit of stress. Recognising Common Problems A close-coupled toilet has a compact design, where the cistern sits directly on the pan. While that setup saves space and usually looks tidy, it also means that any issues might affect both parts at once. Some problems creep in slowly, while others can show up out of the blue. Here are some red flags to keep an eye on: – Leaking around the base If there’s water pooling around the toilet, it’s often not just condensation. It may be a failed seal between the base and the pipe or a cracked joint, which can quickly lead to serious flooring damage. – Frequent or weak flushing If you need to flush more than once or the flush seems weaker than usual, it could be an issue with the flush valve or a blockage in the system. – Constant running Water that runs nonstop into the bowl usually points to a faulty inlet valve or worn-out washers. It’s irritating to listen to and can waste a lot of water. – Loose fittings A toilet that wobbles when you sit down shouldn’t be ignored. Loose bolts or floor mountings could mean larger structural risks or damage building up below the surface. – Bad smells that won’t go away If there’s a strong sewer smell even after cleaning, it might be a sign that the internal seals have worn out, letting gases escape. That’s not something a regular cleaning can fix. These signs may seem minor at first, but they usually point to a bigger problem within. While some folks are tempted to search for a quick fix or grab a wrench themselves, these fixes don’t always hold up. Why Professional Repair Is Necessary It’s easy to think a toilet is a simple fixture, but they’re more complex than they look. A misstep during a DIY repair could create bigger issues like internal water leaks, cracked parts, or loosened fittings. And once water damage starts, it’s tough to undo the harm without taking the toilet out completely. Hiring a professional comes with a few clear upsides: – They know what to look for A qualified plumber can quickly spot whether the issue is with the inlet valve, the flushing system, or something hidden where you can’t see. – Proper tools and parts Not all parts fit all toilets, and using the wrong size valve or seal can make things worse. Professionals carry the right parts or know where to get them fast. – Safe and clean repairs Fixing a toilet involves turning off water lines, draining the system, and lifting heavy ceramic parts. Getting this wrong can leave your bathroom messy or soggy. – Long-term fix, not a quick patch A pro will take steps to make sure the repair holds up over time, not just give a temporary band-aid. It’s one thing to replace a toilet seat or tighten a loose handle, but once the issue dives into pipes or the cistern, it’s best to step back. That way, you avoid turning a simple job into a whole bathroom renovation or worse. By spotting the early problems and knowing when it’s the right time to call for experienced help, fixing a faulty toilet becomes far less stressful. Especially in a busy household, having a quiet, reliable toilet is something you’ll always be glad to have sorted properly. Finding Reliable Repair Services in Melbourne When your toilet starts showing signs of trouble, the last thing you want is to end up with patchy work or added stress from picking the wrong repair service. In Melbourne, where the weather can go from wet to dry pretty quick around September, it’s a good idea to sort anything water-related early before it gets worse. To find a service you can trust, keep these key points in mind: – Experience counts Look for tradespeople who’ve worked with close-coupled toilets before. A well-trained plumber will know how to handle common faults without needing to pull apart your entire bathroom. – Reviews tell you more than ads Don’t just rely on flashy promotions. What past customers say goes a long way. Check reviews, especially detailed ones that mention quick turnarounds or fixed long-standing issues. – Ask about their licence and insurance This might seem like a no-brainer, but it’s often overlooked. Always confirm your plumber is properly licenced in Victoria and has the right cover in case something unexpected happens during the job. – See how clearly they communicate If a plumber explains the problem in simple terms and outlines your options clearly without rushing or pressuring you, that’s a good sign they take pride in honest work. – Timelines, quotes, and clean-up A reliable tradie should give you a general idea of how long the repair will take, what it’ll cost, and what kind of clean-up they’ll handle after. You don’t want to be left with bits of ceramic or tools all over your floor. Take the time to ask questions before agreeing to any quote. In most cases, it’s less about speed and more about getting the job done right the first time. A quick job that needs redoing can be more expensive and damaging than
Professional Solutions for Black Vanity Surface Protection
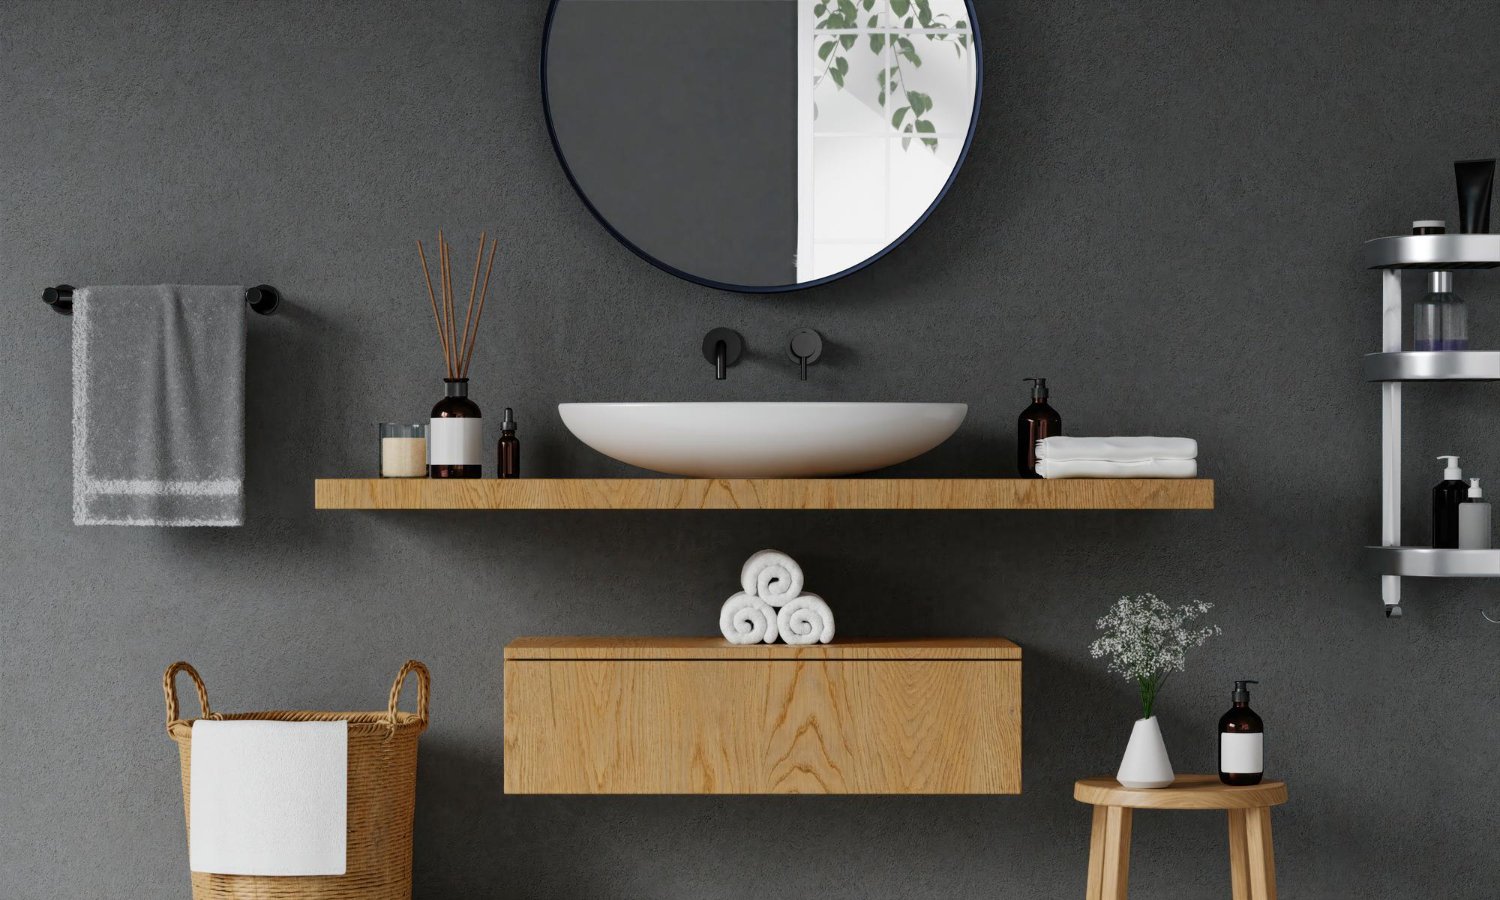
Black vanities have become a go-to feature in modern bathrooms. They add contrast, character, and style without saying a word. The clean lines and deep tones stand out beautifully, whether you’re working with a light, airy space or something moodier and more dramatic. They work well with a wide range of tapware and tile finishes, which makes them easy to pair with almost any design. But there’s a catch – keeping them looking fresh isn’t always easy. Over time, without the proper measures, black vanity surfaces can start to dull, scratch, or show water spots. These issues tend to show up more on darker finishes, which is where regular protection comes into play. The surface sees a lot of use and is often exposed to moisture, heat from styling tools, and frequent cleaning. That means it needs a bit of extra care to maintain its bold finish. Let’s take a look at why surface protection matters and how it can help your vanity last longer and look better. Importance Of Surface Protection Black vanity tops are clean and strong-looking, but they’re also quick to show wear and tear. Whether the material is matte, glossy, or textured, the deep colour can make even the smallest blemish stand out. Daily bathroom habits, like reaching for a toothbrush or leaving a hot hair straightener down for a bit too long, can slowly wear away at the surface. Here are some common problems that come up when there’s no consistent surface protection: – Water rings and stains from toothpaste, soap, or cleansers – Discolouration from harsh cleaning products – Hairline scratches caused by jewellery or tools being placed on the vanity – Surface dullness over time from daily use and wiping These issues don’t usually show up all at once. They can creep in gradually, and before you know it, the vanity doesn’t look quite as sharp as when it was first installed. Even simple splash marks from the tap can become more visible if not wiped regularly and protected with professional products. Taking steps to protect your black vanity surface from the start will help it stay cleaner and look brand new for years to come. Professional Techniques For Surface Protection When you’re after a reliable, long-lasting result, professional treatments are always the best choice. Experts use commercial-grade materials and specialised tools to protect black vanity surfaces. Whether it’s stone, wood, laminate, or solid surface, they choose the right approach that suits the material and finish. Some of the most common professional methods include: 1. Sealants: Professionals apply protective sealants that protect from water, makeup, and cleaning chemicals. These need to be reapplied as part of a maintenance schedule. 2. Coatings: These are specially formulated finishes that add a layer over the vanity surface. They give a subtle sheen or matte coat that helps prevent marks and light scratches. 3. Buffing and polishing: Black varnishes can become patchy over time. Professionals use polishing equipment to refresh the look without stripping or damaging the surface. 4. Heat protection: Some professionals add heat-resistant coatings to protect against hot tools like hair straighteners or curlers. One of the biggest benefits of going with a professional is that the work is tailored to match the exact vanity material and how the space is used. While some spots may just need a sealant, others might be in high-traffic bathrooms and need a combination of methods. Regular professional visits also mean issues can be caught before they get worse. It’s a bit like regular servicing for your car – maintenance now saves time and money later on. DIY Tips To Maintain Surface Protection Even with expert treatments, how you treat the vanity every day matters. A few basic habits can help make the protective coating last longer and keep the finish looking clean and sharp. It’s not about deep cleans or strict routines. It’s more about staying on top of the small stuff. Here are a few habits that go a long way: – Always dry the surface after use. Leaving water drops or soap residue on a black vanity can lead to visible spots that are trickier to remove over time. – Use cleaning products made for surfaces that don’t scratch easily. Anything too harsh can slowly strip the protective coating or dull its shine. – Swap rough sponges or brushes for soft cloths or microfiber. They’re gentler on coatings, especially matte and satin finishes that tend to mark faster. – Keep heat-protective mats on hand if you’re using hot styling tools. Even with a heat layer below, it helps avoid spot damage on busy mornings. A common issue is leaving metal items like razors, rings, or tweezers sitting on the surface. These can leave faint scratches or rust marks, especially in humid conditions. Try keeping metal items in organisers or trays to avoid them sitting directly on the vanity for long periods. For general cleaning, a soft cloth and warm water is enough for daily upkeep. If needed, use a product with a balanced pH. Don’t spray directly onto the vanity. Always wipe with a cloth sprayed with the cleaner first to avoid pooling. And when you need to remove toothpaste or makeup stains, do it quickly. Letting products dry and build up is what starts to eat away at the surface protection. A home routine won’t replace professional work, but when you pair the two together, the result lasts much longer. Creating small, easy habits makes a visible difference week after week. When To Call A Professional There are times when good habits aren’t enough. Some surface wear sneaks in over time, and there are signs that mean it’s worth getting a professional to take a closer look. Leaving things too long makes any damage harder to reverse and more expensive. Here’s when it’s probably time to get help: 1. You see dull patches that don’t shine the same as the rest of the surface 2. Fine scratches or swirl marks become more visible in
Space-Maximising Tips for Your Powder Room Storage Solution
A powder room may be the smallest room in the house, but it can make a strong impression when it’s set up right. While it’s mainly used for quick visits by guests, it still deserves proper attention when it comes to layout and storage. The challenge lies in fitting everything you need without making it feel cramped or cluttered. Whether your powder room feels overly tight or you’re simply looking for ways to neaten things up, a few clever choices can make a big difference. Picking the right vanity, using open space wisely, and thinking vertical can all help bring order to small areas without dropping style. The good news is, even small changes can have a big impact when they’re thoughtfully planned out. Assessing Your Space and Needs Before anything else, take a step back and get a clear view of what you’re working with. Powder rooms tend to be smaller than main bathrooms, but that doesn’t mean they should feel like an afterthought. The key to making the most out of a compact area is to fully understand its layout and your storage priorities. Start by grabbing a tape measure and noting down the wall lengths, floor space, and current set-up. Check where doors swing open. Notice if drawers or cupboards could bump into anything. This helps avoid buying something that technically fits but doesn’t work well for daily use. Think about how people move around the space, especially when there’s a need for quick handwashing or when guests are using it during a gathering. Next, think about what items are actually needed within the powder room. Unlike a full bathroom, you likely won’t need to store towels, shampoos or cleaning supplies. Most powder rooms only need space for a few basics: – Spare toilet paper rolls – Hand towels or disposable napkins – Soap or handwash – Air freshener – Small bin With that slim list in mind, the storage solution can also stay compact. This allows you to go with lighter furniture that doesn’t take up much visual space. If your current set-up feels cluttered or overbuilt, you’re probably trying to fit too much into a room that doesn’t require it. If you’ve got an awkward layout or structural quirks, sketch it out. This doesn’t have to be pretty. It’s just about catching the corners and angles that might limit the furniture or fittings you can use. Once you’ve identified what’s practical for your layout and what needs to be stored, the next step is picking a vanity that works with your space. Choosing The Right Vanity Picking the right powder room vanity might seem simple, but it can do a lot more than just support the basin. In a smaller room, every bit of built-in storage and thoughtful design can help keep things tidy without making the area feel closed in. Start with the shape and size. A bulky unit might offer more internal storage, but if it starts to crowd the floor or sits too close to the toilet, it becomes impractical. Look for slimline designs that give you basic cupboard space without dominating the room. Wall-hung vanities are especially useful. They leave the floor exposed, giving a roomier vibe. When your eyes can see more of the floor, even a snug room feels bigger. They’re also easier to clean underneath, which is handy with tiled floors. Remember these quick points when picking a vanity: – Choose finishes that reflect light, such as white gloss or pale wood – Go with soft-close drawers for quiet use in tight spaces – Avoid deep cabinets unless storage absolutely needs it – Semi-recessed basins provide decent depth without large vanities Think about style, too. Since powder rooms are often guest-facing, they can afford to be a little more expressive. Vanities with unique handles, soft curves or bold colour choices can double as decor highlights while still hiding your essentials. Just be sure they fit with the overall layout and don’t hog room unnecessarily. Once you’ve found the right vanity, use that as a base for secondary storage ideas. From here, shifting your focus upward is the easiest next win. Using Vertical Space To Maximise Storage Once the vanity is sorted, it’s time to start looking up. Vertical space is often ignored in powder rooms, yet some of the best storage ideas work off the floor. Adding higher elements can help you store what you need, keep reachables close, and avoid making the room feel crowded. Wall-mounted cabinets are a smart choice. Slim, mirrored versions offer practicality while reflecting light around the room. They fit seamlessly above hand basins or toilets. If cabinets feel bulky, opt for open shelves installed above head height. They’re perfect for holding light baskets, folded face cloths or even a bit of decor. Tall and narrow cabinets can slip into corner spots or small wall gaps. Adjustable shelves inside them mean you can make space for both small and larger items. Just be sure their finish and colour match or complement your vanity and tiles. This keeps things feeling cohesive and stops the space from looking overloaded. Don’t forget the space above the door. A sturdy floating shelf above the entry can hold bulkier supplies you don’t need every day. Just anchor it properly and be mindful of weight limits. Using levels for storage keeps your walking space clear and adds visual height. The more you can stack storage vertically, the more room you’ll have down below without sacrificing convenience. Creative Storage Solutions That Make a Difference Once all the obvious areas are utilised, it’s worth adding some smart extras. With a little creativity, you can boost your powder room’s function without crowding it. Small updates and accessories go a long way. Start with the insides of cabinets and doors. These often-overlooked spots are ideal for flat organisers. Consider adding a narrow caddy inside a cupboard door for storing toilet paper or extra soap. Stick-on hooks work well for hand towels or