Stop Your Freestanding Tub from Moving: Professional Solutions

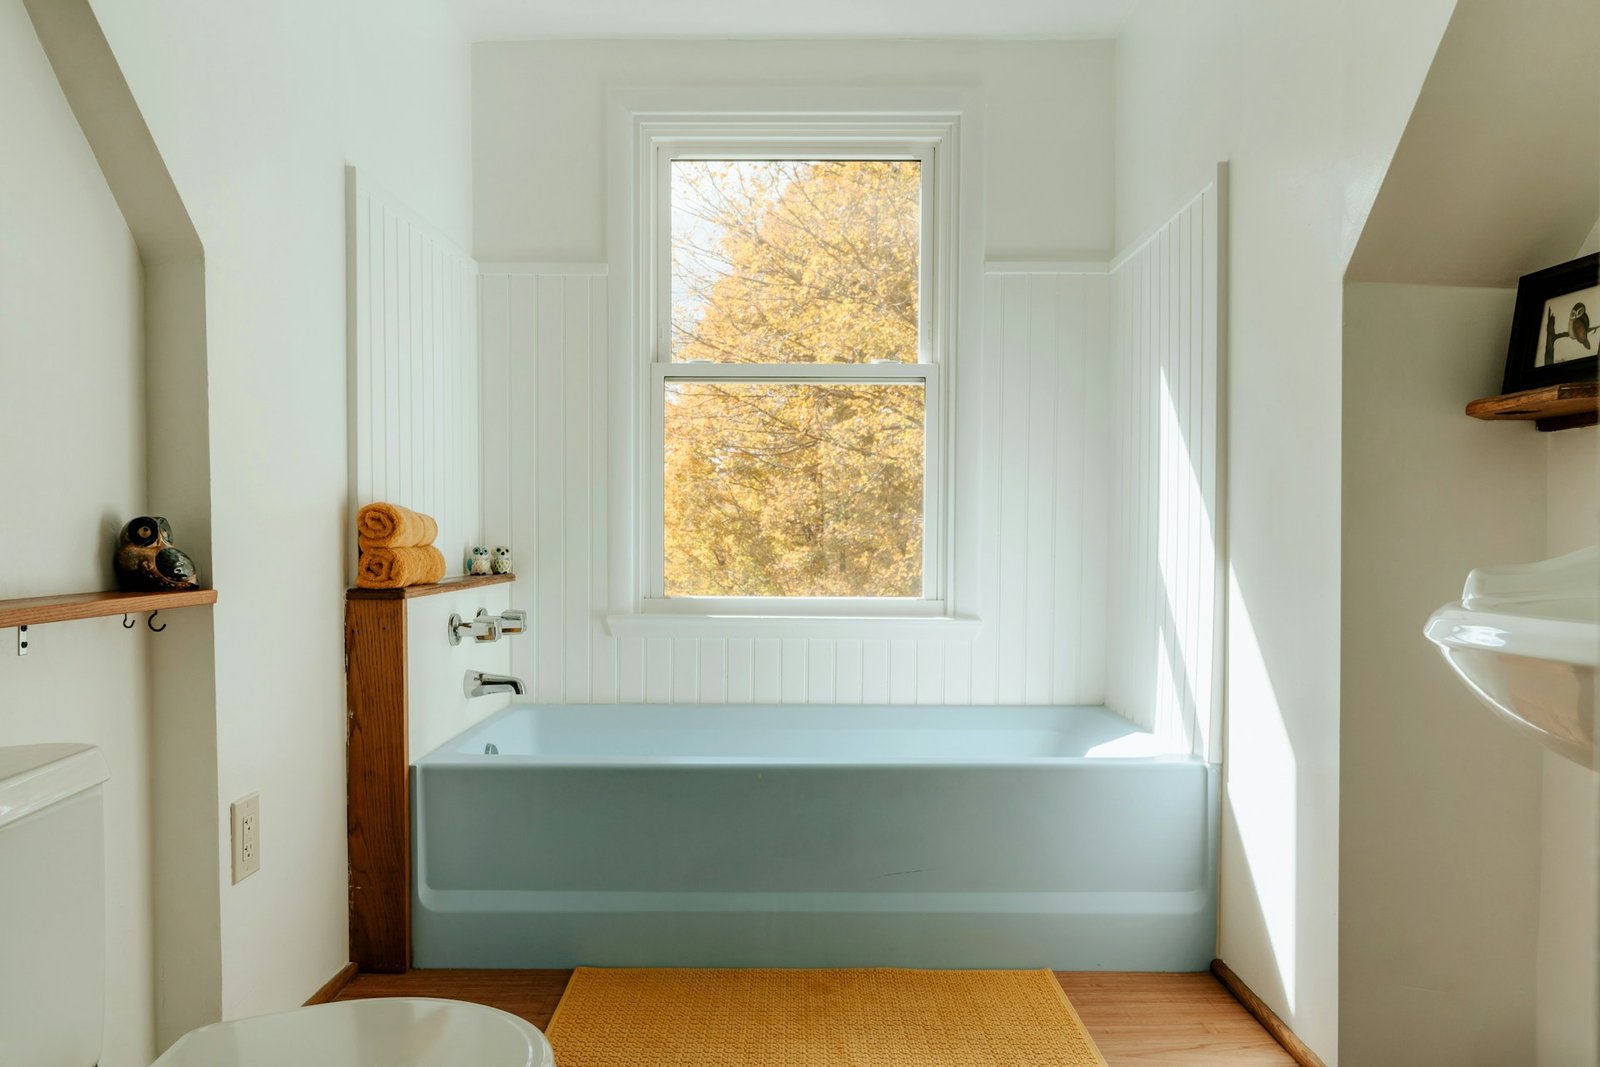
Freestanding bathtubs are a stylish pick that adds a luxe feel to any bathroom. But their standout feature, being unattached to walls, can quickly turn into a headache if the tub starts moving. It might shift while you’re trying to get in or wobble slightly when weight is added. Over time, it can even cause damage to the flooring or plumbing underneath. That’s not just inconvenient, it’s something that can seriously affect the safety and comfort of your bathroom. If your freestanding tub isn’t staying put, don’t ignore it. It’s usually a sign that something wasn’t installed quite right or that parts underneath have worn out. Professional solutions, done by people who know what they’re doing, can fix the issue for good. Not only will it feel safer getting in and out, but it also helps protect the structural parts of your bathroom that you can’t see. Let’s take a look at what usually causes freestanding tubs to move and how the right help can sort it out. Common Reasons Freestanding Tubs Move A freestanding tub might look like a solid, heavy centrepiece, but the truth is it can feel surprisingly unsteady when the setup’s not done correctly. Here are a few reasons why they move around more than they should: 1. Uneven Floors If the surface under your tub isn’t level, the base won’t sit properly. This creates a gap or a tilt, which makes the whole thing shift slightly every time someone uses it. 2. Worn or Poor-Quality Feet or Pads Most freestanding bathtubs come with feet or padding beneath them. These are meant to keep them balanced and distribute weight evenly. With time, those parts can wear out or become loose, especially on hard flooring like tiles or polished concrete. Once that happens, the tub can slide or rock with even the smallest movement. 3. Loose or Weak Mounting In some setups, a freestanding tub needs to be semi-secured to prevent movement. If mounting wasn’t part of the install or was done poorly, the tub may shift. Even mild movement like this can loosen plumbing connections and leave you with leaks or water damage below the surface. 4. Expansion and Contraction of Materials Floors and supports made from timber can expand or shrink slightly due to temperature or humidity changes. This isn’t something you always notice straight away, but over time it can throw the tub off balance. 5. Plumbing Movement The pipes under the floor or connected to the tub might also shift if they weren’t properly locked in. This movement might pull the bathtub slightly, just enough to make it feel shaky after a while. Each of these problems may seem small alone, but together they can turn a relaxing soak into a frustrating and noisy experience. Professional Installation Techniques When done properly, installing a freestanding tub is about a lot more than lifting it in and calling it a day. Professional plumbers and installers work through steps that make sure the tub is steady from the start and stays that way over time. Here’s how a qualified team gets it right: – Proper Floor Preparation Before the tub goes in, the flooring needs to be levelled and reinforced if needed. This step is often skipped during DIY jobs and ends up causing issues later. – Adjusting and Securing Tub Feet or Base Pads Some tubs come with adjustable feet, which must be set evenly so the tub doesn’t rock. Others require rubber or non-slip base pads. These need to be good quality and correctly placed to keep the tub in place. – Using the Right Mounting Hardware Depending on the type of tub and floor, special mounting brackets or adhesive systems may be used to secure the tub. These don’t make the tub a permanent fixture but provide just enough anchoring to stop it from sliding or shifting. – Making Sure the Plumbing Works with the Tub’s Position Installers position the plumbing so that the tub can settle naturally, without pulling on pipes. Once all is connected, they double-check that it’s leak-free and solid. When proper steps are followed, freestanding tubs won’t budge, no matter how often they are used. It’s a smoother experience from the start and reduces the risk of future fixes. Maintenance Tips To Prevent Movement Even with a well-done install, freestanding tubs still need attention from time to time to stay put. They might not be attached to the wall, but they shouldn’t shuffle or squeak as they age. A few regular maintenance steps can keep things steady and help your tub and flooring last longer. Start by checking for movement now and then. Giving the tub a gentle push or observing it while filling with water can show small shifts that aren’t otherwise obvious. If the tub shifts or rocks even a little, it’s better to have someone look at it before it worsens. Check the feet or pads regularly. These parts wear down gradually, especially on surfaces like tile or timber. If they’ve become loose or flattened, they don’t hold the tub properly and can let it tilt when weight is applied. Adjustable feet might need tightening over time as well. Moisture under the tub can also be a problem. Leaks, condensation, or minor plumbing faults often go unnoticed until they impact the flooring or subfloor. If water’s been collecting quietly, your floorboards may swell or weaken, which can cause the tub to lose stability. A yearly inspection by a professional can catch this early. A few habits can go a long way in keeping your bathtub stable: – If your tub rocks or squeaks, don’t ignore it. Small movement usually gets worse. – Avoid using glues or silicone around the base to fix wobbling. These can hide the real problem. – Watch the flooring near your tub base and note any swelling, cracks, or marks. – Don’t sit or lean on the tub edges. That kind of force can shift weight and throw off its balance.
Smart Shopping Guide for Budget-Friendly Bathroom Units in Melbourne
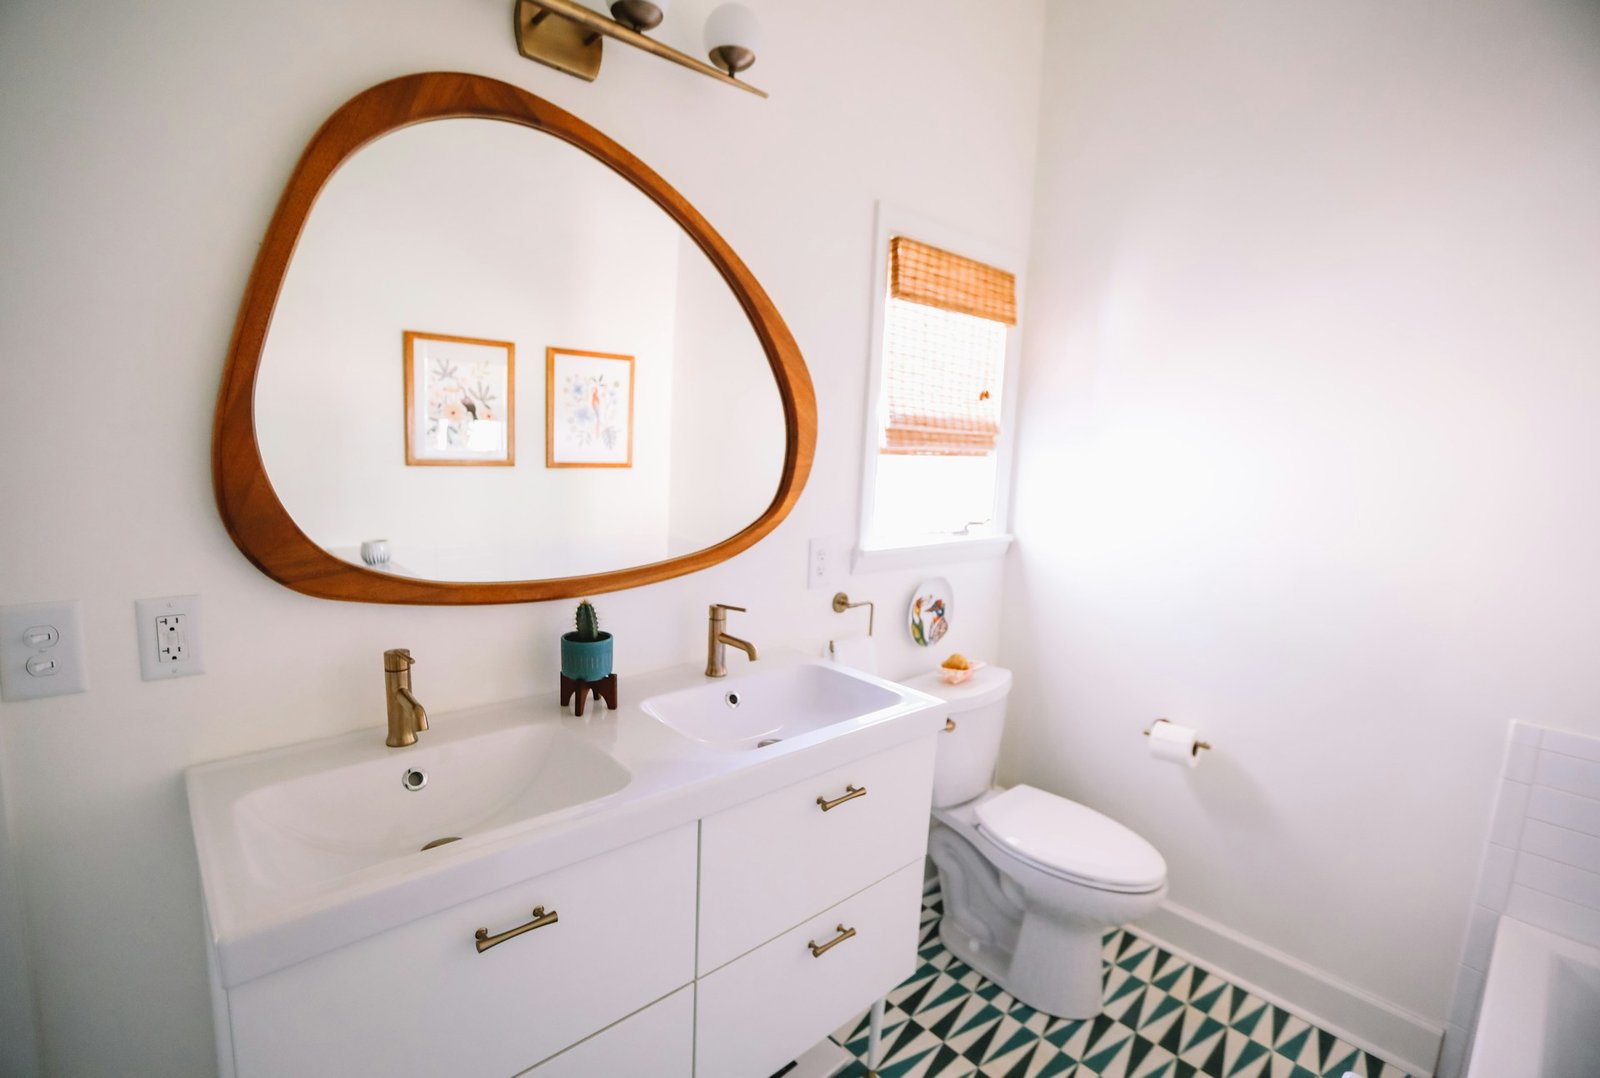
Shopping for bathroom units when you’re on a budget doesn’t mean you have to settle for plain or poor quality. With the right planning, you can find fresh, stylish vanity units that feel right at home in your bathroom without overspending. Whether you’re freshening up a powder room or working on a full renovation, affordable options do exist that deliver both form and function. Since this article is focused on Melbourne, we’re zooming in on options available in that area along with some tips to help you shop smart. Understanding what you need, where to look, and how to get the best value will simplify your search for discount bathroom vanity units and help you avoid wasting money on something that’s not quite right for your space. Understanding Your Needs Before you jump into hunting for deals, take a good look at your current bathroom setup. Is it tight on space? Do you need more storage? Would a wall-hung vanity work better than a freestanding one? These questions will guide your search in the right direction. Making quick purchases without checking fit and function can lead to regrets and cost you more down the road. Start by measuring your available space. Don’t just measure the floor. Look at height restrictions, clearance for drawers, and possible interference with doors or existing fixtures. Once you’ve got your accurate dimensions sorted, move on to defining what matters most to you. Think about: – Storage requirements: Do you need deep drawers for large bottles, or are open shelves better suited? – Style taste: Are you after something sleek and modern or a traditional look? – Surface material: Is water resistance more important, or are you going for a particular finish? Setting your budget is just as important. It’s easy to get caught up in trendy catalogues or showroom displays, but having a cost limit helps filter choices and pushes you to focus on value. Aim for pieces that look the part but also fit your day-to-day needs. For example, a narrow vanity with slide-out drawers might suit a tight ensuite better than a wide unit with swinging doors. By having clear priorities, your decision-making gets easier and more focused. You know what to say yes to and what to walk away from, even if the discount tag seems tempting. Where To Find Discount Bathroom Vanity Units In Melbourne Melbourne has no shortage of places where you can pick up a deal, but knowing where to start can save both time and stress. Both in-person and online options carry plenty of budget-friendly bathroom vanities, but each comes with different perks and things to watch out for. Here’s a simple breakdown: 1. In-Store Shopping – Good for physically inspecting products – Helpful if you want to compare finishes, open drawers, and see the build quality up close – Staff are often available for advice 2. Online Showrooms or Retailers – Convenient access to wider ranges – Great for checking pricing quickly – Easy to set filters for budget, size, or style preferences Be cautious when buying online. Photos can be misleading, and something that looks solid on screen could turn out flimsy when delivered. If you’re going the online route, check if samples are available or if their return policy allows for change of mind. To increase your chances of finding a good deal: – Shop during mid-week when stores are quieter, especially at the end of the month – Keep an eye out for clearance events or floor stock sales – Sign up for emails from suppliers that often promote limited-time discounts – Consider visiting warehouse outlets that stock discontinued or ex-display units If you’re debating between getting a vanity in-store or online, think practically. If you’re confident in reading specs and measuring accurately, online might be simpler. But if you’re not sure about colour, texture, or overall look, it’s safer to visit a showroom first. You’ll quickly spot if the discount is worth the compromise or if it’s better to keep searching. Evaluating Quality On A Budget When you’re working with a smaller budget, it’s tempting to grab the cheapest vanity unit you can find. But price doesn’t always match quality, and picking something poorly built might leave you replacing it sooner than you’d like. That ends up costing more overall. A quick look at the product in person—or photos if shopping online—can offer clues about its durability. Start with the construction. Pressed wood and particle board units with thin laminate finishes wear down faster in moisture-prone bathrooms, even with light use. On the other hand, units made from MDF with PVC or melamine coatings offer better resistance to water. Timber vanities might look stunning, but they need sealing and care to stay that way. If the vanity has drawers, check that they glide smoothly and close properly. Doors should sit level, hinges shouldn’t wobble, and the whole thing should feel sturdy when nudged. Before you checkout, take time to: – Read reviews from others who’ve purchased the same unit – Look into warranty terms to see if there’s any coverage for defects or faults – Take note of any paint chips, joint gaps, or weak-sounding backing—these suggest shortcuts in manufacturing If buying face to face, try opening every door and drawer. If you hear creaking sounds or the panels flex under slight pressure, it’s probably a sign the build won’t last long in a busy household. Remember, your vanity will face regular splashes, humidity, and cleaning products. Even when cost is your main concern, don’t accept something that looks wobbly or poorly sealed. It’s better to spend a little more upfront than replace a discount unit that breaks within a few months. Maximising Value Through Professional Guidance Skilled advice can save you from mistakes that add months or hidden expenses to your renovation. It also ensures everything functions as intended once it’s installed. Fitting a vanity might sound like a job you can tick off with a few tools, but the reality
Resolving Drainage Issues with Corner Bathtubs
Bathrooms serve as a crucial component of our homes, offering a space for relaxation and daily routines. However, even the most well-designed bathrooms can encounter drainage issues, which can be particularly tricky when dealing with corner bathtubs. These tubs, with their unique shape and placement, provide great use of space but come with their own set of drainage challenges. Water not draining properly can lead to more than just standing water; it can cause mould growth and unpleasant odours, making it important to address these problems swiftly. Corner bathtubs are popular for their ability to fit into less typical spaces, bringing style and functionality. Yet, they can also experience specific issues that standard bathtubs might not, including unaligned pipes due to their angled design and potential for increased debris accumulation. Addressing drainage issues as soon as they arise is essential to ensure your bathroom remains a comfortable and functional space, offering a seamless bathing experience without hassle. Common Drainage Issues with Corner Bathtubs Understanding the typical drainage problems associated with corner bathtubs helps in diagnosing and addressing them effectively. Here are some common issues you might face: – Signs of Drainage Problems: – Water pooling at one end of the tub. – Slow drainage that leaves residue around the drain. – Strange gurgling sounds when the water is being drained. – Possible Causes: – Improper Installation: Misaligned pipes or an uneven tub base can affect water flow. – Blockage: Hair, soap scum, and other debris can clog the pipes, slowing drainage. – Wear and Tear: Over time, components like seals or gaskets can degrade, affecting water flow. In everyday use, these problems manifest as longer standing water in the tub, or remnants of water after your bath, which can be pretty annoying. Regular checks and maintenance routines can help catch these issues early, saving you from more significant problems down the line. Keep an eye on unusual symptoms so you can seek appropriate solutions without delay. Effective Solutions for Resolving Drainage Issues Dealing with drainage problems in your corner bathtub doesn’t have to be overwhelming. Follow these straightforward steps to identify the issue: 1. Initial Inspection: Begin by checking the visible parts of the drain. Use a flashlight to see if there are any visible obstructions. 2. Basic Troubleshooting: Try using a plunger to see if you can clear any light blockages. This simple tool can often solve minor clogs without much hassle. 3. Clear Debris: A drain snake can reach further into the pipe to pull out hair or soap scum that might be stuck. Be cautious as too much force can damage the piping. 4. Use of Solutions: Consider using a mild solution of vinegar and baking soda to break down any buildup naturally. Avoid harsh chemicals that can damage plumbing over time. These steps will help you manage minor issues on your own, but knowing when to call in a pro can save time and effort. Professional Fixes and When to Call a Pro There comes a point when professional help is necessary. Consider reaching out to a professional under these circumstances: – Stubborn Clogs: If plunging and snaking don’t work, professional equipment like a hydro-jet might be needed. – Recurring Issues: When problems persist despite regular fixes, it’s time to call someone with expertise in plumbing. – Installation Errors: Misalignment from installation might require adjustments or refitting by a professional. Professionals have the tools and expertise to tackle complex drainage issues efficiently, ensuring the longevity of your corner bathtub without the hassle of repeatedly handling these problems yourself. Although hiring a professional might seem like an extra expense, their work often prevents future issues, saving you money in the long run. Preventive Maintenance Tips for Corner Bathtubs Keeping your corner bathtub in top condition involves routine maintenance. Here are some tips to help prevent drainage issues in the future: – Regular Cleaning: Aim to clean the drain at least once a month, removing any debris that may have collected. – Mindful Use: Avoid washing pet hair or large amounts of debris down the drain. A simple drain cover can catch residues before they cause trouble. – Seasonal Inspections: Even if everything seems fine, periodic professional checks can reveal hidden problems, allowing you to address them before they become major issues. Adopting these habits will help maintain your bathtub’s functionality and keep future issues at bay. Keeping Your Corner Bathtub in Top Condition Ensuring your bathtub remains hassle-free involves understanding and addressing drainage issues promptly. Consistent maintenance and knowing when it’s time to call in the experts can make all the difference in avoiding bigger problems down the line. Regular attention to your bathtub’s care, coupled with professional support when needed, guarantees a long lifespan for your tub. Ultimately, these steps ensure you enjoy a relaxing and stress-free bathroom experience. A corner bathtub is a beautiful addition to any home, providing both comfort and style. By keeping the drainage system in check, you maintain the peace of mind that your bathroom will always be ready to meet your needs, without the worry of unexpected drainage problems. To ensure your corner bathtub offers the best performance, regular attention and care are key. If you’re looking to optimise both style and function, explore the selection of corner bathtubs and accessories available at CARGO Bathroom & Kitchen. With thoughtfully designed options, you can create a bathroom that is both practical and visually appealing.
Fixing Seal Problems with Luna Rimless Toilet Suites
Toilet troubles can be a real hassle, and seal issues rank highly on the annoyance scale. A leaky seal around your toilet can lead to bigger problems if left unchecked, like water damage to your floors or unpleasant smells wafting through your home. Faced with such issues, there’s no need to panic. The Luna Rimless Toilet Suite offers a modern and efficient design that can help avoid many of these common problems. The Luna Rimless Toilet Suite stands out with its sleek lines and innovative features, such as a powerful flush system. Apart from its stylish appearance, its practicality in design addresses many everyday bathroom challenges, including those pesky seal problems. Addressing seal issues promptly with this model is crucial to prevent larger damages and ensure your bathroom remains a fresh and functional space. Common Causes of Seal Problems Understanding why these seal problems exist can help you prevent them in the first place. Here are some of the reasons seals may fail over time: 1. Poor Installation Practices: If the toilet wasn’t installed correctly, the seal can misalign over time. This might happen if the toilet is not set straight or is placed on an uneven surface. 2. Wear and Tear Over Time: Like most home features, the seals in toilets deteriorate due to regular use. The constant pressure and slight movements can weaken the seal. 3. Issues with the Wax Ring or Flange: The wax ring is a key component in ensuring a tight seal. Cracking or deformation in the wax ring can lead to leaks. Similarly, flange problems, such as cracked or improperly mounted flanges, can cause seal failures. These causes highlight the importance of vigilance in detecting seal issues early. With time, taking small preventive actions can save you from larger inconveniences. Identifying Seal Problems Spotting seal problems early can save you a lot of trouble. Here are a few things to watch out for: – Leaks Around the Base: Puddles at the base suggest there might be a seal problem. Even if the leak is minor, it’s important to address it quickly. – Unusual Noises and Water Issues: Gurgling sounds when you flush or slow draining can also indicate a seal problem. These noises could mean the seal has broken, allowing air and water to escape incorrectly. – Other Symptoms: Keep an eye (or nose) out for bad odours. Water damage on nearby floors or walls can also signal trouble with the toilet’s seal. While ongoing maintenance can help prevent some of these signs, recognizing when a seal needs attention is key. Keeping your Luna Rimless Toilet Suite in top shape ensures peace of mind and a high-functioning bathroom. Steps to Fix Seal Problems with Luna Rimless Toilet Suites Getting down to fixing seal issues can seem daunting, but breaking the task into manageable steps makes it easier. Before you start, gather your tools and materials. You’ll usually need a wrench, a scraper, a new wax ring, and a cloth. Always check that you’ve turned off the water supply to the toilet to avoid any messy surprises. Step-by-step, here’s how you can address the seal problem: 1. Remove the Toilet: Start by loosening the nuts holding the toilet to the floor. Carefully lift the toilet straight up and place it on a flat surface. Removing the toilet gives you access to the wax ring that needs replacement. 2. Inspect the Wax Ring: Once the toilet is out of the way, take a good look at the wax ring. If it’s damaged or deformed, that’s likely the culprit. Use a scraper to get rid of the old wax completely. 3. Place the New Wax Ring: Next, position the new wax ring over the flange, making sure it’s centered properly. A well-placed wax ring is crucial for a tight seal. 4. Reinstall the Toilet: Carefully lift the toilet back into place over the new ring. Make sure it aligns perfectly with the bolts before tightening them. 5. Secure and Test: Tighten the nuts evenly to secure the toilet. Turn the water supply back on and check for leaks by flushing the toilet a few times. These steps should resolve common seal issues, offering peace of mind and a smoothly functioning toilet. Preventive Maintenance Tips Maintaining your toilet involves more than just fixing problems once they pop up. Regular checks can help catch issues before they escalate. Here are some handy tips: – Regular Inspections: Check the seal area and the floor for signs of water or unusual softness. Catching these early can prevent major disasters later. – Clean with Care: Use gentle, non-abrasive cleaners to avoid wearing down the seal and other components. Harsh chemicals might degrade parts of the toilet prematurely. – Professional Check-Ups: Consider having a professional inspection every now and then. Trained eyes can spot potential problems you might miss. Incorporating these habits into your routine means you’ll likely spend less time worrying and more time enjoying a fault-free bathroom. Keeping Your Bathroom in Top Shape Fixing a seal problem with your Luna Rimless Toilet Suite is a straightforward process when approached methodically. It helps ensure your bathroom remains a comfortable and inviting space. Regular maintenance doesn’t just prevent problems—it keeps your entire bathroom looking as good as new. An efficient and well-maintained bathroom enhances the quality of your daily routine. By taking simple steps like regular check-ups and mindful use of cleaning products, you manage to keep problems at bay. It’s all about preserving functionality and maintaining that serene bathroom vibe that everyone appreciates. Moving forward confidently with these maintenance tips can help you enjoy a seamless bathroom experience. To keep your bathroom looking sleek and functioning at its best, consider investing in quality fixtures like the Luna Rimless Toilet Suite. For top-tier selections and expert advice, explore the range at CARGO Bathroom & Kitchen. Enhance your space and avoid future hassles with solutions that combine both style and practicality.
Restoring an Aged Heritage Bathroom Vanity
Heritage bathroom vanities are more than just functional pieces in a home. They carry a history that adds character and an aura of timeless elegance to any bathroom. These vanities usually boast intricate woodwork and design flourishes that are hard to find in modern furniture. Owning such a piece can be both a privilege and a challenge, as the process of restoring it to its former glory requires care and attention. Whether you’re a vintage enthusiast or someone who has inherited a classic vanity, the journey of bringing it back to life can be incredibly rewarding. Restoring an aged heritage bathroom vanity might seem daunting at first, but it offers a unique opportunity to revive its historical charm while enjoying the transformative touch it brings to your bathroom space. The beauty of these vanities lies in their ability to resonate with stories from the past, making the restoration process not just about repair and polish, but about reconnecting with a piece of history. As you embark on this journey, you’ll find that a little effort goes a long way in turning a worn-out fixture into the show-stealer of your bathroom. Assessing the Condition Before diving into the restoration, it’s important to assess your vanity’s current state. Start by examining the structural integrity. Are there any visible cracks or signs of rot in the wood? Check if the joints are sturdy and whether the vanity can support the weight it was designed for. Structural issues can cause bigger problems down the line, so it’s best to address them early. Next, take a close look at the surface wear. Scratches, stains, and faded finishes are common in old vanities. Determine whether these imperfections require a simple polish or a more intensive refinishing. Surface wear can tell you a lot about the wood type and the original finish, which is crucial for choosing the right materials for restoration. Make sure to inspect the hardware condition. This includes knobs, handles, and hinges that may have corroded over time. While some can be cleaned and polished, others might need replacing. Keep an eye out for ornate details that contribute to the vanity’s unique charm. Here’s a simple checklist to help you with the assessment: – Check for structural integrity, including cracks and joint stability. – Examine surface wear and identify any scratches, stains, or fading. – Inspect hardware condition, noting any corrosion or missing pieces. – Identify wood type and original finish to guide restoration choices. Using this guide as your roadmap, you’ll be better equipped to start the journey of breathing new life into your heritage bathroom vanity. Repairing Structural Damage After assessing your vanity, it’s time to tackle any structural damage. Common issues like loose joints, cracks, or even small areas of rot can often be fixed with the right approach. Begin by reinforcing any weak areas. You can use wood adhesive to secure joints or fill in gaps with wood filler. For more serious damage, replacing broken parts might be necessary. Make sure to use wood that matches the original in order to maintain consistency in appearance. For those tricky areas with significant problems, seeking professional help might be the best way to ensure everything is handled correctly. Professionals can offer solutions for complex repairs, like repairing intricate woodwork or deep-seated rot, and prevent any potential long-term issues. By fixing these structural woes, you ensure that your vanity remains sturdy and retains its charm for years to come. Refinishing and Polishing Once the structure is sound, the focus shifts to surface refinement. Start by stripping off the old finish. Use a gentle stripper that won’t damage the wood. Follow with thorough sanding to smoothen the surface, making it ready for a new finish. Sanding must be done evenly to avoid any scratches or uneven spots. Choosing the right varnish or paint is pivotal in maintaining the vanity’s vintage appeal. Opt for finishes that highlight the natural grain of the wood. Matte finishes can offer an authentic antique look, while a slight sheen can enhance intricate details. Sealing is the final touch. This not only protects the wood from moisture and wear but also ensures the new finish lasts longer. Applying a quality sealant adds a layer of protection, which is particularly important in a bathroom setting where humidity is a challenge. Updating Hardware and Fixtures Freshening up your vanity’s hardware can bring a significant transformation. Select knobs, pulls, and hinges that complement the vanity’s style. When possible, look for period-appropriate hardware to preserve the authentic look. Reproductions can work well if sourcing originals proves difficult. Installing new hardware requires attention to detail. Ensure the pieces are aligned and work smoothly with the existing doors and drawers. Take time to adjust fitting screws so that everything sits tightly and functions perfectly. Enhancing Functionality Modern living doesn’t mean you must sacrifice the classic appeal of your heritage vanity. Consider updates like soft-close hinges or upgraded plumbing fixtures for sinks and taps. These tweaks make your vanity practical without altering its historical essence. Balancing functionality with aesthetics ensures you enjoy both style and convenience every day. Small conveniences, like adding organisational inserts for drawers, can vastly improve the user experience. Keep the original beauty intact while integrating small comforts that suit today’s needs. Reviving Heritage: Transform Your Vanity into a Timeless Bathroom Focal Point By addressing each aspect with care, your restoration journey can transform an aged vanity into a stunning centrepiece of your bathroom. Appreciating the craftsmanship and history of the piece adds a sense of pride and accomplishment. Whether you admire its intricate details every morning or relish the story it tells, your renewed vanity brings both beauty and history to the heart of your home. As the finishing touches are applied, take a moment to reflect on the journey. This is more than a restoration; it’s a personal endeavour that connects the past with the present. Let your revitalised vanity stand as a testament to the beauty of preservation, where every
Dealing with Water Spots on Black Vanities for Bathrooms
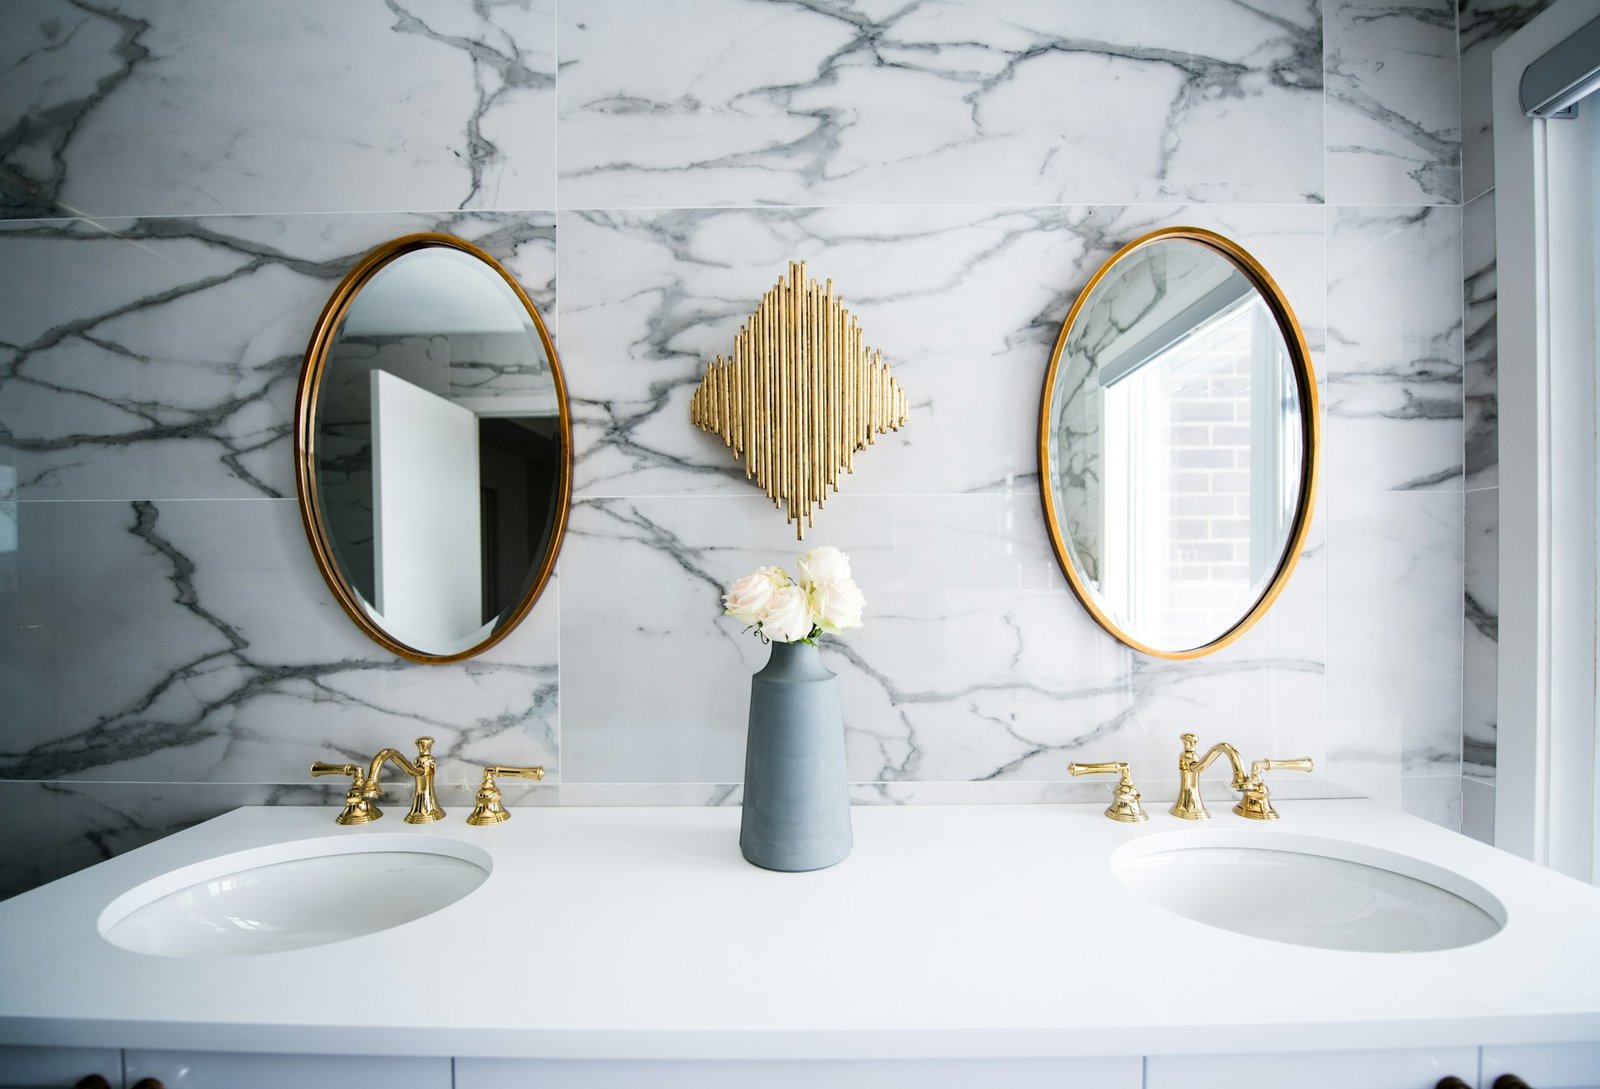
Water spots can be a bothersome issue, especially on black vanities for bathrooms. These elegant pieces often add a sleek and modern touch to a space, but they can quickly lose their charm due to unsightly water spots. These marks aren’t just a visual nuisance; they can interfere with the overall maintenance of your bathroom furnishings. The contrast of black surfaces with light mineral deposits makes the issue more noticeable, leaving homeowners frustrated. Understanding how to tackle this problem ensures that your luxurious black vanity stays in top condition, maintaining its sophisticated appeal. While black vanities remain a popular choice for many bathrooms due to their chic appearance, dealing with water spots is a common challenge. These spots are typically formed from hard water minerals that dry on surfaces or from soap scum that builds up over time. Fortunately, there are solutions to these problems. In this discussion, we’ll explore what causes these spots and how you can effectively prevent and treat them, making sure that your black vanity remains as stunning as ever. Understanding Water Spots Water spots are more than just a minor inconvenience; they stem from specific causes that, when identified, can be managed more easily. These marks are generally the result of two main culprits: mineral deposits and soap scum. Mineral deposits come from hard water, which is water that contains high levels of calcium and magnesium. When this water evaporates on your vanity, it leaves behind these minerals, creating visible spots. Soap scum, on the other hand, forms from a mix of soap, body oils, and water. This creates a cloudy film that sticks to surfaces. The appearance of these spots isn’t the only issue. They can make your vanity look worn out and neglected over time. Affected vanities may also require more frequent cleaning, escalating the upkeep effort needed to preserve their sleek look. Besides aesthetics, water spots, if not managed, can interfere with how well your vanity handles moisture and everyday use. To keep your vanity looking pristine, it’s helpful to not only understand the different types of water spots but also to consider preventive measures that can be put in place to maintain the beauty of your bathroom’s focal point. Preventive action doesn’t just preserve appearances; it extends the life of your vanity, ensuring that its functionality and charm are sustained. Knowing why these spots form is the first step in tackling them effectively and making sure that your bathroom looks its best every day. Preventive Measures Keeping those pesky water spots at bay means being proactive. Here are some simple steps you can take to prevent them from forming in the first place: – Wipe Down Surfaces: After using the bathroom, grab a soft cloth or towel and dry off any surfaces. This quick act can drastically reduce the chances of mineral deposits building up. – Use a Water Softener: Installing a water softener can help treat hard water, reducing the minerals that cause spots. This solution isn’t just for your vanity; it benefits your entire plumbing system. – Install Splash Guards: Prevent excess water from splashing onto your vanity with splash guards. They might sound like a fancy addition, but they work wonders in keeping your bathroom dry. – Choose the Right Products: Reach for cleaners that specifically say they won’t leave a residue. This will stop soap scum from sticking around. Regular cleaning routines aren’t just good hygiene—they’re your best friends in fighting water spots. Spending a few minutes a week on maintenance can save you hours of scrubbing later. Cleaning Solutions for Existing Water Spots Even with the best preventive measures, water spots can sometimes sneak their way onto your vanity. When that happens, knowing how to clean effectively is key to restoring your vanity’s allure. Here’s how to tackle them: 1. Vinegar Solution: Mix equal parts white vinegar and water in a spray bottle. Spray it onto the spots, leave it for a couple of minutes, then wipe with a soft cloth. 2. Mild Soap: For those less stubborn marks, a simple mix of mild dish soap and warm water can be all you need. Just dip a cloth in the sudsy solution, wipe the affected areas, then rinse with water. 3. Specialised Cleaners: Some water spots might be more persistent and need a bit more muscle. Look for commercial cleaners designed for bathroom surfaces, ensuring they’re safe for your vanity’s finish. Use these steps consistently to keep your vanity sparkling and spot-free. Regular attention will help ensure that your bathroom looks inviting all year round. Maintaining the Finish Once your vanity is clean, maintaining that fresh look is the next step. A well-maintained vanity not only looks good but performs better too. Here’s how you can keep it in tip-top shape: – Protective Coatings: Consider applying a protective polish or wax. These coatings can create a barrier on your vanity’s surface, helping to repel water and reduce the effort needed for daily maintenance. – Regular Maintenance Routine: Setting a routine for cleaning helps in the long run. Every few weeks, spend time polishing the vanity to ensure it keeps its shine and resists dullness. – Be Mindful of Products: Use clean cloths and avoid any abrasive materials that might scratch or dull the finish. A gentle touch goes a long way. With just a bit of extra care, your black vanity can remain a stunning showpiece in your bathroom, showcasing its sleek beauty and modern appeal. Keeping Your Vanity Spot-Free By understanding water spots and taking steps to prevent and treat them, you can keep your black bathroom vanity looking as new as the day you got it. Applying preventive strategies and effective cleaning routines ensures that it’s not just about looks; it’s about maintaining functionality and adding value to your home. Remember, a cared-for vanity is more than just a fixture—it’s the centrepiece of your bathroom and a reflection of your style. Embrace these tips to keep it pristine and maintain the inviting atmosphere