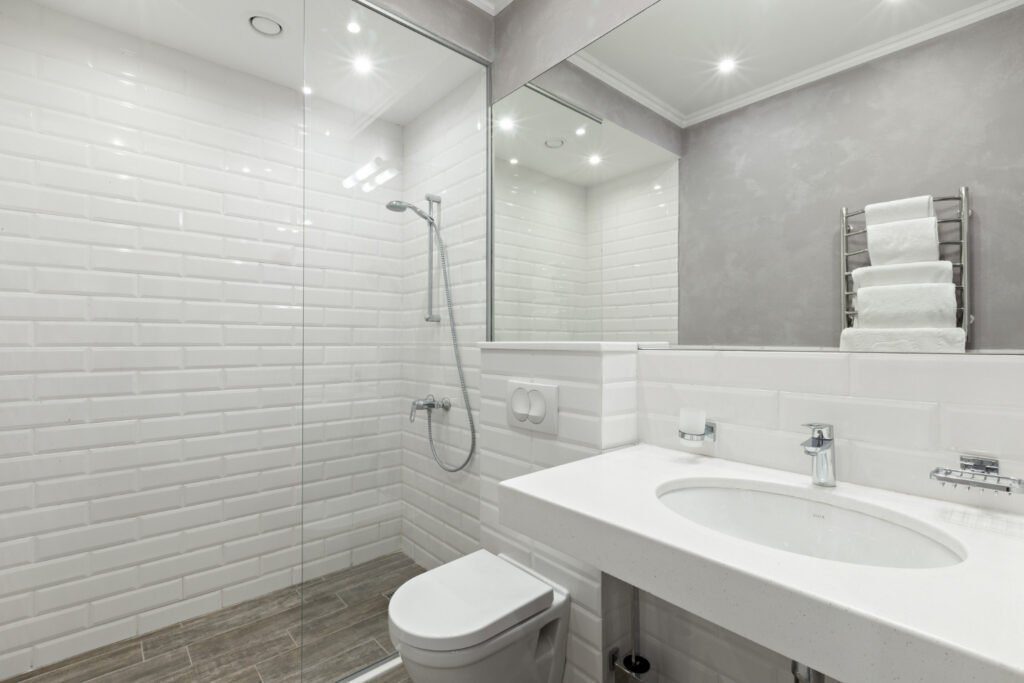
How to Install a Wall-Mounted Toilet Yourself
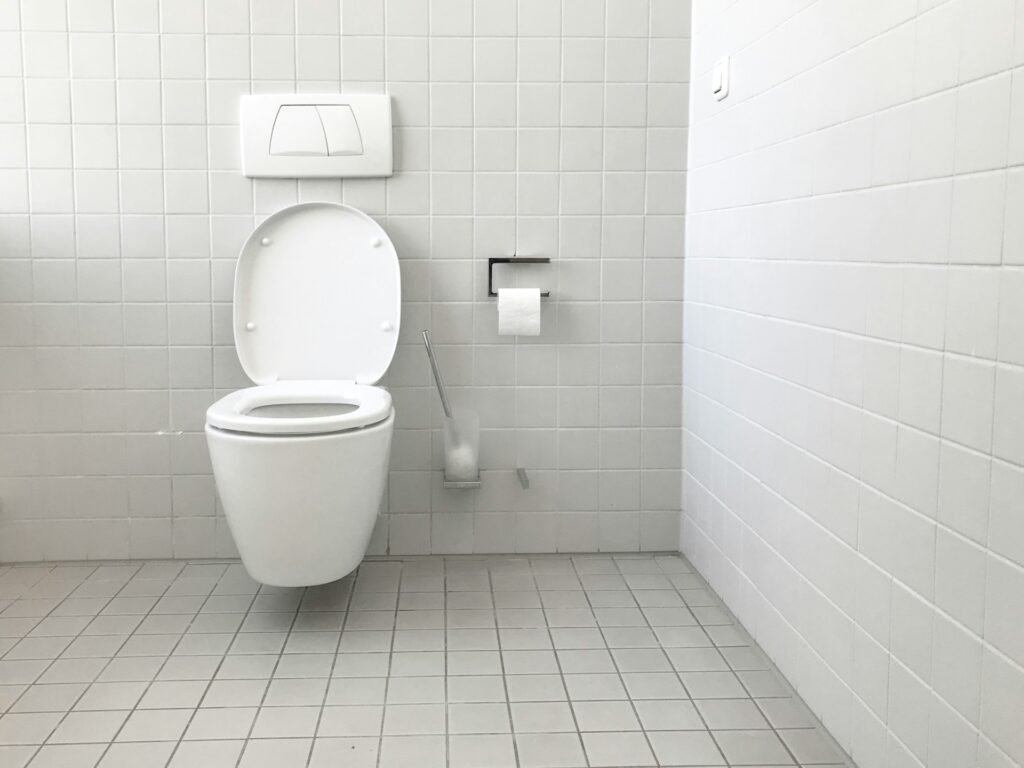
Installing a wall-mounted toilet can be a fantastic way to save space and create a modern look in your bathroom. While it might seem challenging at first, with the right tools and preparation, you can tackle this project yourself and enjoy the benefits of a sleek, floating toilet design. Not only does this style add elegance, but it also makes cleaning under the toilet a breeze. Before getting started, it’s essential to gather all the necessary tools and materials. Planning ensures a smoother installation process and helps you avoid unnecessary trips to the hardware store. Wall-mounted toilets integrate with your existing plumbing, so checking compatibility beforehand is critical to ensure everything works seamlessly. This guide will walk you through each step of the installation, from prepping your space to securing the final touches. With clear instructions and handy tips, you can transform your bathroom with confidence and skill. Gathering Necessary Tools and Materials Before starting the installation of a wall-mounted toilet, it’s important to have all the right tools and materials on hand. This preparation step ensures you can tackle the job efficiently without interruptions. Here’s a list of essential tools you’ll need: Drill with appropriate bits Level Wrench set Screwdriver Tape measure Safety goggles and gloves In addition to these tools, you’ll need specific materials to complete the installation. This includes the wall-mounted toilet kit, which typically consists of the toilet bowl, mounting frame, cistern, and flush plate. Make sure to have plumbing sealant and pipe fittings at hand as well. It’s vital to check that your chosen wall-mounted toilet kit is compatible with your bathroom’s existing plumbing system. This includes verifying that the water supply and drainage systems align with the toilet’s requirements. This step prevents any mismatch and ensures smooth operation once installed. Don’t forget to read the manufacturer’s instructions thoroughly to understand any unique requirements your kit might have, allowing you to prepare any additional items necessary for a successful installation. Preparing the Installation Site Once you have all your tools and materials ready, it’s time to prepare the installation site by removing the old toilet. Begin by shutting off the water supply to prevent leaks during the removal process. Flush the toilet to empty the cistern, then use a sponge or towel to soak up any remaining water in the bowl and tank. Carefully disconnect the water supply line using a wrench and unscrew the bolts securing the toilet to the floor. Gently rock the toilet back and forth to break the seal and lift it away from the floor. Once removed, check for any remaining wax residue and clean the area thoroughly. With the old toilet out of the way, focus on securing the wall frame that will support the new wall-mounted toilet. Use the tape measure to ensure precise alignment. Follow the manufacturer’s guidelines for height and distance from the wall. Make sure the frame is securely fastened to the wall studs for stability. Accuracy in measuring and alignment is crucial. Take your time ensuring everything is level and correctly spaced. This prepares a solid foundation for the wall-mounted toilet and helps prevent installation issues. By completing these preparatory steps with care, you’ll set yourself up for a smoother installation process. Installing the Wall-Mounted Toilet With your site prepared, it’s time to install the wall-mounted toilet. Begin by positioning the mounting frame according to the manufacturer’s guidelines. Use a level to make sure the frame is straight. Secure the frame firmly to the wall studs, checking the attachment points are solid and reliable. This structure will support the toilet, so precision here is crucial. Next, attach the cistern inside the wall cavity. Ensure all pipe fittings are connected tightly to prevent leaks. Use plumbing sealant where necessary to reinforce joints and connections. With the frame and cistern in place, it’s time to mount the toilet bowl. Carefully align it with the frame’s mounting brackets. Fix it securely using the bolts provided in your installation kit. Once the bowl is mounted, test all connections to ensure they are watertight. Turn the water supply back on and check for leaks by flushing. Adjust any loose fittings if necessary to secure a firm connection. Evaluate the flushing mechanism to confirm it operates smoothly. Adjust the settings on the flush system to ensure optimal performance, considering water pressure and bowl clearance. Don’t rush these checks—ensuring everything works flawlessly at this stage can help avoid issues later on. Finishing Touches and Maintenance Tips After the installation is secure, focus on the finishing touches to complete the look. Conceal any exposed plumbing or unsightly elements using decorative panels, which can match your bathroom’s design. These panels not only add style but also provide easy access for future maintenance. Consider investing in a sleek flush plate to complement the modern feel of the wall-mounted toilet. Regular maintenance ensures your new toilet performs efficiently. Clean the toilet bowl and flush mechanisms routinely to avoid build-up and ensure smooth operation. Also, occasionally check connections and seals for any signs of wear or leaks, addressing these promptly to prevent larger problems. If you encounter any issues you can’t resolve, don’t hesitate to consult a professional. Problems like persistent leaks or flush system failures might require expert attention. Knowing when to seek help will keep your bathroom running smoothly and save you from costly repairs. Conclusion: Installing a wall-mounted toilet is an excellent way to update your bathroom, offering both style and functionality. By following proper procedures and double-checking each step, you can ensure a successful DIY installation. Remember the importance of precise alignment and secure fittings to prevent leaks and ensure long-term durability. Your bathroom renovation doesn’t stop at the toilet. Consider updating other fixtures and styles to complement your new installation. Creating a cohesive design can enhance the overall look and feel of your space, turning your bathroom into a modern haven. Excited to transform your bathroom? Let CARGO Bathroom & Kitchen guide you through the process with our extensive range
Troubleshooting Common Bathroom Renovation Problems
Renovating a bathroom can be an exciting project. It offers the chance to refresh your space and improve its functionality. However, like any renovation job, it can come with its own set of challenges. Facing unexpected issues or changes can feel overwhelming, especially if you’re not prepared. Common problems like plumbing headaches, hidden structural surprises, or budget overruns can throw a wrench in your plans. Knowing how to tackle these issues with creative solutions makes all the difference. Additionally, achieving a good balance between design and practicality ensures your bathroom not only looks great but works well too. By understanding potential problems you might face, you can adequately plan and adapt. This careful approach prevents renovation headaches and keeps your project on track, allowing your dream bathroom to become a reality without unnecessary hassles. Tackling Plumbing Issues Plumbing can be a tricky area during bathroom renovations, with several common challenges that can arise. Slow drains, leaks, and fluctuating water pressure are frequent issues many face when updating their bathrooms. A slow drain might occur due to a partial blockage in the plumbing pipes, which can lead to more significant water flow issues if not addressed promptly. Leaks might become evident when replacing old fixtures, exposing issues in the connections or the pipes themselves. Lowered water pressure can occur if rust or sediment accumulates in the pipes, restricting water flow. To address these problems, consider the following solutions: Slow Drains: Use a plumber’s snake to clear minor blockages. For more stubborn issues, you might need chemical treatments designed for plumbing systems. Leaks: Regularly check and tighten fixtures to ensure they’re properly sealed. If leaks persist, replacing worn washers or seals often resolves the problem. Water Pressure: Clean faucet aerators and showerheads to remove mineral build-up. If the issue persists, consult a plumber to check your main water line. Knowing when to seek professional help is crucial. If you encounter persistent problems or complex setups, calling a licensed plumber ensures that issues are correctly and safely resolved, saving you time and future headaches. Dealing with Unexpected Structural Discoveries Renovating a bathroom sometimes reveals unexpected structural problems like mould, weak floorboards, or hidden water damage. These can cause delays and increase costs if not handled appropriately. Mould often thrives in damp, enclosed spaces and can become a health hazard. Weak floorboards might not support new fixtures adequately, while water damage can indicate plumbing leaks or poor insulation. To manage these surprises effectively: Identify the Issue: Conduct a thorough inspection once the bathroom is stripped back. Look for discolouration or musty smells that might indicate mould. Check floorboards for any movement or rot. Address the Problem: If mould is present, ensure the area is well-ventilated and apply mould-removing treatments. Replace any weakened structural elements to ensure a safe foundation. Prevent Future Damage: Ensure proper sealing and waterproofing of areas prone to moisture. Regular maintenance and inspection can help catch future issues early. Always include a contingency budget in your renovation plans for such unexpected structural issues. This reserve allows you to address unforeseen problems swiftly without derailing the entire renovation project, maintaining both your timeline and budgetary constraints. Managing Budget Overruns Staying on budget during a bathroom renovation can be challenging, but it’s not impossible with a little planning and prioritisation. One of the primary reasons for budget overruns is underestimating the costs of materials and labour. To avoid this, research thoroughly before beginning the project. Obtain multiple quotes from suppliers and contractors to better gauge the expected costs. Another helpful strategy is to prioritise essential updates over cosmetic changes. Focus on necessary improvements like upgrading old plumbing fixtures or enhancing energy efficiency, which can save you money in the long run. Once these essential tasks are complete, you can allocate any remaining funds toward aesthetic enhancements. Here are some ways to save money on your renovation without compromising on quality: Repurpose Existing Fixtures: If possible, refurbish existing fixtures instead of replacing them entirely. A new coat of paint or small modifications can breathe new life into old vanities and cabinets. Focus on Smart Buys: Look for discounted materials or consider purchasing slightly imperfect items that are still functional. DIY Where Possible: Handle minor tasks yourself, like painting or installing easy-to-fit items, to cut down on labour costs. Through careful management and making informed decisions, you can keep your renovation on track financially, aligning your dream bathroom with your budget. Achieving Design and Functionality Balance Balancing design and functionality is crucial for a successful bathroom renovation. While it’s easy to get carried away with trends and beautiful designs, practicality should not be overlooked. Choosing styles that suit your everyday needs enhances comfort and usability in the long term. Start by considering who will use the bathroom and how it will be used. Families with small children might benefit from installing durable, easy-to-clean surfaces, whereas a couple without kids might focus on installing luxury fixtures. Think about long-term plans too; incorporating features like grab bars or non-slip flooring might be useful if the household includes elders. When selecting materials and fixtures, ensure they align with both design and functional goals. Aim for materials that are both attractive and durable. Consider: Storage Solutions: Opt for vanities and cabinets that provide adequate storage while blending with the overall design. Efficient Fixtures: Choose water-saving devices, such as dual-flush toilets and low-flow showers, to save on utility bills and contribute to sustainability. Practical Layout: Create a bathroom layout that allows easy movement without compromising aesthetics. By considering these elements, you strike a perfect balance between style and function, ensuring your renovated bathroom serves your needs beautifully and effectively. Conclusion: Bathroom renovations can significantly enhance the beauty and functionality of your home, but they come with potential challenges. From managing plumbing issues and unexpected structural discoveries to ensuring budget adherence and achieving the perfect balance between design and functionality, each step requires careful planning and execution. Tackling these common problems with a proactive approach not only keeps stress at
How to Choose a Child-Friendly Bathroom Vanity
Choosing a bathroom vanity for your kids involves more than just finding one that fits in the space. It’s about ensuring safety while also creating a fun and inviting environment for them. When picking out a vanity, there are several factors to keep in mind to ensure it’s child-friendly and suits their needs as they grow. Safety should be at the top of your list, with features such as rounded edges and anti-slip surfaces to prevent accidents. It’s equally important to consider a vanity that encourages independence. This is achieved by choosing fixtures and fittings that are accessible, helping children learn and grow more confident in their daily routines. Playful design elements can make the bathroom a place that children enjoy, without sacrificing practicality. From colourful finishes to clever storage, there are many ways to blend functionality with a child’s sense of wonder. Additionally, picking a vanity that can adapt as your child grows will save time and money in the future, maintaining its usefulness for years to come. Prioritising Safety Features Safety remains a top priority when choosing a bathroom vanity for your children. Small details, such as rounded edges, play a significant role in preventing injuries. Sharp corners can be hazardous, especially for younger kids who are prone to bumps and tumbles. By selecting vanities with smooth, curved edges, you reduce the risk of accidents significantly. Sturdy materials are another crucial element when evaluating vanity safety. Children are likely to use vanities as a place to lean or pull themselves up, so it’s vital that the material withstands this kind of usage. Opt for high-quality, durable materials like solid wood or reinforced plastic, which can endure the wear and tear that comes with having kids at home. Lockable drawers and cabinets are essential features to consider, especially when storing potentially hazardous items like cleaning products or grooming tools. These safety measures prevent curious little hands from accessing dangerous items, ensuring a safe bathroom environment. Installing child proof locks either built-in or as add-ons provides an extra precautionary layer, offering parents peace of mind. Encouraging Independence and Accessibility Encouraging your children to manage bathroom activities independently is an important step in their development. Choosing the right height for your bathroom vanity is crucial to accessibility. A vanity that is too high can hinder them from reaching necessary items like soap and towels. Consider vanities designed specifically for kids, or opt for adjustable ones that can be modified as they grow. To further promote independence, incorporate step stools and other child-friendly aids. Step stools offer a boost, helping kids reach the sink comfortably. Some vanities even come with pull-out steps, seamlessly integrating into the design. These tools enable children to wash their hands, brush their teeth, and perform other tasks without constant adult assistance. In addition to height considerations, installing easy-to-use handles and fixtures is beneficial. Smaller hands often struggle with knobs and taps designed for adults. Choose fixtures that are simple to grasp and turn, making them more accessible for young users. Lever handles and single-handle taps simplify usage, empowering children to handle bathroom routines themselves with ease. Balancing Functionality with Playful Design Creating a child-friendly bathroom vanity means finding the perfect balance between practicality and playfulness. Kids love bright colours and fun themes, which can transform an ordinary bathroom into a delightful space. When selecting a vanity, consider incorporating these elements in a way that doesn’t sacrifice functionality. Opt for colourful accents or wall decals that can add a playful touch without altering the essential use of the vanity. Durability is key when designing a child’s bathroom, so choose finishes that are both stain-resistant and easy to clean. Children are often messy, and surfaces that can withstand splashes and spills will maintain their appearance with minimal effort. Materials like laminate or sealed wood protect against damage, ensuring your vanity looks good over time. Storage solutions should also cater to a child’s bathroom needs. Creative ideas include baskets or bins for housing bath toys and toiletries. Shelves can be designed to hold towels or hairbrushes in easy reach. By choosing storage that is both accessible and aesthetically pleasing, you encourage children to keep their bathroom organised, which is a great habit to nurture. Planning for Growth and Adaptability As children grow, their needs change, and it’s important to consider how your bathroom vanity can adapt over time. Investing in adjustable features is a smart move. Look for vanities that offer adjustable heights or can be modified to cater to growing children. Some designs allow you to alter the height of the sink or install additional features as needed. Versatile designs accommodate a broad range of ages, making them a worthwhile investment for families. Consider vanities with neutral themes that can easily transition from a toddler-friendly space to a more sophisticated design for older children. This adaptability ensures that the bathroom remains functional and enjoyable as your children mature. Planning for adaptability also involves recognising that your family’s needs may change. Whether it’s accommodating more children or changing bathroom functions, a well-planned vanity will save you time and resources. Ensure the design is flexible and can be reimagined to suit your family’s evolving lifestyle, providing lasting value and service. Conclusion: Choosing a child-friendly bathroom vanity involves a mix of fun, safety, and practicality. By focusing on safety features like rounded edges and easy-access options, you create a secure environment for your kids. Incorporating playful designs while ensuring functionality can make daily routines enjoyable and less of a chore for the little ones. Versatile solutions ensure that your investment grows with your family, making it both a smart and cost-effective choice. When designing a bathroom for children, think about their current and future needs. The right vanity does more than just serve its function; it becomes a seamless part of daily life, encouraging growth and fostering independence. From safety to adaptability, every element helps create an inviting space where children feel comfortable and confident. Looking to upgrade your kids’ bathroom?
New Bathtub Setup: Professional Planning Guide
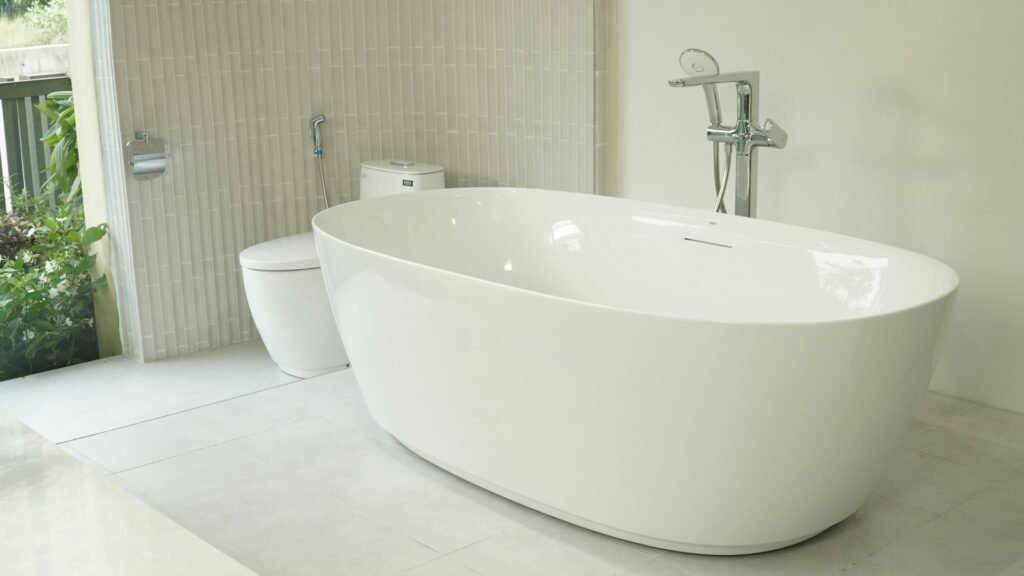
Installing a new bathtub can be an exciting way to refresh your bathroom and add a touch of luxury to your home. However, to ensure it serves you well, careful planning and thoughtful choices are essential. This process involves more than just picking a design you like; it’s about making informed decisions that suit your space and lifestyle. Start by examining the space you have and how a bathtub will fit into your bathroom’s layout. Accessibility and usage considerations are vital, especially for families with young children or elderly members. Plus, deciding whether the bathtub will stand alone or pair with a shower will significantly impact the design. Choosing the right type and material for your bathtub is crucial as well. These decisions affect everything from the look and feel to the practicality and maintenance of your new bath. Understanding plumbing needs and installation essentials ensures a smooth and hassle-free addition. With these elements in mind, you’re set to create a bathroom that perfectly blends beauty and function. What to Consider When Installing a New Bathtub 1. Assessing Bathroom Space and Layout Before diving into the bathtub selection, take a good look at your bathroom’s space and layout. Begin by measuring the exact area where you intend to place the bathtub. Note down any existing features such as doors, windows, and built-ins that might affect the layout. It’s essential to ensure that your new bathtub won’t make the bathroom feel cramped or obstruct any current features. Think about who will be using the bathtub and what their needs are. If you have children, consider a bathing area that accommodates them safely. For those with mobility concerns, a walk-in tub or low-profile edges can be beneficial. Ensuring ease of access not only increases safety but also enhances the usability of the space. Decide whether your bathtub will stand alone or become part of a shower-bath combo. A standalone tub creates a distinct focal point and offers luxurious appeal, while a shower-bath combo maximises space, making it ideal for smaller bathrooms where both a shower and tub are desired. Key considerations: Available Space: Measure for fit and ensure unobstructed access. User Needs: Address safety and ease for all family members. Tub Placement: Choose between a standalone tub or a shower-bath combo. 2. Choosing the Right Bathtub Type When deciding on a bathtub type, you’ll find a range of options, each fitting different needs and aesthetics. Freestanding tubs offer a dramatic look and flexibility in placement. They can be placed anywhere, provided plumbing allows, but they require a spacious bathroom to shine. Alcove bathtubs are practical and fit well in smaller spaces. They nestle between three walls, typically forming part of a shower-bath combo, and are easier to surround with a shower curtain or doors, making them ideal for family bathrooms. Drop-in bathtubs feature a rim and are dropped into a platform, allowing customisation with surround materials. They offer a sleek, built-in look but need a specific deck structure for support. Corner tubs fit snugly into a corner to save space, often offering a spa-like feel thanks to their larger capacity. They’re perfect for bathrooms that are not constrained by space. Consider these factors: Freestanding Tubs: Luxurious and flexible but need space. Alcove Tubs: Efficient for smaller bathrooms and shower combos. Drop-In Tubs: Customisable with deck installation. Corner Tubs: Space-saving with a spa-like appeal. Selecting the right bathtub type ensures it complements your space and meets your bathing preferences, adding both beauty and functionality to your bathroom. 3. Material and Durability Considerations Selecting the right material for your bathtub is vital for ensuring longevity and easy maintenance. Acrylic is a popular choice due to its lightweight nature and ability to retain heat well. It’s easy to clean and available in a variety of shapes and styles. However, it can scratch under heavy use, so care is needed. Cast iron bathtubs, coated with enamel, offer exceptional durability and heat retention. They are less likely to chip or scratch, making them perfect for families. Though heavier, adding a classic and elegant look to any bathroom can be worth the weight considerations. Fibreglass bathtubs are lightweight and budget-friendly. They are easy to install, but they might not be as durable as other materials, making them more suited to less frequently used bathrooms. When choosing a bathtub material, take into account: Acrylic: Lightweight, good heat retention, easy to shape. Cast Iron: Extremely durable, retains heat, heavier installation. Fibreglass: Lightweight and affordable but less durable. Consider the weight and installation requirements of each material to ensure your bathroom floor can support it, and that installation goes smoothly. Plumbing and Installation Essentials Before installing your new bathtub, understanding the plumbing requirements is key. Each bathtub type might need different plumbing setups, so it’s crucial to plan these modifications in advance. Freestanding tubs, for example, often require more complex plumbing work, while alcove tubs might just need basic fixture updates. Professional installation is highly recommended to ensure everything fits correctly and works safely. It also maintains any warranties that come with your new bathtub, protecting your investment. Professionals can identify potential issues that might not be evident during planning, such as the need for floor reinforcement beneath heavier tubs. Consider potential hidden costs involved with installation: Plumbing Modifications: Necessary adjustments vary by tub type. Professional Installation: Ensures safety, functionality, and warranty coverage. Hidden Costs: Floor reinforcement and fixture updates may be needed. Investing in proper installation prevents future problems and ensures your bathroom remains a safe, functional space. Conclusion Choosing and installing a new bathtub involves several crucial decisions that can affect your bathroom’s function and aesthetic for years to come. Each decision you make contributes to creating a space that is not only beautiful but also meticulously designed to serve your needs. Whether you’re drawn to the elegance of a freestanding tub or the practicality of an alcove design, taking these factors into account ensures a harmonious blend of form and function. Your bathroom renovation journey can start
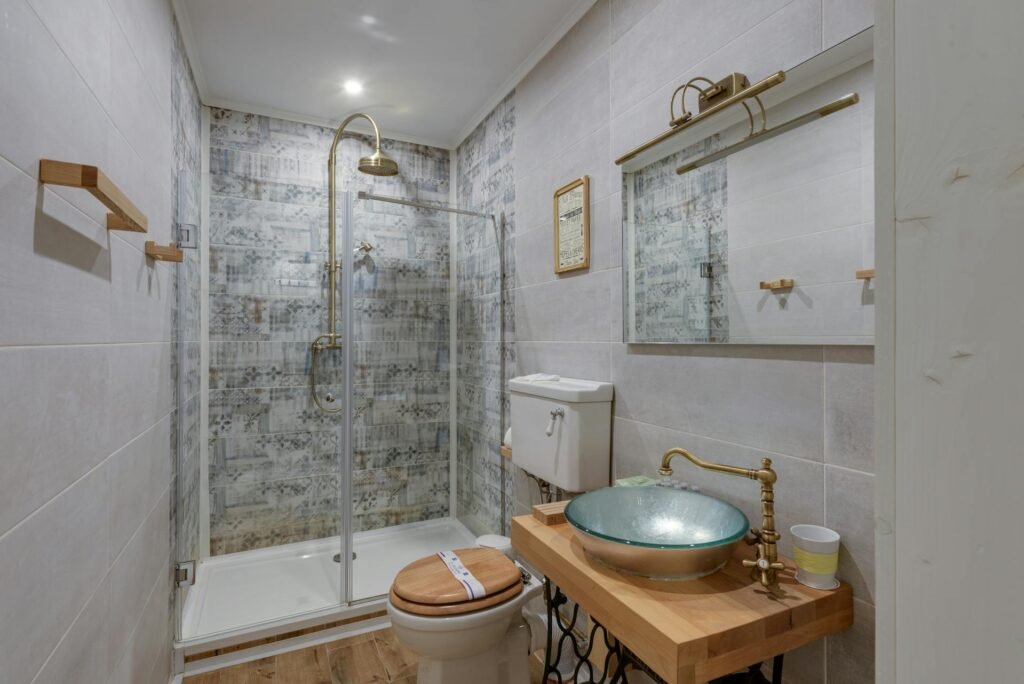
Compact Toilet Solutions: Small Bathroom Guide 2025
Finding the right toilet for your small bathroom can make all the difference in creating a functional and comfortable space. With homes becoming increasingly compact, utilising every square metre efficiently is crucial. Space-saving toilets provide a smart solution, allowing you to enjoy a stylish bathroom without feeling cramped. These toilets are not just great for conserving space; they also offer notable environmental benefits. Using less water is not only good for your wallet but also kind to our planet. Innovative features and clever designs mean you don’t have to compromise on the look and feel of your bathroom. Small bathroom renovations can be tricky, but choosing the right fixtures makes the task much easier. From wall-mounted designs to compact floor models, there are plenty of options to consider. Plus, pairing your space-saving toilet with complementary bathroom vanities and fixtures will give you a seamless, cohesive design that feels open and airy. Understanding the Benefits of Space-Saving Toilets Space-saving toilets are a game changer for small bathrooms. They allow you to maximise every inch of your bathroom without sacrificing comfort or functionality. By using smart design, these toilets make your bathroom feel larger and more open. Their compact size fits snugly into spaces where traditional toilets might feel cramped. This clever use of space opens up your bathroom, making it more practical and comfortable for daily use. In terms of style and functionality, space-saving toilets blend beautifully with various bathroom designs. They come in modern styles that add a sleek look to any bathroom. Features like hidden cisterns and streamlined shapes eliminate bulky elements. This minimalistic approach enhances the overall style, making the bathroom feel fresh and contemporary. Besides aesthetics and functionality, space-saving toilets promote environmental benefits. Many models are designed with water efficiency in mind, conserving a significant amount of water with each flush. They frequently feature dual-flush systems, which allow you to choose between a full flush for solid waste or a reduced flush for liquid waste. This not only saves water but also reduces water bills, making these toilets an eco-friendly option for small, conscious households. Wall-Mounted Toilets Wall-mounted toilets offer significant space-saving advantages and are ideal for small bathrooms. These toilets are installed directly onto the wall, leaving the floor space beneath completely open. This floating design creates an illusion of more room and makes cleaning the bathroom floor easier, adding to their appeal for tight spaces. The designs of wall-mounted toilets are sleek and modern, adding a touch of elegance to any bathroom. They often feature concealed cisterns, which are hidden behind the wall. This not only makes the bathroom look tidier but also frees up additional space. Their streamlined appearance fits well with contemporary bathroom trends, providing both a stylish and practical solution. When it comes to installing wall-mounted toilets, there’s a bit more to consider than just aesthetics. Installation can be more complex than floor-mounted models. Here’s a quick checklist for installing and maintaining these toilets: Ensure the wall is strong enough to support the toilet. Use a professional for installation if you’re unsure, as plumbing adjustments might be necessary. Regularly check for any leaks or issues, as the cistern is not immediately accessible. Integrating with existing plumbing can be a concern. Ensuring compatibility before purchasing is essential to avoid costly alterations. With the right planning, a wall-mounted toilet can be a stylish and space-efficient addition to your bathroom. Compact Toilet Models In Australia, there’s a wide variety of compact toilet models designed specifically for small bathrooms. These models offer practical solutions without compromising on performance. When considering a compact toilet, it’s useful to understand what features will best suit your needs. Look for models with dual-flush technology, which allows users to conserve water by choosing between a full or half-flush option. This feature not only saves space but also helps reduce water usage, which is great for the environment and can lower water bills. Here are some compact floor-mounted toilet models to consider: Back-to-wall toilets: These models fit snugly against the wall, concealing the cistern and offering a streamlined look. Short-projection toilets: Designed to extend less into the room, they create more space in front of the toilet, ideal for tighter spots. Corner toilets: A unique option that fits neatly into a corner, maximising corner space often overlooked in small bathrooms. When comparing these different models, weigh the pros and cons based on your bathroom layout. Back-to-wall toilets are great for hiding plumbing but might be more complex to install. Short-projection toilets offer better manoeuvrability but might provide limited bowl size options. Evaluate your priorities and choose a model that aligns with both your space and design preferences. Choosing the Right Toilet for Your Space Selecting the perfect toilet for a small bathroom involves considering several factors. First, assess the current layout and measurements accurately. Knowing the exact dimensions ensures you choose a toilet that fits comfortably, leaving sufficient room for movement and other fixtures. Consider the overall design theme of your bathroom. The toilet should complement other features like the vanity and shower. This cohesion can enhance the aesthetic appeal and create a balanced look. Here are some tips to ensure a perfect fit: Measure the available space accurately, focusing on width, depth, and height. Consider the toilet’s height from the floor to the seat to ensure it’s comfortable for all family members. Check the rough-in size, which is the distance from the wall to the centre of the drainpipe. This ensures compatibility with plumbing connections. Also, think about long-term maintenance and cleanliness. Wall-mounted and back-to-wall models are easier to clean around and under, reducing cleaning times. By taking these considerations into account, you can select a toilet that not only fits your space but also enhances functionality and style. Conclusion Selecting the right space-saving toilet can transform your small bathroom into a more functional and stylish space. Whether you opt for wall-mounted or compact floor-mounted models, each type offers unique benefits that cater to different requirements. By prioritising space efficiency
How to Make a Small Bathroom Look Bigger
Making a small bathroom feel larger can truly transform your daily routine. While it might seem like a daunting task, with a few smart design choices, limited space can become your personal oasis. Focusing on layout, colour, and clever fixtures allows you to give even the smallest bathroom a roomier feel. Effective space planning is essential. Choosing the right fixtures and fittings can maximise every inch of space you have. Simple changes, like rearranging the layout or adding a few mirrors, can have a huge impact. An airy, open vibe isn’t out of reach, no matter your bathroom’s actual size. Harnessing the power of colour and light can drastically alter the space perception. A carefully chosen palette and strategic lighting do wonders in making your bathroom feel open and inviting. With these tips and tricks, you can create a new atmosphere that makes daily routines much more enjoyable. Optimising Layout and Space The way you arrange the fixtures in your bathroom can make a significant difference in how spacious it feels. Begin by evaluating your current layout and identifying any space that’s being underutilised. In many cases, simply switching the position of certain fixtures, like the toilet or shower, can free up room and improve the overall flow. Consider compact or wall-mounted toilets and sinks to create more open floor space. Adding built-in shelves or recessed niches can provide storage without taking up valuable space. These options not only clear the floor but also keep your bathroom essentials organised and off countertops. When it comes to bathroom vanities, choose designs that maximise storage without overpowering the room. Opt for vanities with open shelves or slim profiles that blend seamlessly into small spaces. Also, corner units are particularly useful in tight areas, allowing you to use every part of your bathroom effectively. Wall-mounted fixtures, such as towel bars and hooks, help keep surfaces clear. Prioritise these space-saving solutions to maintain an environment that feels open and airy rather than cluttered. With the right approach, your small bathroom can offer more functionality than you might expect. Selecting Colours and Lighting Colours and lighting play a crucial role in making a small bathroom feel bigger. Lighter tones, like soft whites, light greys, or pastel hues, can open up a room. These colours reflect more light and give the illusion of a larger space. They also create a clean, crisp look that makes the bathroom feel refreshing and pleasant. When choosing paint or tiles, consider large tiles over smaller ones. Bigger tiles reduce the appearance of grout lines, which helps maintain a seamless visual flow. This trick prevents the space from being chopped up visually and adds to the sense of continuity. Natural light is another essential component of spaciousness. If possible, maximise window openings to let daylight flood in, creating a welcoming atmosphere. Consider translucent window treatments to maintain privacy without sacrificing light. For artificial lighting, use layered lighting solutions, such as overhead lights and recessed lighting. Soft, bright LED lights around mirrors or under cabinets can add depth and dimension. Well-placed lights enhance colours and create a sense of airiness, making your bathroom appear larger and more inviting. Incorporating Mirrors and Reflective Surfaces Mirrors are a fantastic way to make a small bathroom appear larger. By reflecting light and creating the illusion of depth, mirrors can significantly alter the perception of space. The right mirror choice can enhance the overall vibe, making it feel open and inviting. Large mirrors are particularly effective, reflecting walls or light fixtures to amplify brightness. Consider strategic placements for mirrors, like opposite windows to increase natural light or near vanities to reflect light fixtures. Mirrored cabinets can serve dual purposes, providing storage while enlarging the visual space. Don’t hesitate to experiment with various shapes and sizes to find what best complements your bathroom’s design. Reflective surfaces, such as shiny tiles, glass shower doors, and chrome fixtures, also contribute to an expanded look. They catch light and bounce it around the room, giving the bathroom an airy and open feel. Using glass elements like shelves can enhance transparency and avoid clutter, seamlessly extending the line of sight. Enhancing Visual Flow and Simplicity To create a sense of spaciousness, aim for a visual flow that keeps the design simple and cohesive. Minimising clutter is crucial in a small bathroom, as too many items can make the space feel cramped. Streamlined designs with clean lines maintain an organised look, permitting the eye to move seamlessly across the room. Consistency helps tie everything together, from your choice of colours and patterns to fixtures and finishes. Sticking to a cohesive design theme prevents an overwhelming mix of styles, thus establishing a calming aesthetic. Harmonising elements, such as matching cabinet hardware with taps or choosing a unifying colour scheme, strengthens this effect. Incorporate continuity in materials and textures to maintain a harmonious look. Using the same tiles on the floor and walls, or continuing paint shades across different surfaces, creates an unbroken flow. This technique tricks the eye into perceiving a larger space, making the bathroom feel more comfortable and expansive. Conclusion Creating the appearance of a larger bathroom is achievable with thoughtful design choices and the right elements. Focusing on optimising space by arranging fixtures efficiently sets the foundation for a room that fits your needs without feeling confined. Clever use of colour and light ensures the space feels airy and welcoming, while mirrors and reflective surfaces further enhance the openness. Streamlining your design helps maintain an uncluttered look, promoting a sense of spaciousness. A cohesive, simple theme throughout your bathroom ties elements together and ensures everything works in harmony. With these strategies, small bathrooms can become functional and stylish retreats. Take the first step towards transforming your bathroom today with CARGO Bathroom & Kitchen. Our extensive range of bathroom vanities, storage solutions, and design options are designed to help maximise any space, making your small bathroom feel like a sanctuary. Discover innovative solutions in our bathroom supply stores, and let